Article
Source
Doc
| Category | GMC |
|---|---|
| Type | Doc |
| Last Modified | 1 December 2025 |
| Location | Guides, SOPs & Policies (GMC) > Internal Guides |
Placeholder Products for Metaobjects (Internal Guide) | NOV 2025
From FAQ-Off, the Calibre9 knowledge base
While the Greedy List task activates all Metaobject attributes and some of their associated values, creating Placeholder Products in Shopify allows us to activate every associated value. This ensures the final Matrixify raw export includes ALL Shopify default and custom Metaobject attributes, along with ALL corresponding values.
This step is crucial because the resulting Metaobjects Display Names Library sheet is required for the DataFeedWatch mapping process.
Pre-requisities
- Strategy Summary: PIM Enrichment – You need to use the Overview tab as a reference guide
- Custom Metaobject Creation – You need to have been able to create the custom metaobjects in the Shopify backend and added in all the values
- Greedy List Implementation – You need to have had all of the Metaobject attributes activated and assigned to categories to become Category Metafields
STEPS
1 | Navigate to Shopify Products and select Add Products. Set the Status to Draft. Rename the Title to “C9 Test Product for Metaobjects 1” Add the description “*This is a placeholder product by C9 used for activating metaobject values. Please ignore and do not delete.*” to make sure the client knows the purpose of this Placeholder Product. | 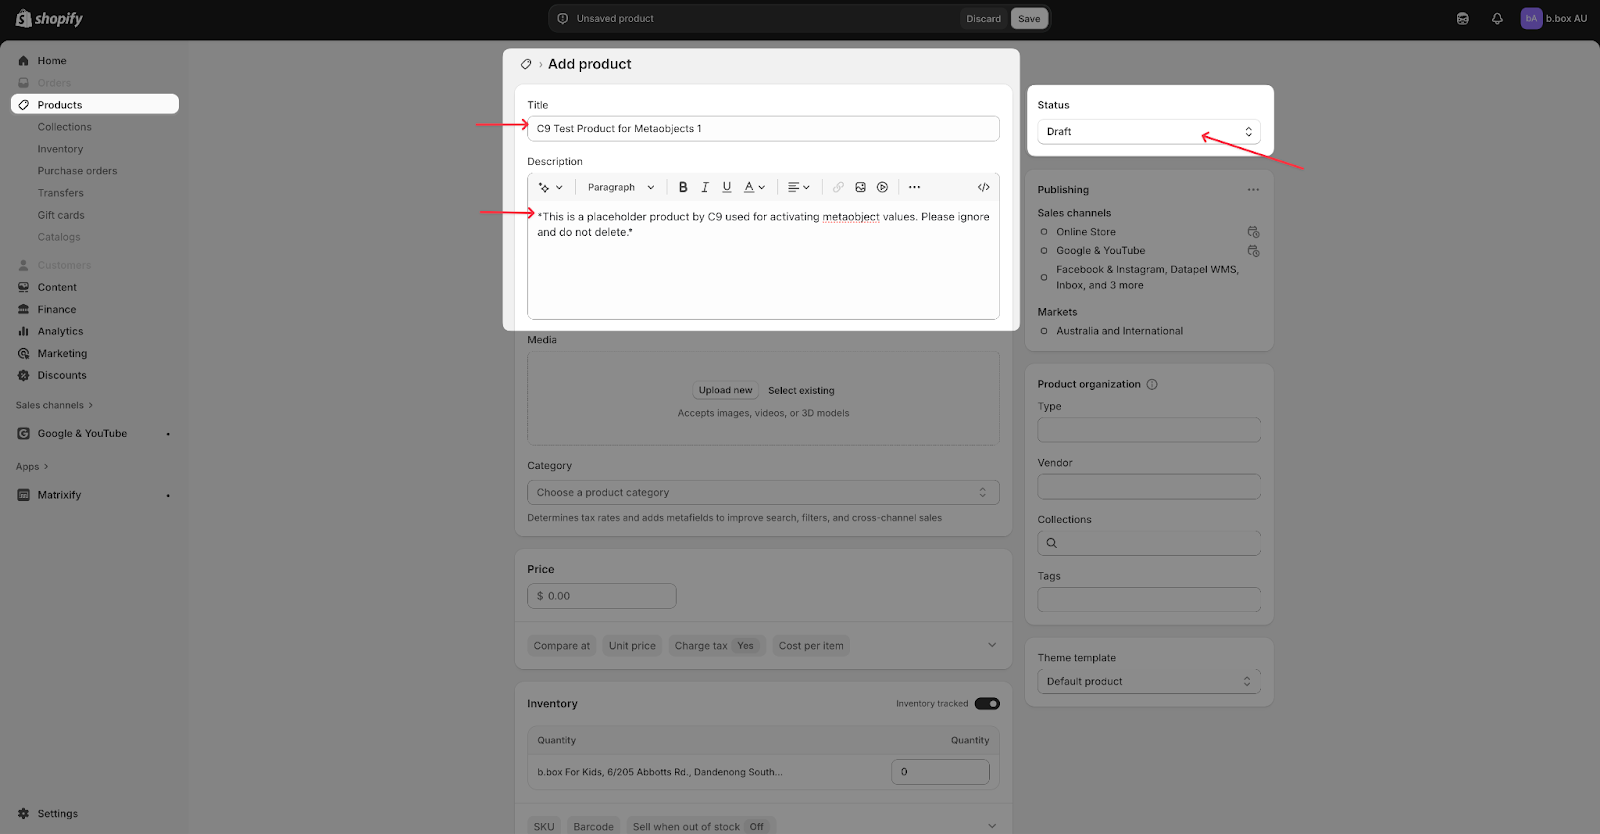 |
|---|---|---|
2 | Use the Strategy Summary (PIM Enrichment) sheet to decide what Category you can assign this Placeholder Product so that it covers as many of the Metaobject attributes (now Category Metafields) as it can. Once you’ve assigned it a Category, it should reveal all of the Default and Custom attributes that have been associated to that category. | 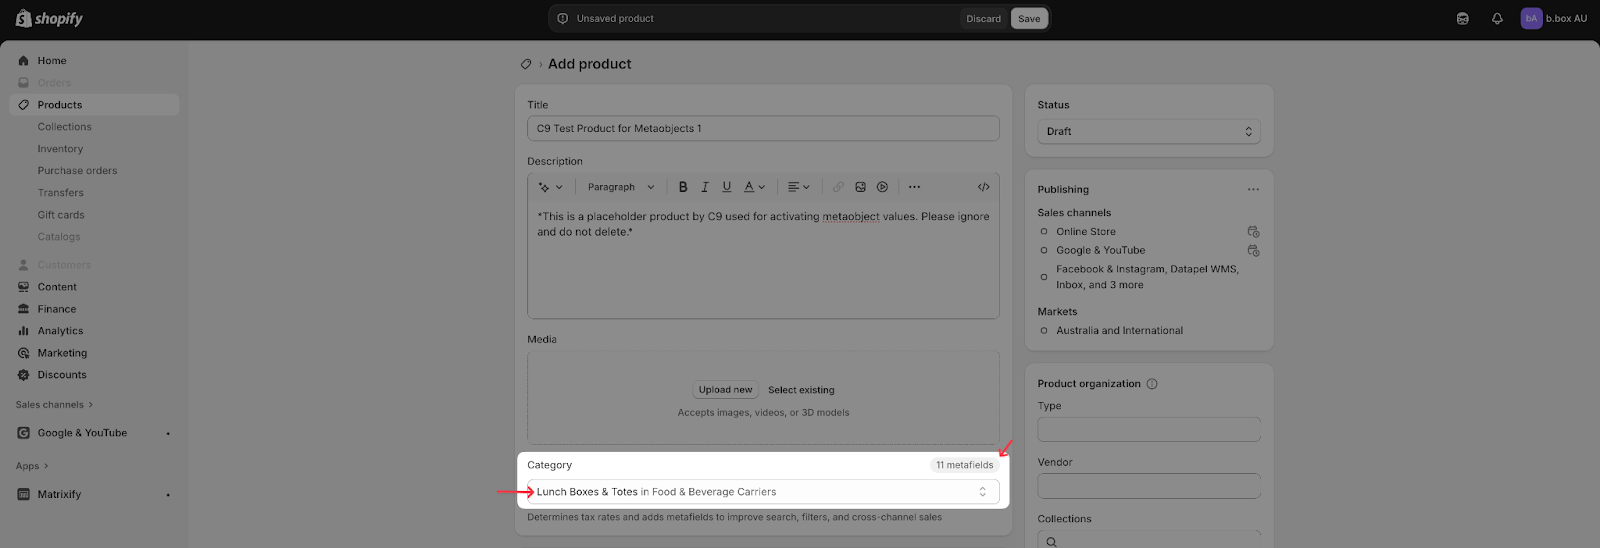 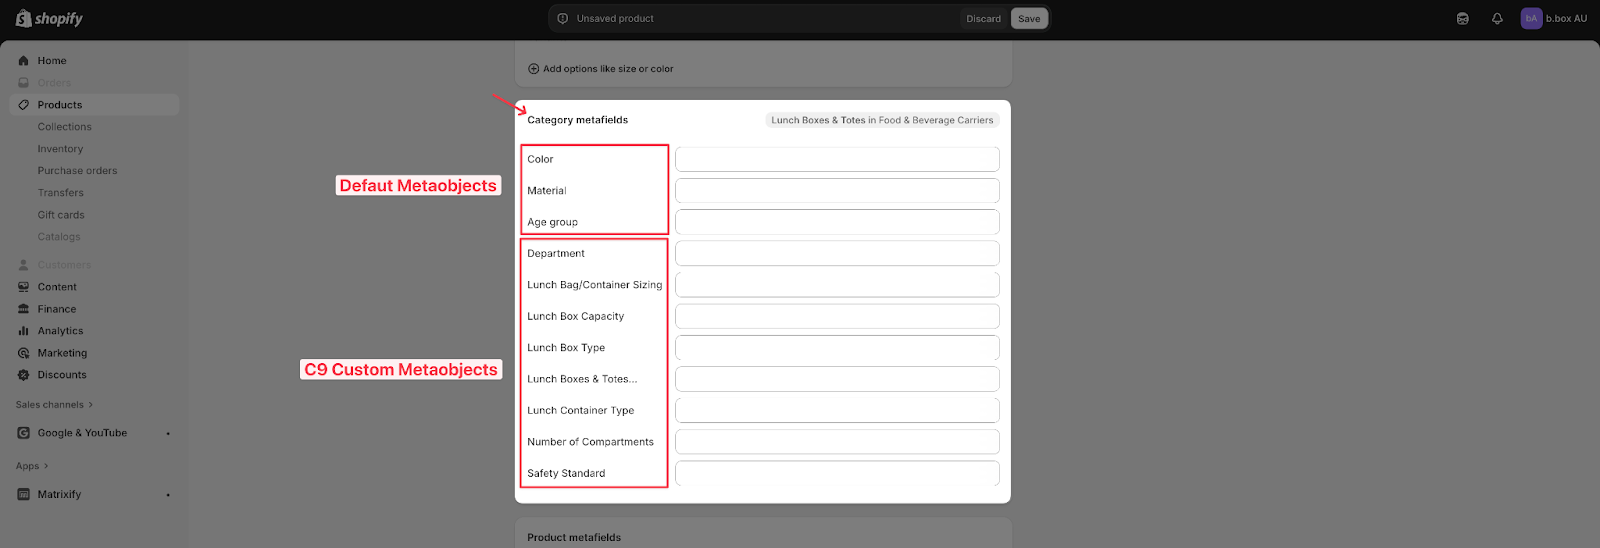 |
3 | You then want to select every single value for each of the Category Metafelds. Because all of the Custom ones have already been added as value entries during the Custom Metaobject Creation task, doing it for the Custom attributes is optional. However, it is required for all of the Default ones. You want to utilise the Shopify Standard Product Taxonomy to reference the value list for each attribute to see which ones have been activated already, and which ones you might have to add as an entry. | 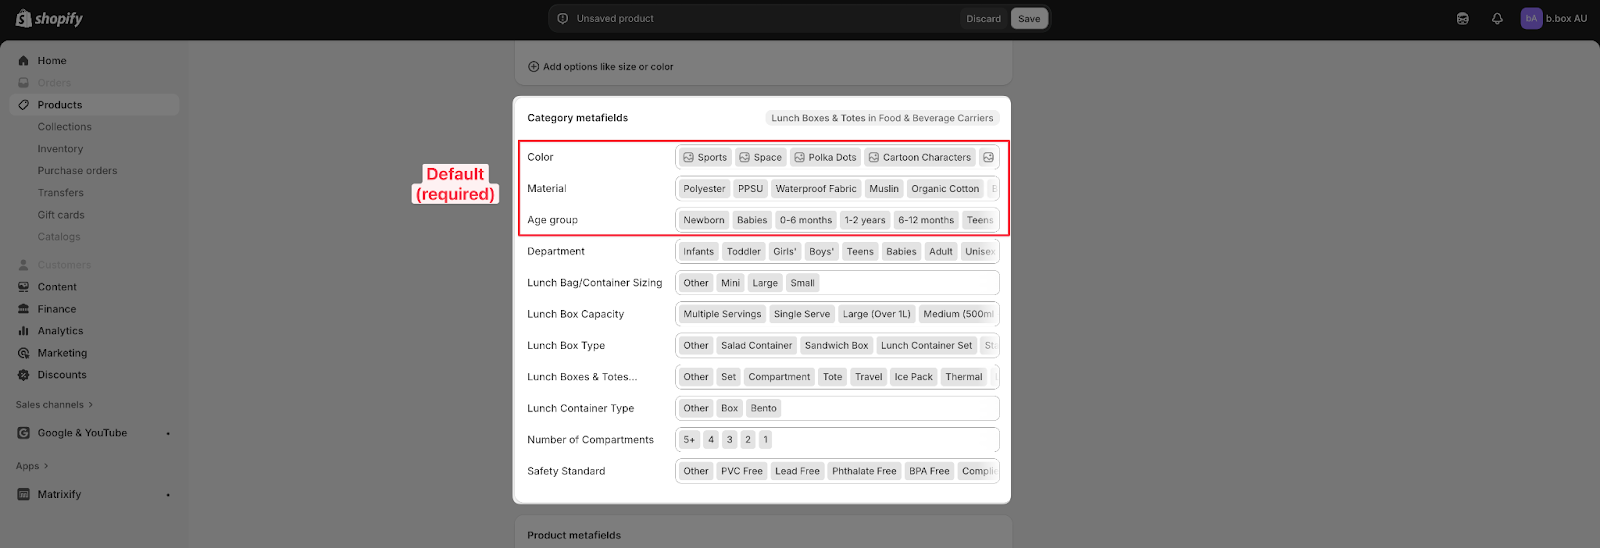 For example, the Material attribute values: 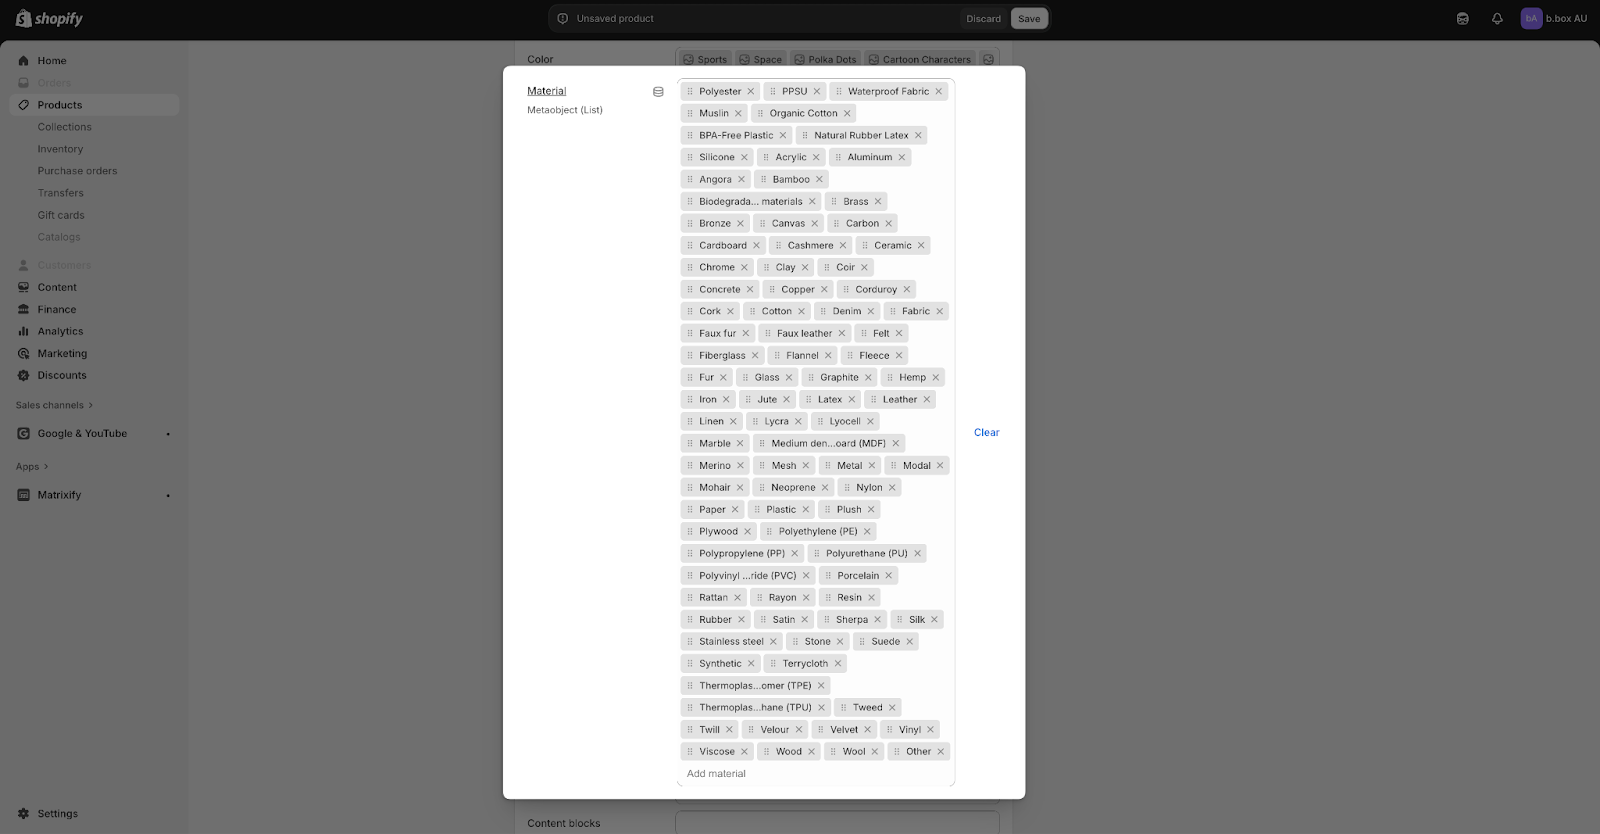 Use the Shopify Standard Product Taxonomy to reference if each of the values have been added 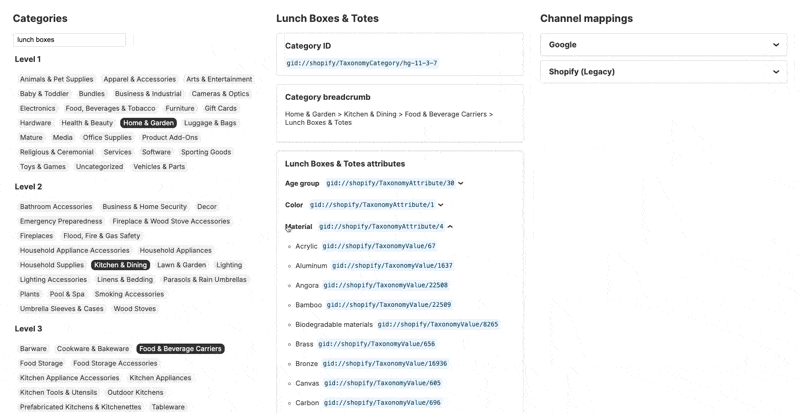 |
4 | If there are entries you need to add, you can simply click on the Add new entry option. The Label should be named the same thing as the value Display Name from the Shopify Standard Product Taxonomy. Then you will also need to select base values for it (think about where it is derived from). Hit Save once done. Then repeat the same process for the other values you want to add in. | 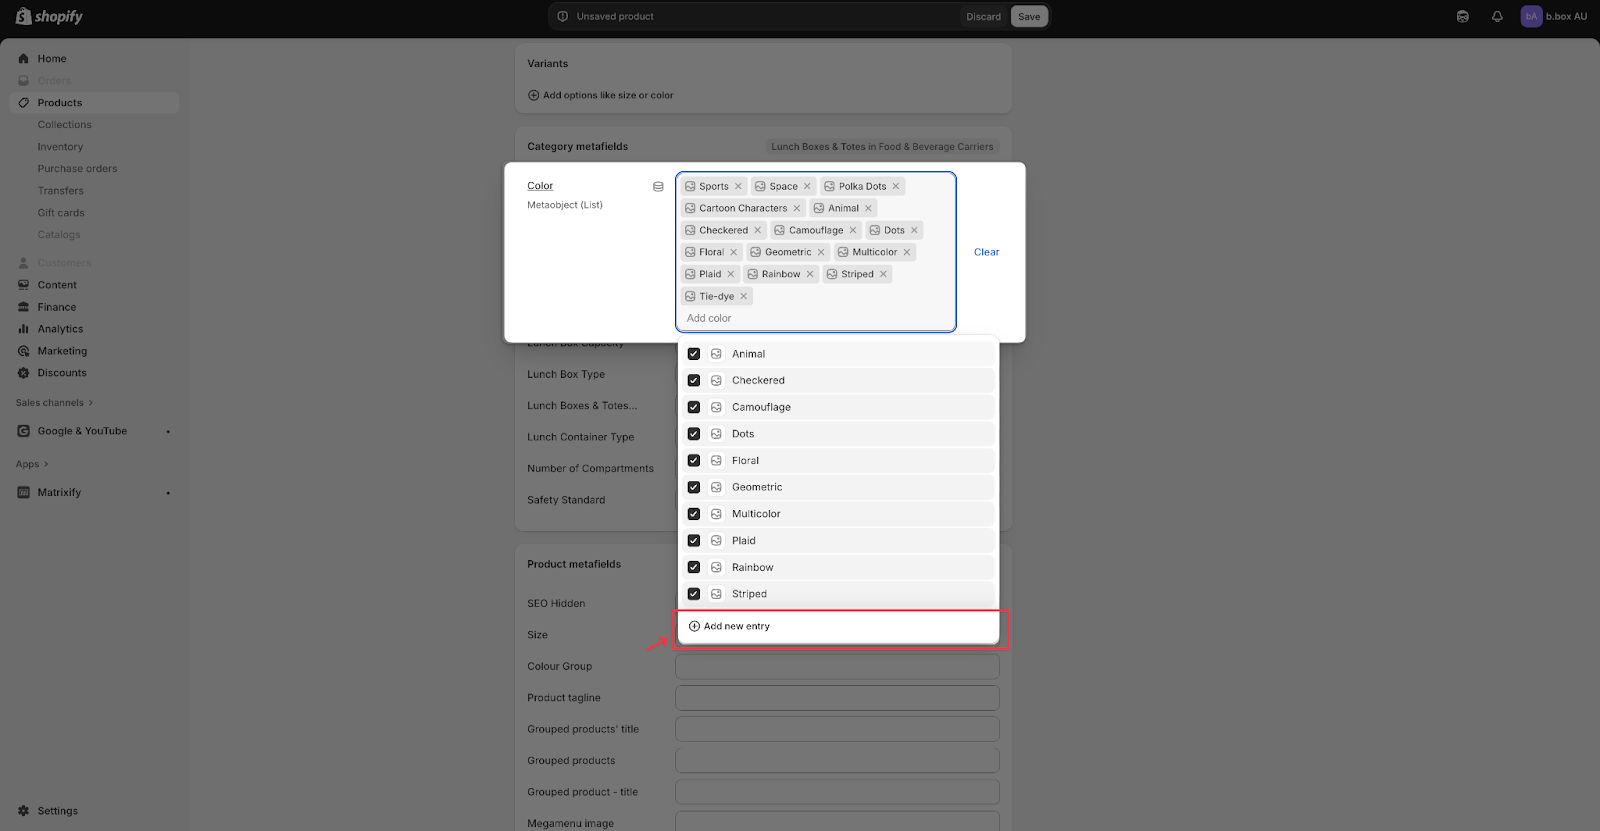 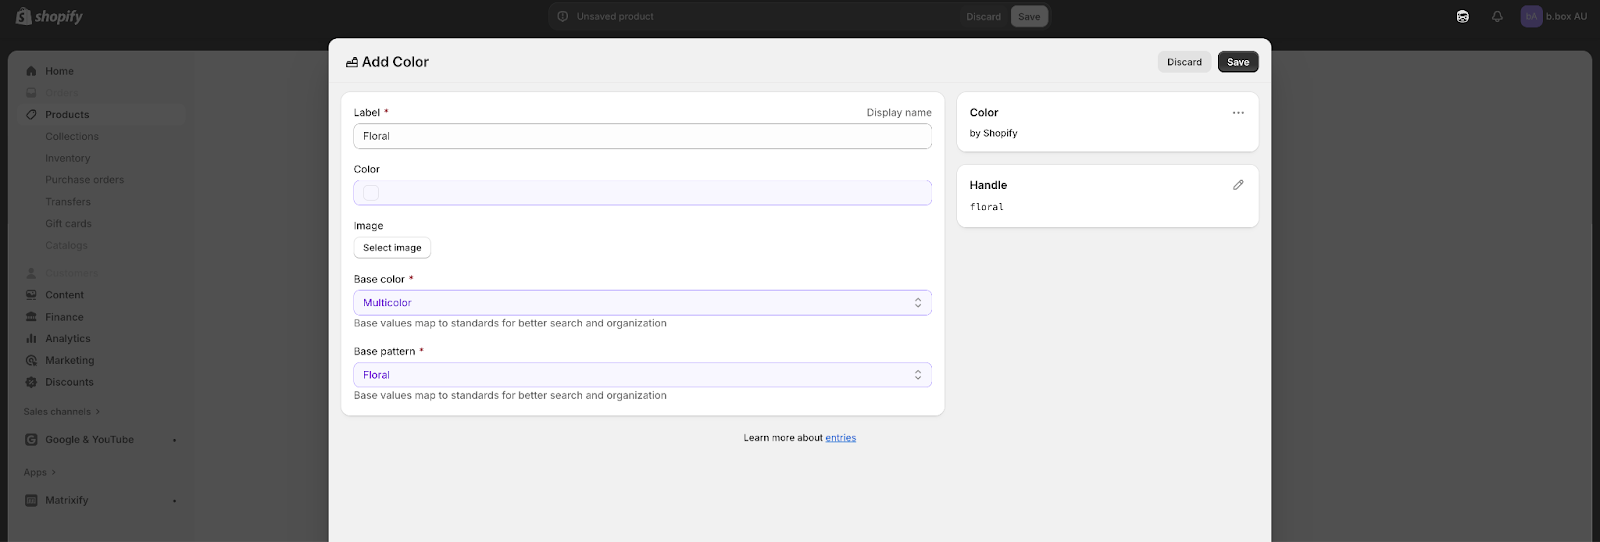 |
5 | Once you’ve completed adding all the values for all the Category metafields, hit Save then click Add another product. | 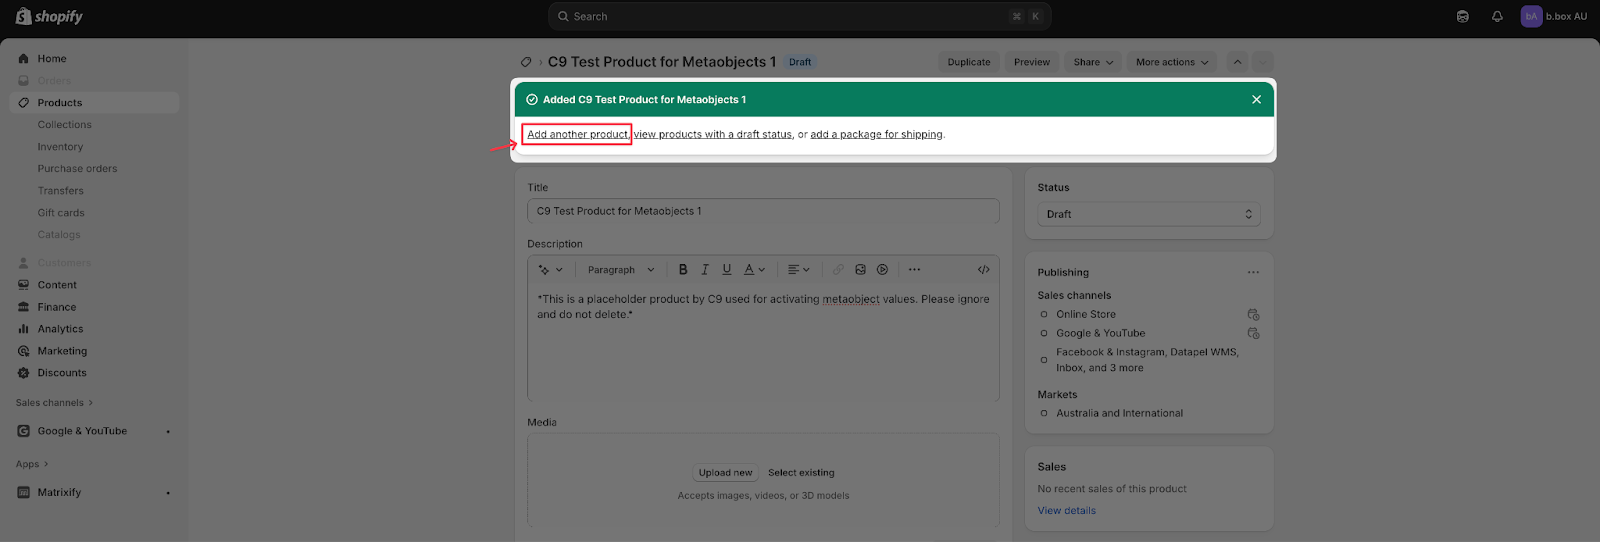 |
6 | Repeat steps 1-5 until you’ve activated all Metaobjects and all associated values. Make sure that you update each Title by increasing the number every time you create a new one. | |
7 | Once you’ve finished that, navigate to Shopify Apps, then click Matrixify. Create a new Export of Metaobjects. Ensure you’ve ticked all of the Basic Columns and Field Values, then hit Export. This should give you a downloadable CSV of all the Metaobject values. Import all of that data into a new spreadsheet and label it Then save the file within the Raw Data folder. You are done! | 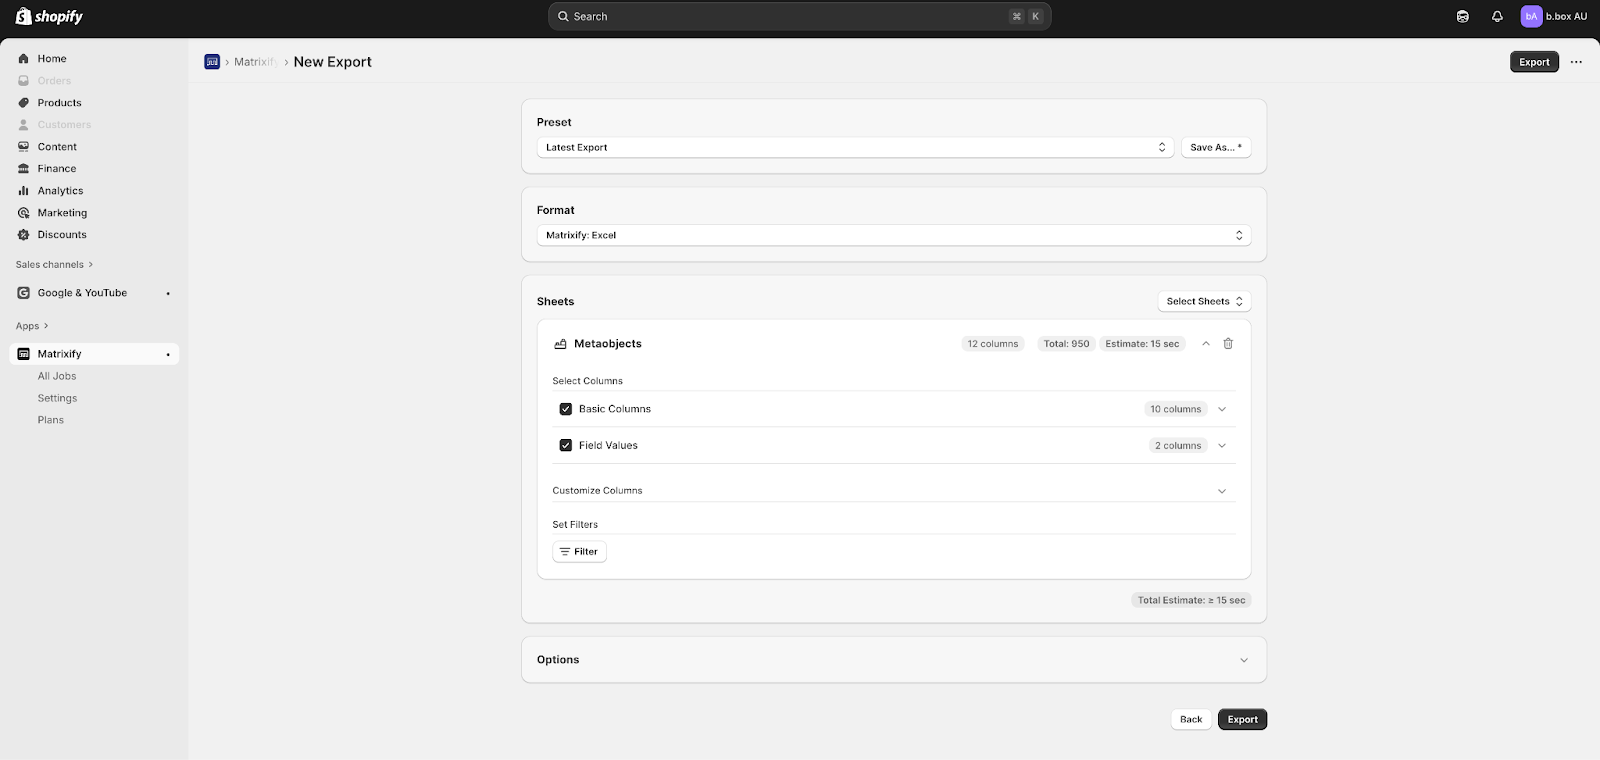 |
Categories:
GMC
Guides, SOPs & Policies (GMC)