Article
Source
Doc
| Category | GMC |
|---|---|
| Type | Doc |
| Last Modified | 17 March 2025 |
| Location | Guides, SOPs & Policies (GMC) > Client Guides |
Adding Your Business Information to Google Merchant Center
From FAQ-Off, the Calibre9 knowledge base

Adding Your Business Information
Once you've set up your Google Merchant Center account, it's crucial to input accurate business information settings. This step is essential before your SEOs can optimise your organic product listings, as verification is a prerequisite.
Guide to Adding Business Information Settings
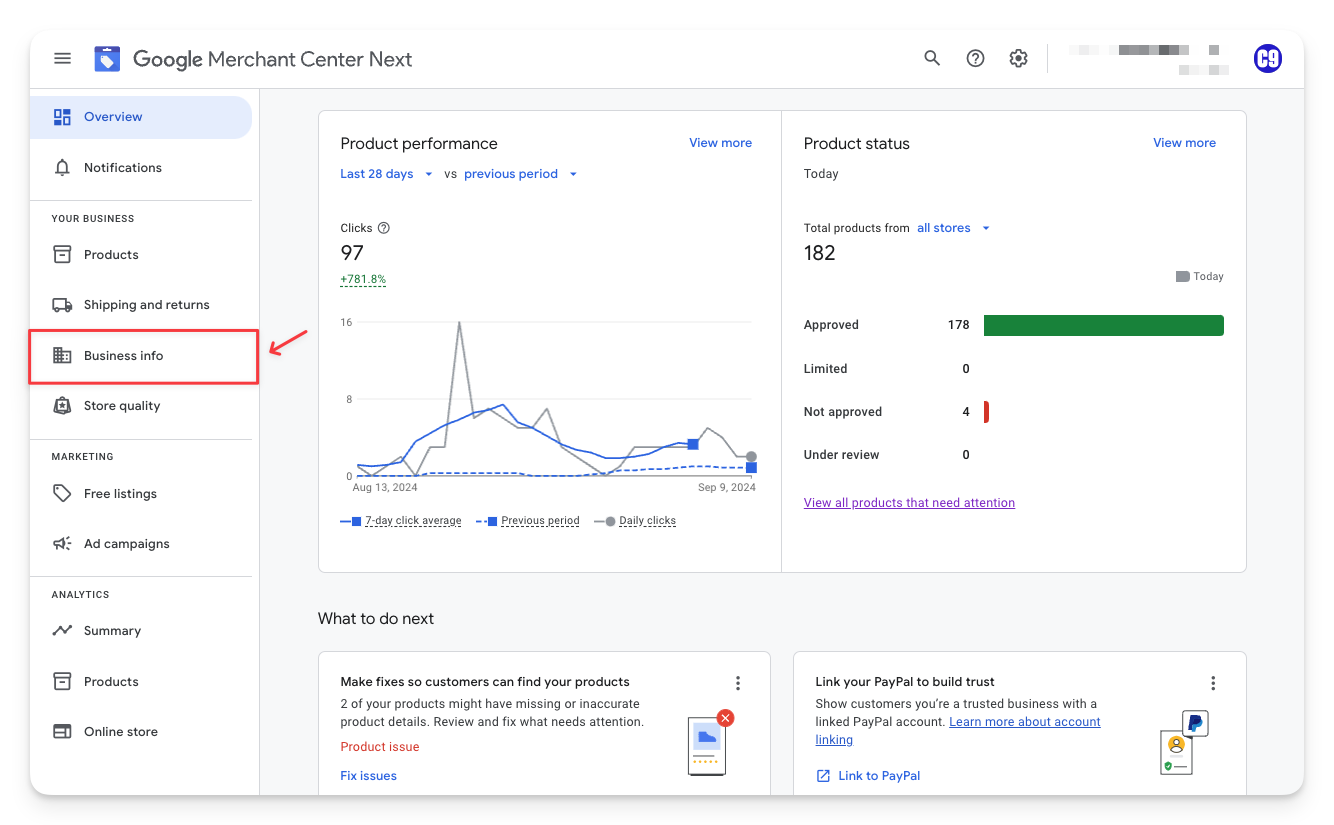
1 | Log in to your company Google Merchant Center account Navigate to the left-hand side of your dashboard and select Business Info
|  |
|---|---|---|
2 | In the Details tab, select Edit business details.
Fill in your Business name (this will be your display name), Business address, and Customer service information. This includes a phone number that may need verification.
Make sure you save the information and verify your number. |  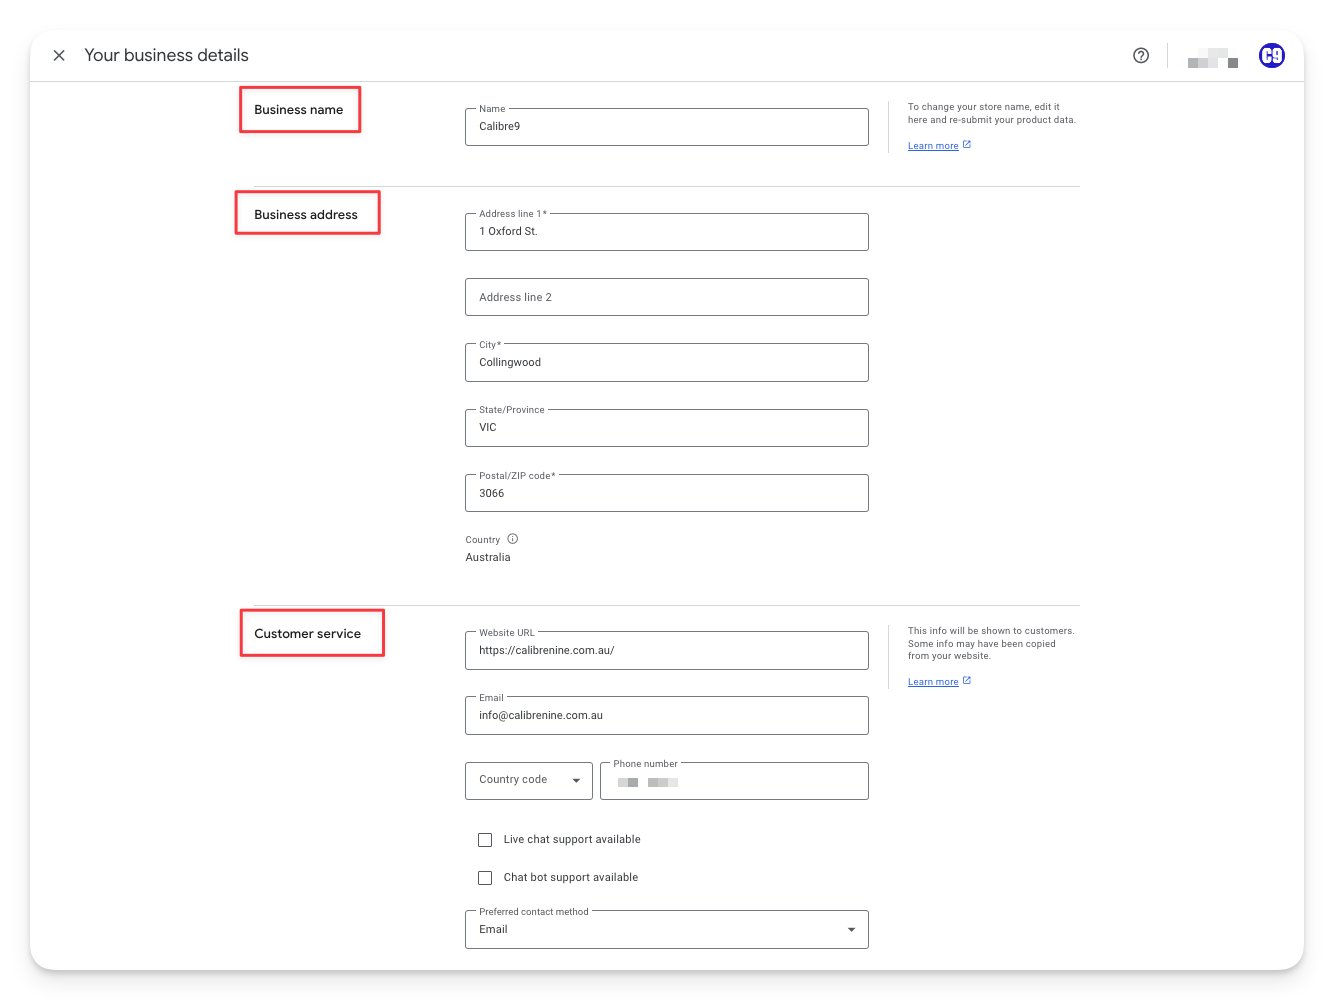 |
3 | Choose what method of verification you prefer and enter the 6-digit code provided. |   |
4 | Next, select Edit your online store.
You want to make sure that your website is both verified and claimed. |  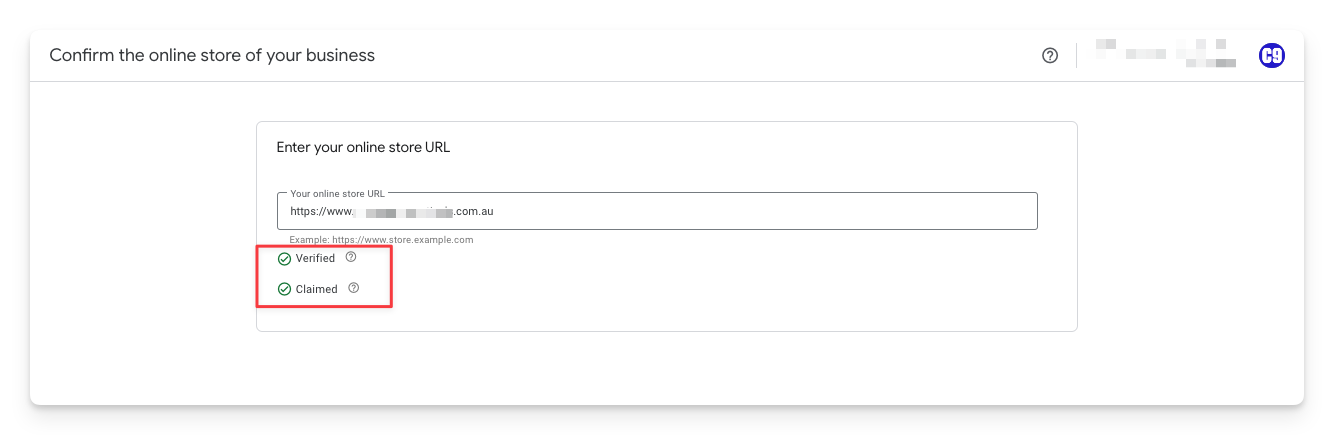 |
5 | Select Edit logos and colors. Add your square logo (favicon), rectangular logo, and brand colours. | 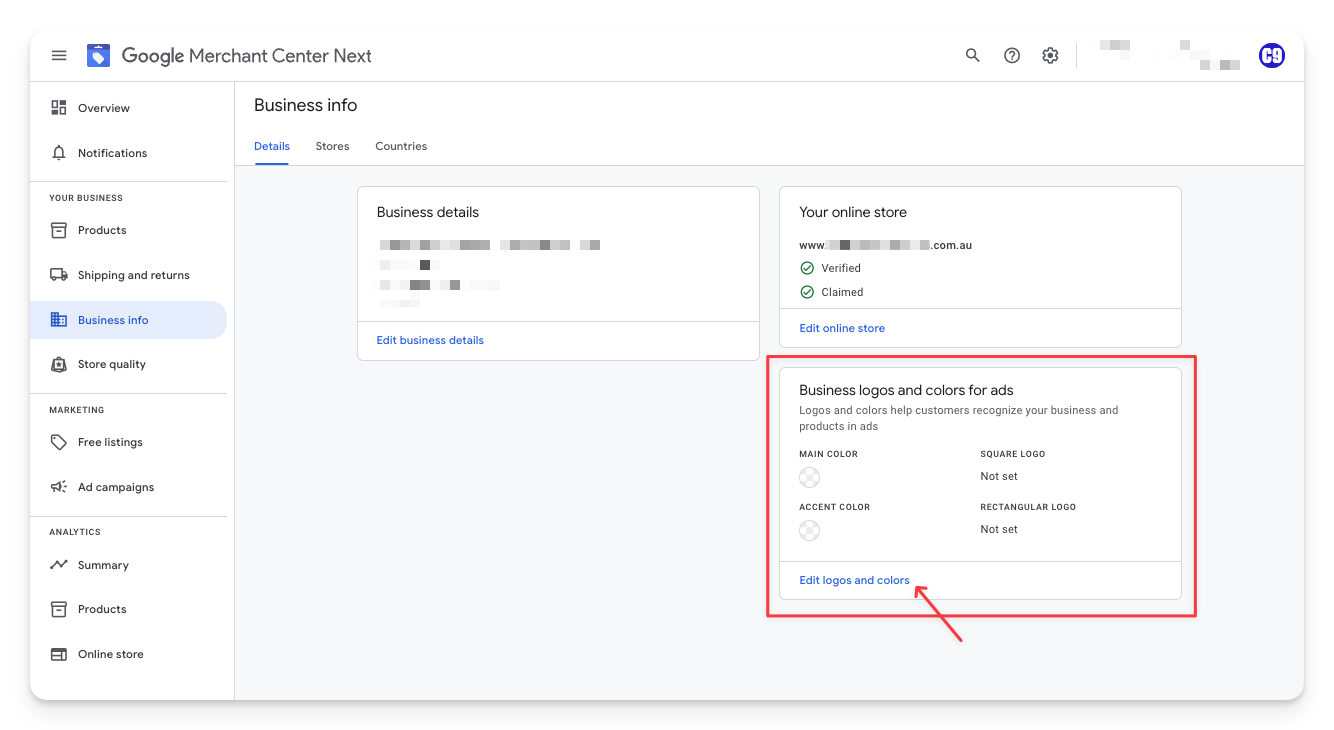  |
6 | All done! Your Google Merchant Centre account is ready for a GMC campaign to begin. |
Categories:
GMC
Guides, SOPs & Policies (GMC)