| Category | GMC |
|---|---|
| Type | Doc |
| Last Modified | 30 October 2025 |
| Location | Guides, SOPs & Policies (GMC) > Internal Guides |
P.E.M. Tool Vendor Category Assignments (Internal Guide) | OCT 2025
Pre-requisites
The following tasks need to have been completed before performing this task.
- Product Data Cleansing
- Strategy Summary: PIM Enrichment
STEPS
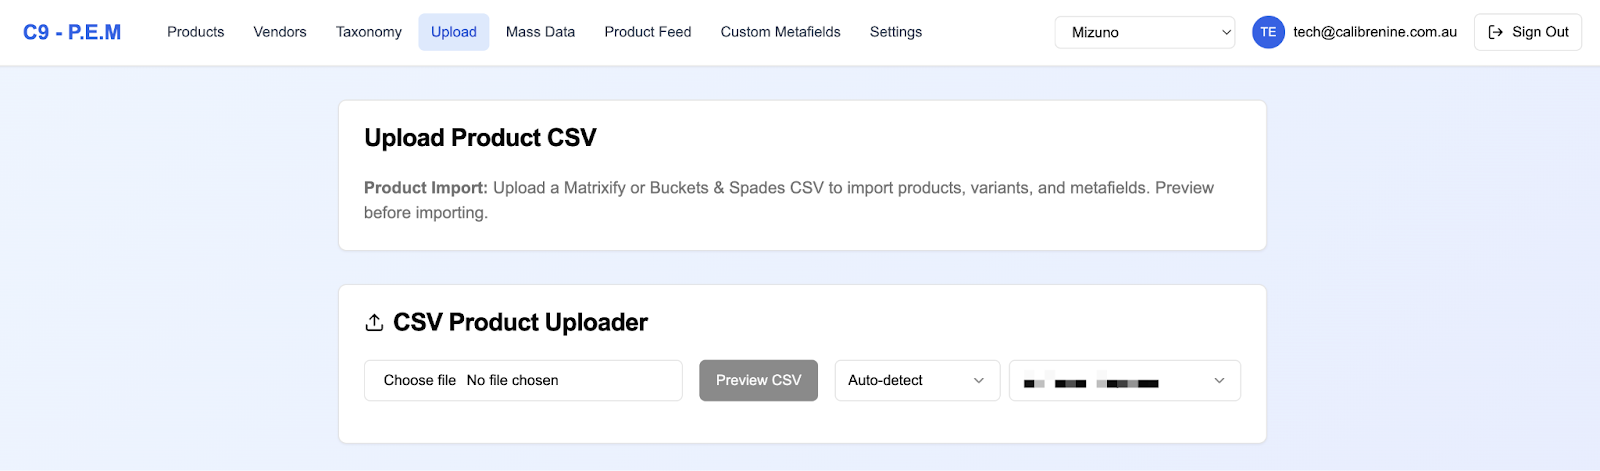
- Log in to the P.E.M. Tool Dashboard and select the Upload tab
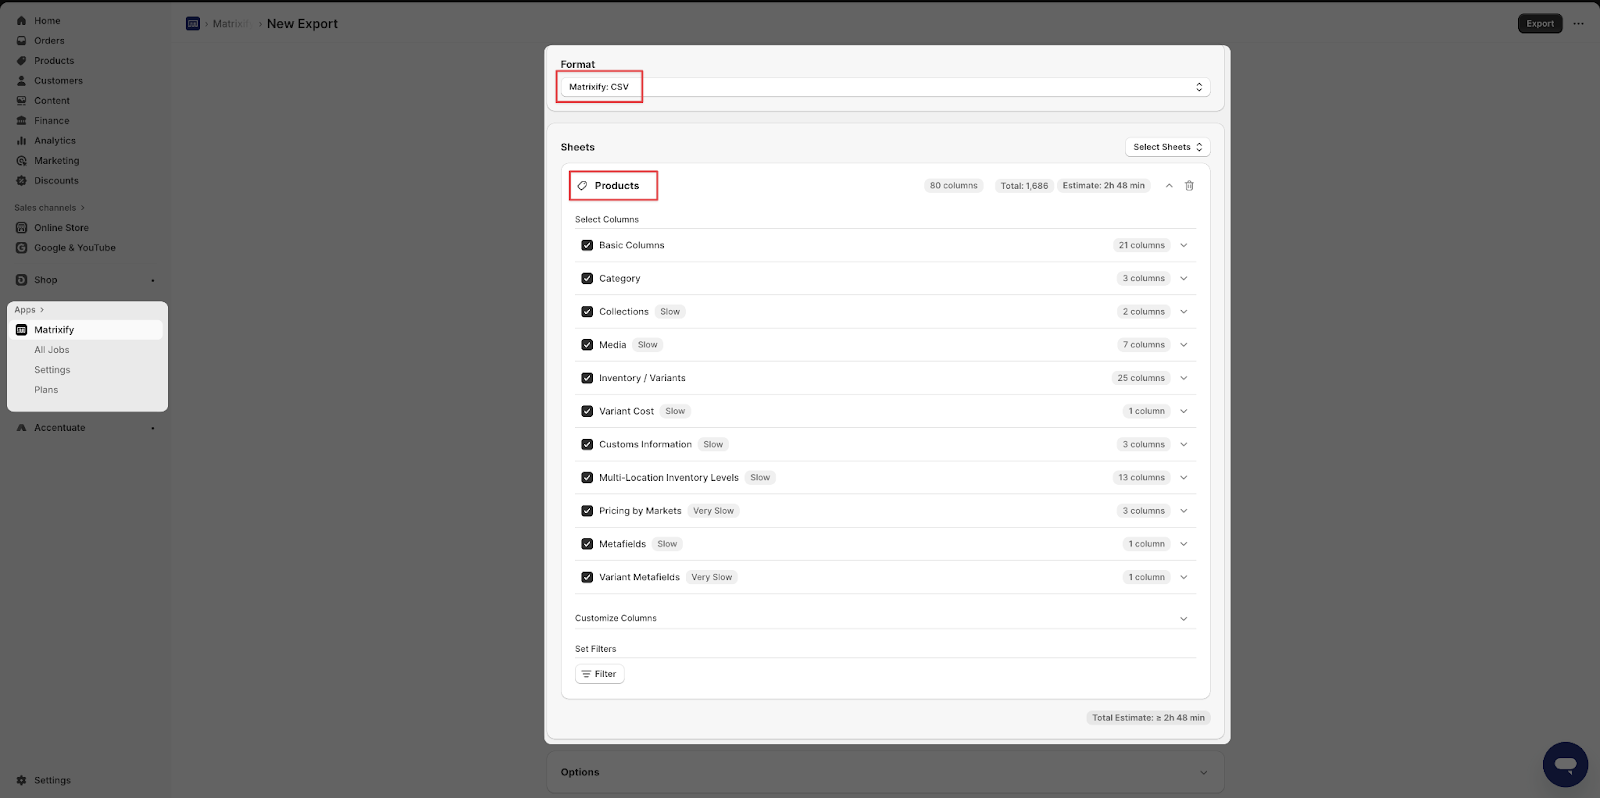
- Navigate to the client's Matrixify on Shopify and create an export of the all of the Products. We want to make sure we have the latest export that reflects the current state of their product catalogue.
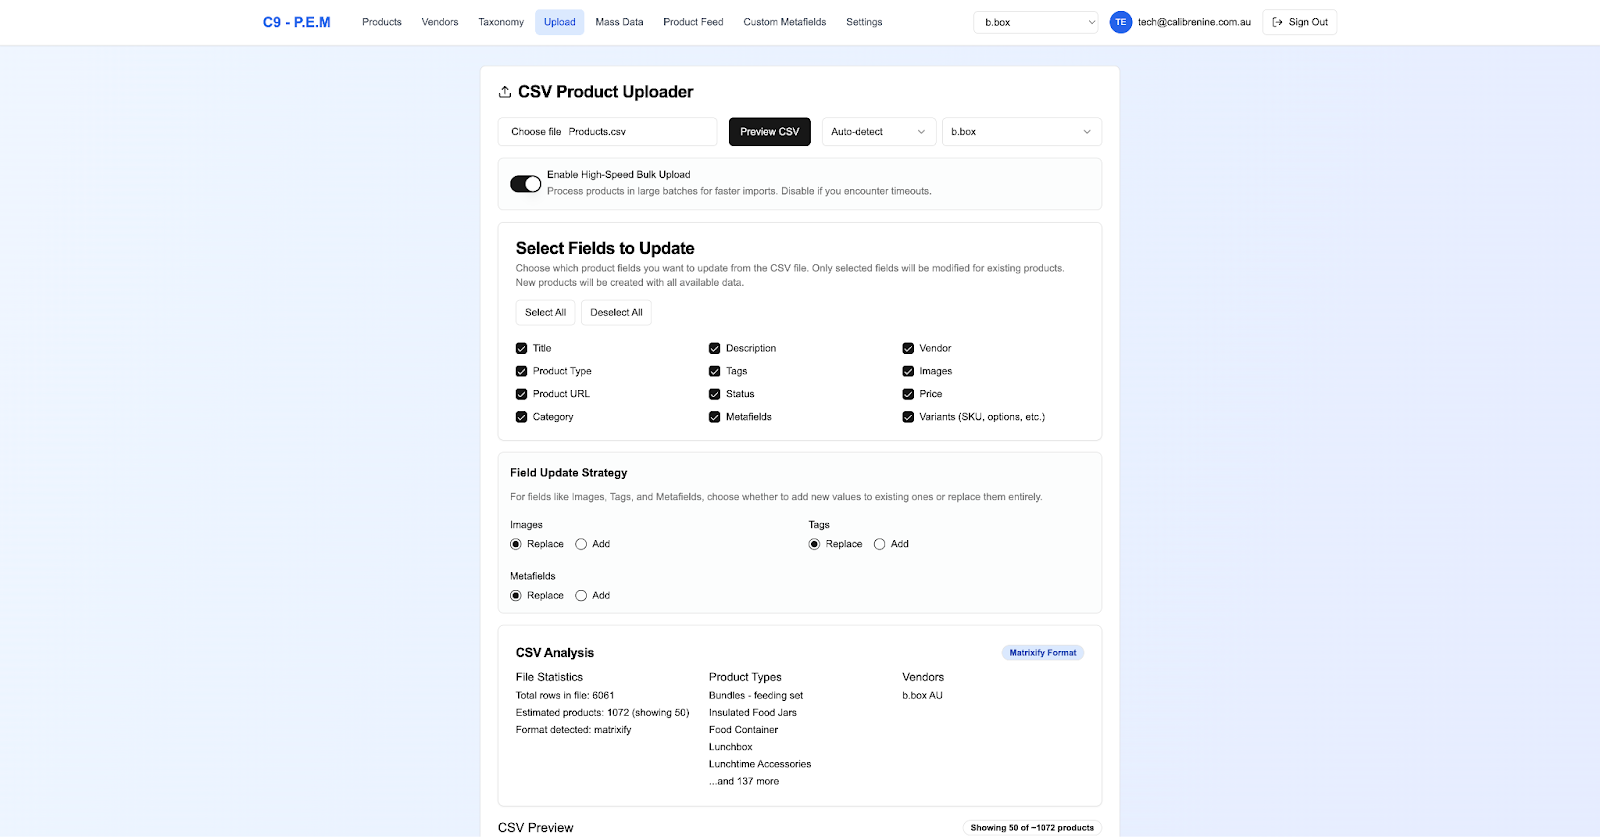
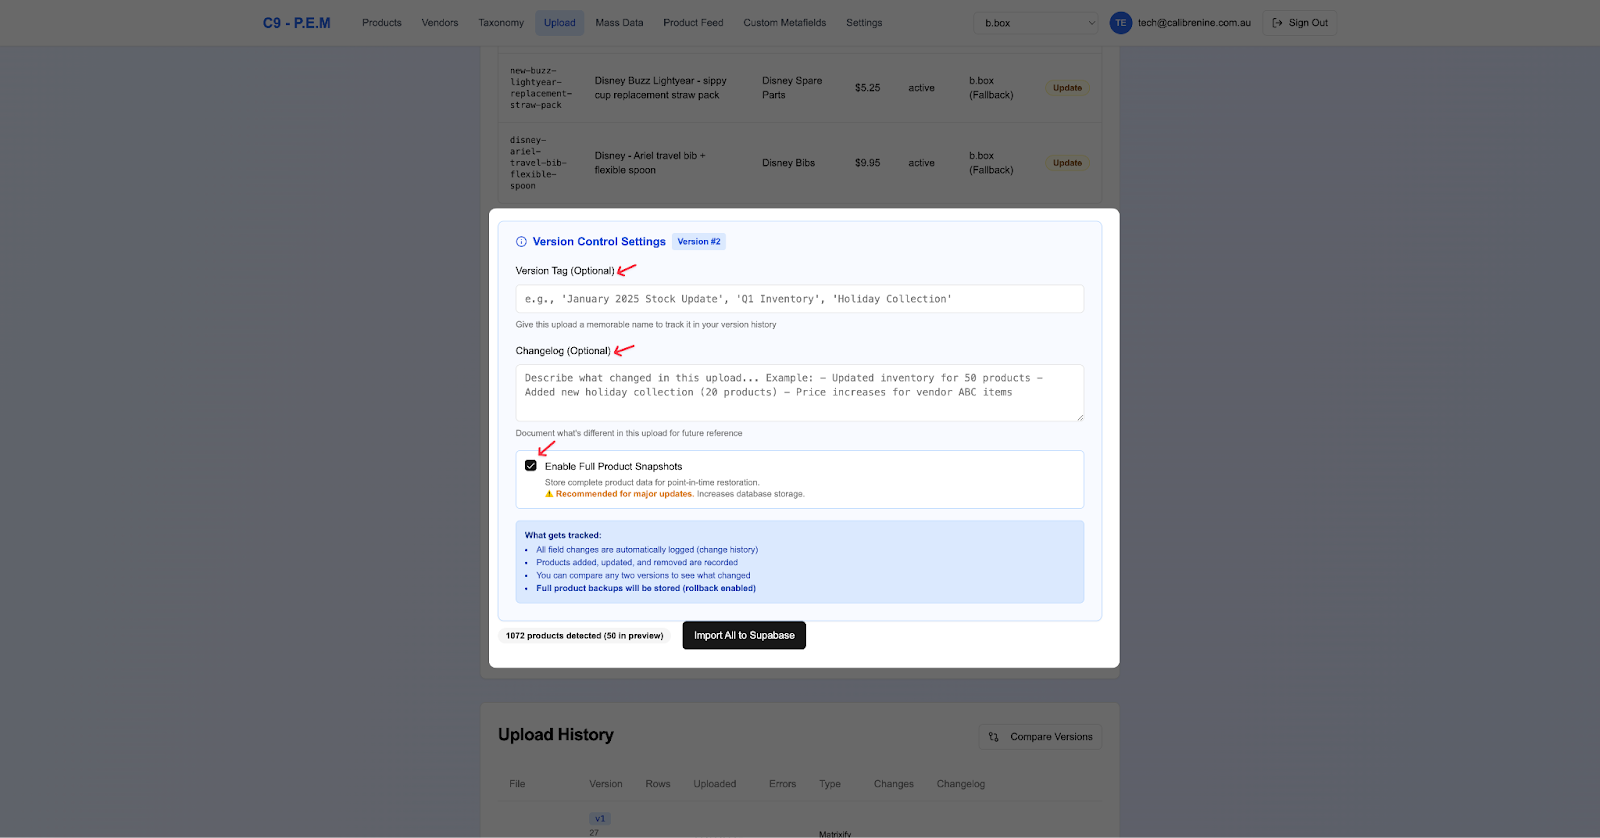
- Upload the Products CSV to the CSV Product Uploader. Preview it to double check. Select either Auto-detect or Matrixify, and then select the Client. Ensure the following settings have been set. Include a tite for the Version name and a short description.
- Apart from the target and general categories (and their parallels) we would have identified in the Strategy Summary: PIM Enrichment sheet, we want to check if the client has provided any Category assignments to their products so we can use both as references for context when we decide on the accepted product categories for each Vendor.
- To check what Category assignments the client has previously done, go back to the P.E.M. Tool Dashboard and select the Products tab.
On the left filter navigation, select Reset to Default. In the Product Browser tick Select All Matching. Scroll through the different action button options and select Export Categories.
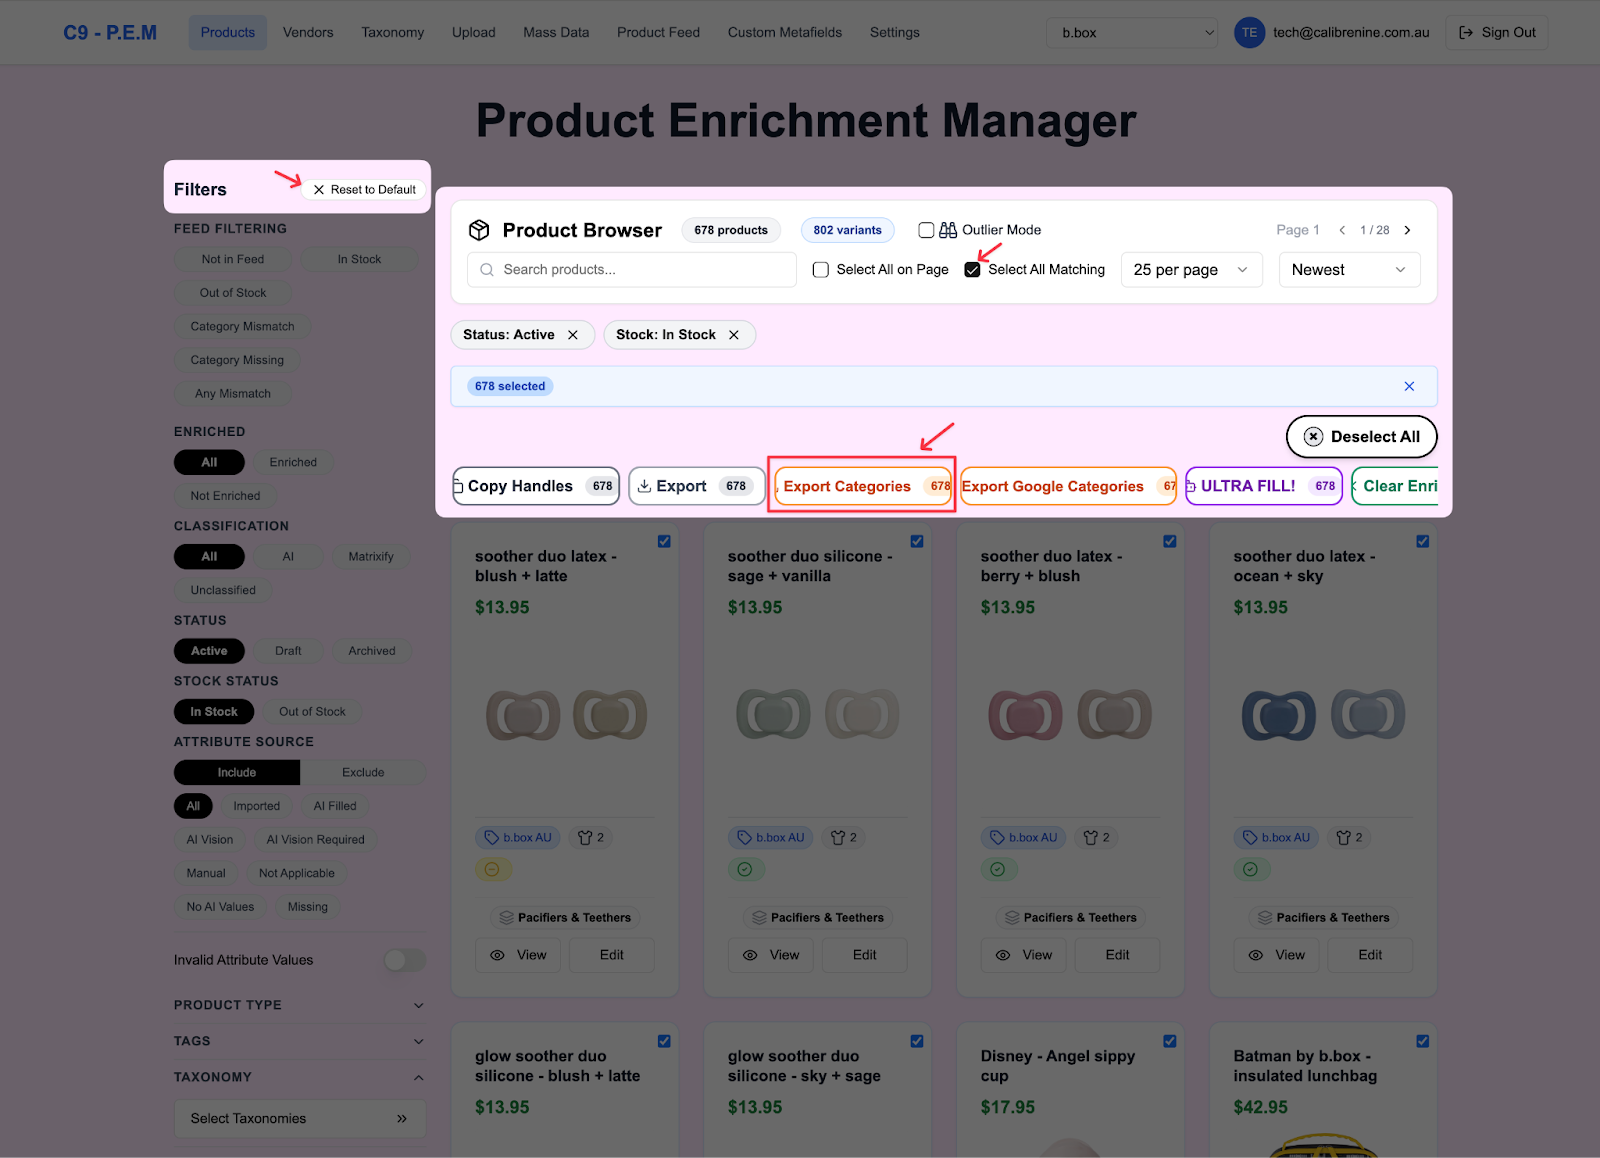
This should give you a CSV export of all of the existing Category assignments they’ve got.
*TIP: Upload the CSV into a sheet within the Client’s Raw Data folder so that you can easily filter through them and come up with a clean list you can work with. Use your discretion to highlight in red, if there were any mistakes the client has made or any that we won’t consider as an accepted category.
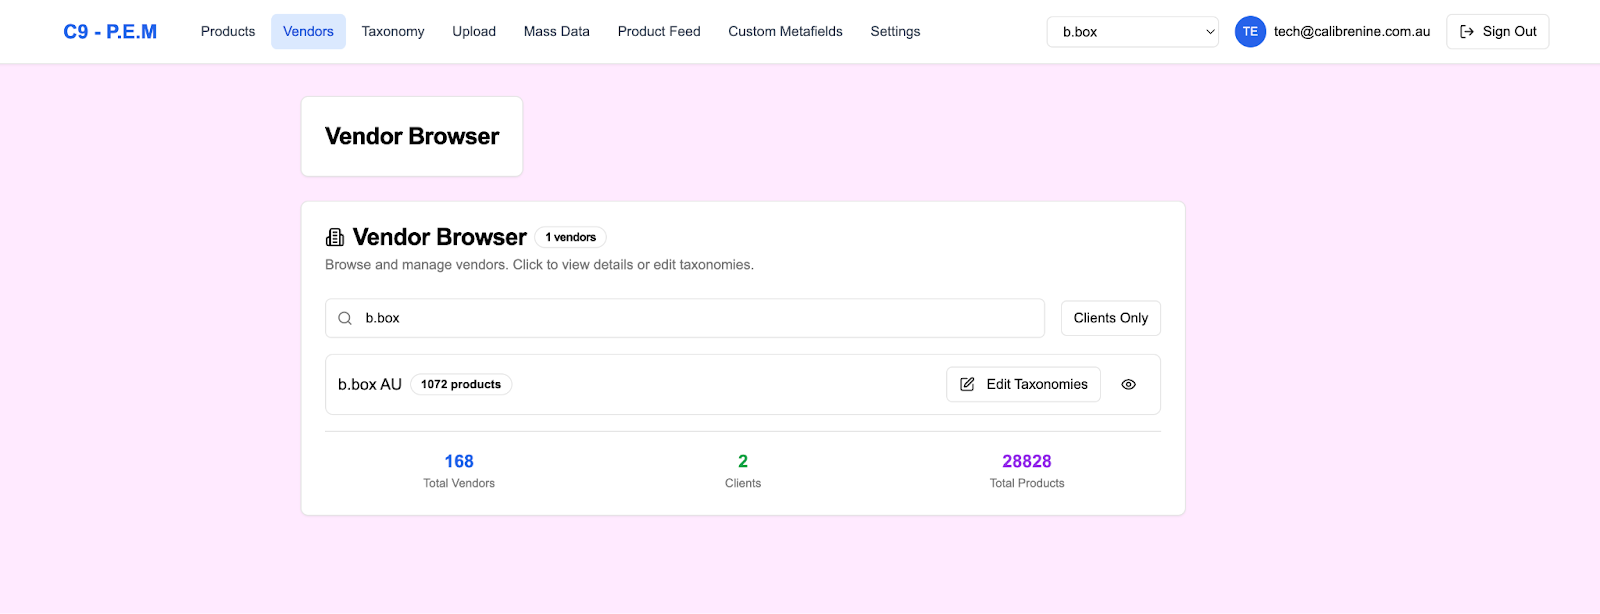
- Go back to the P.E.M. Tool Dashboard and select the Vendor tab. If the client is the D2C brand themselves, simply enter the client’s name then click “Edit Taxonomies”.
If the client is the authorised distributor or retailer of multiple brands, you will need to do the same process for every brand from this Vendor list.
- Make sure you have the Categories Raw Data sheet you’ve just created and the client’s Strategy Summary: PIM Enrichment sheet open.
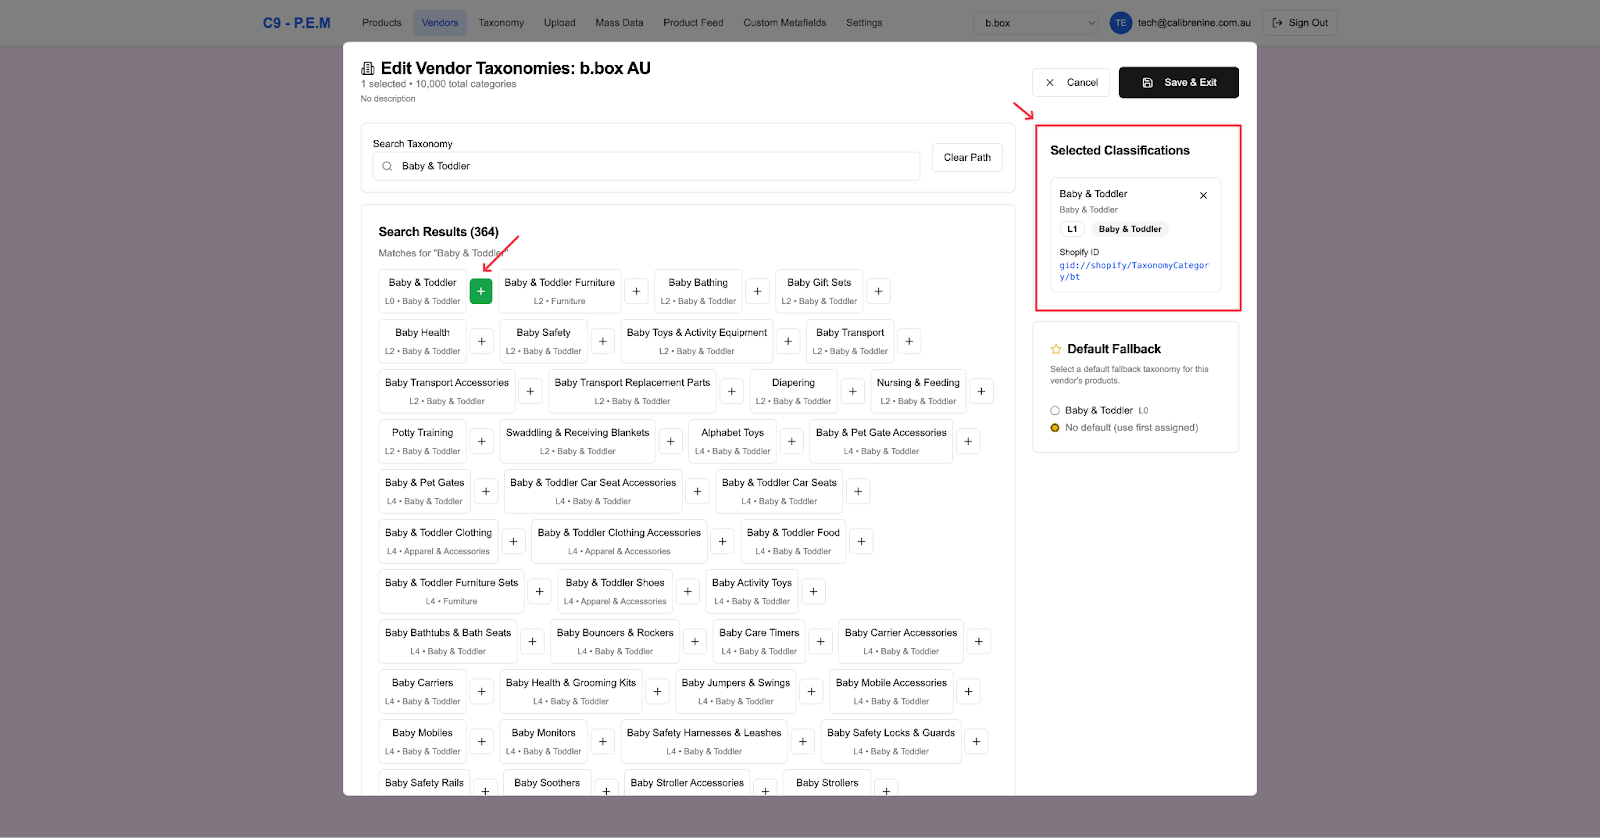
- Start entering each of the categories you’ve found in to be relevant/applicable to the Vendor from the Raw Data sheet to the Search Taxonomy section.
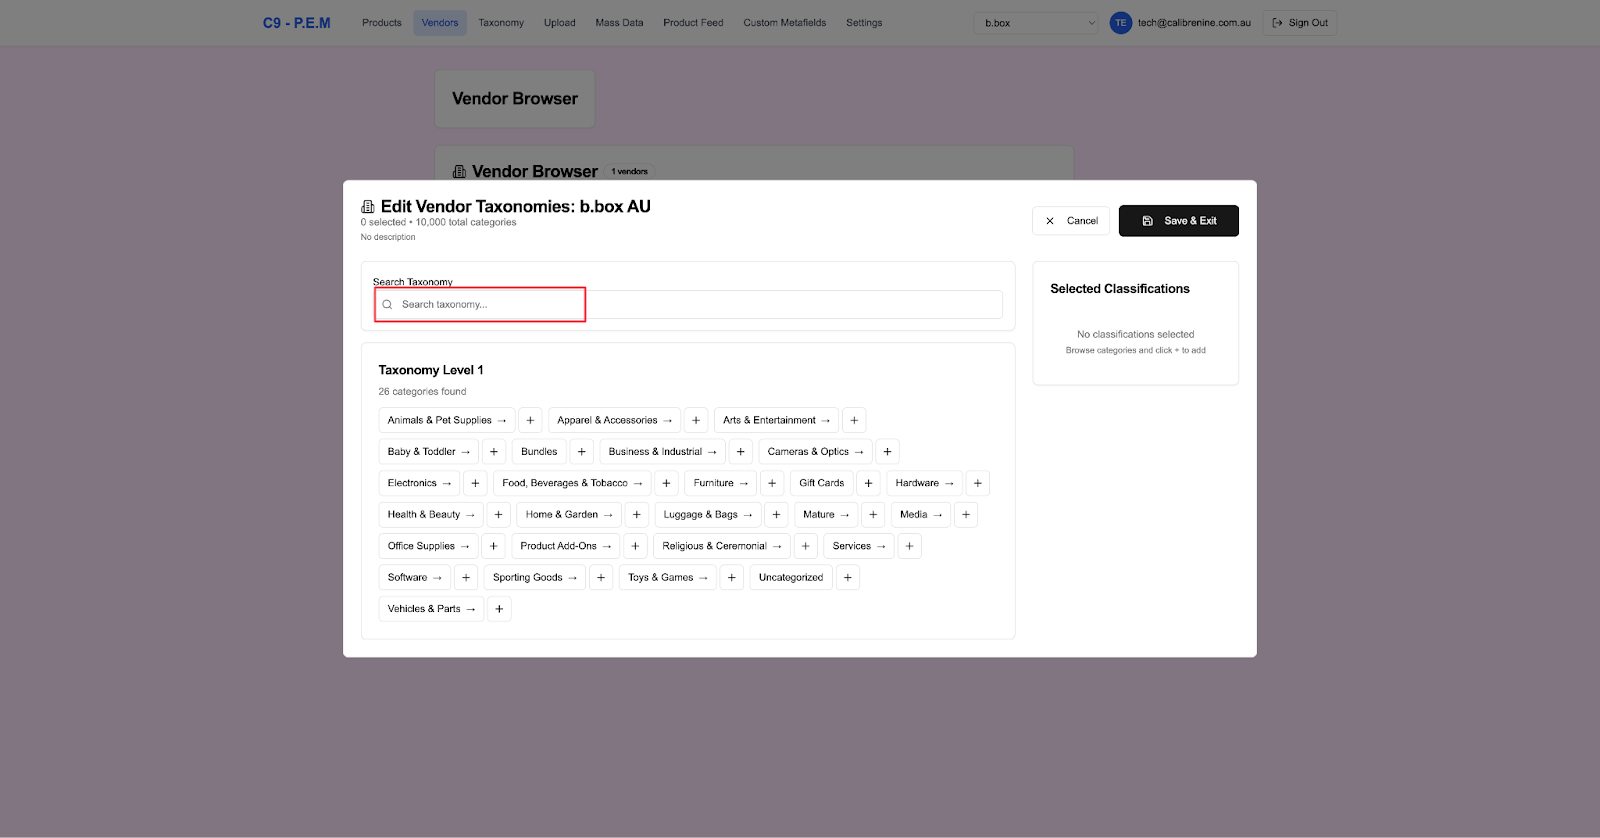
To add a category as an accepted category within that Vendor, click on the Plus (+) symbol. Every tome a new one is added, it is reflected in the Selected Classifcations section (aka accepted categories) .
Make sure to hit Clear path before entering any new one to add to the list.
- Repeat the same process for the Categories you’ve identified in the Strategy Summary: PIM Enrichment sheet as well. There may be crossovers.
- Once done, hit Save & Exit.
- If you decide to add in more categories down the line, you can always come back to it to edit and add in (or even remove) categories.