Article
Source
Doc
| Category | Documentation |
|---|---|
| Type | Doc |
| Last Modified | 8 October 2025 |
| Location | Tools > Screaming Frog |
Screaming Frog Guide
From FAQ-Off, the Calibre9 knowledge base
| Introduction | |
Intro | Screaming Frog is a website crawler that you can run from your personal computer. It helps us to see websites as the Googlebot sees them, and to analyse technical issues at scale. It is the single most useful piece of SEO software in our entire library and is core to how we do technical audits. This guide is maintained by Lachlan Cowie. If you’d like any additions or clarifications, please add a comment or Slack me. |
| Quick Start | |
Cowie’s Config | This is a copy of my usual crawl settings. It’s a great starting place for a default SEO crawl: |
Importing Settings | → Go to Configuration → Profiles → Load...
→ Select my config from your downloads folder (or a different config of your choice) then click Open
→ Then go to Configuration → Profiles and click Save Current Configuration as Default (this will use the current settings as the default, each time you open Screaming Frog) 
|
Exporting Settings | In case you’d like to share your own settings: → Go to Configuration → Profiles → Save As...
|
License | To enter your license: → Screaming Frog SEO Spider → Settings... → Licence  If you do not have a licence, please contact Chris Pride.
|
| Common Issues | |
My crawl is taking forever 🤬🤬🤬 | If the crawl is taking forever, it’s usually one of these settings that is responsible:
Keep in mind that most of these settings have a trade-off, and there are issues you may miss or misdiagnose because you have these settings changed. For particularly large websites, the crawl may take hours regardless of what your settings are. Plan accordingly. |
“You are running out of memory for this crawl” error | This usually happens because you haven’t allocated Screaming Frog enough temporary storage (RAM). You should:
|
I keep getting 403/510 errors | 403 and 510 errors usually mean you have been blocked by the webserver. This can happen for a number of reasons: Shopify Sites
For Shopify sites, you usually get blocked by crawling the pages too quickly. I recommend reducing the crawl speed to ~2 URL/s (see instructions). The block is temporary, so you can try again in half an hour. If you need to crawl more quickly, use a VPN (or move your VPN to a different server) WordPress and Other CMSs
WordPress blocks are usually permanent. You will need to fix your settings and then use a VPN (or move your VPN to a different server). You have usually been blocked for one of these reasons:
|
I want to know how many blog posts are on the website | The search bar above the page list in Screaming Frog is the best way to filter pages by pathway, title, status, indexability and more: 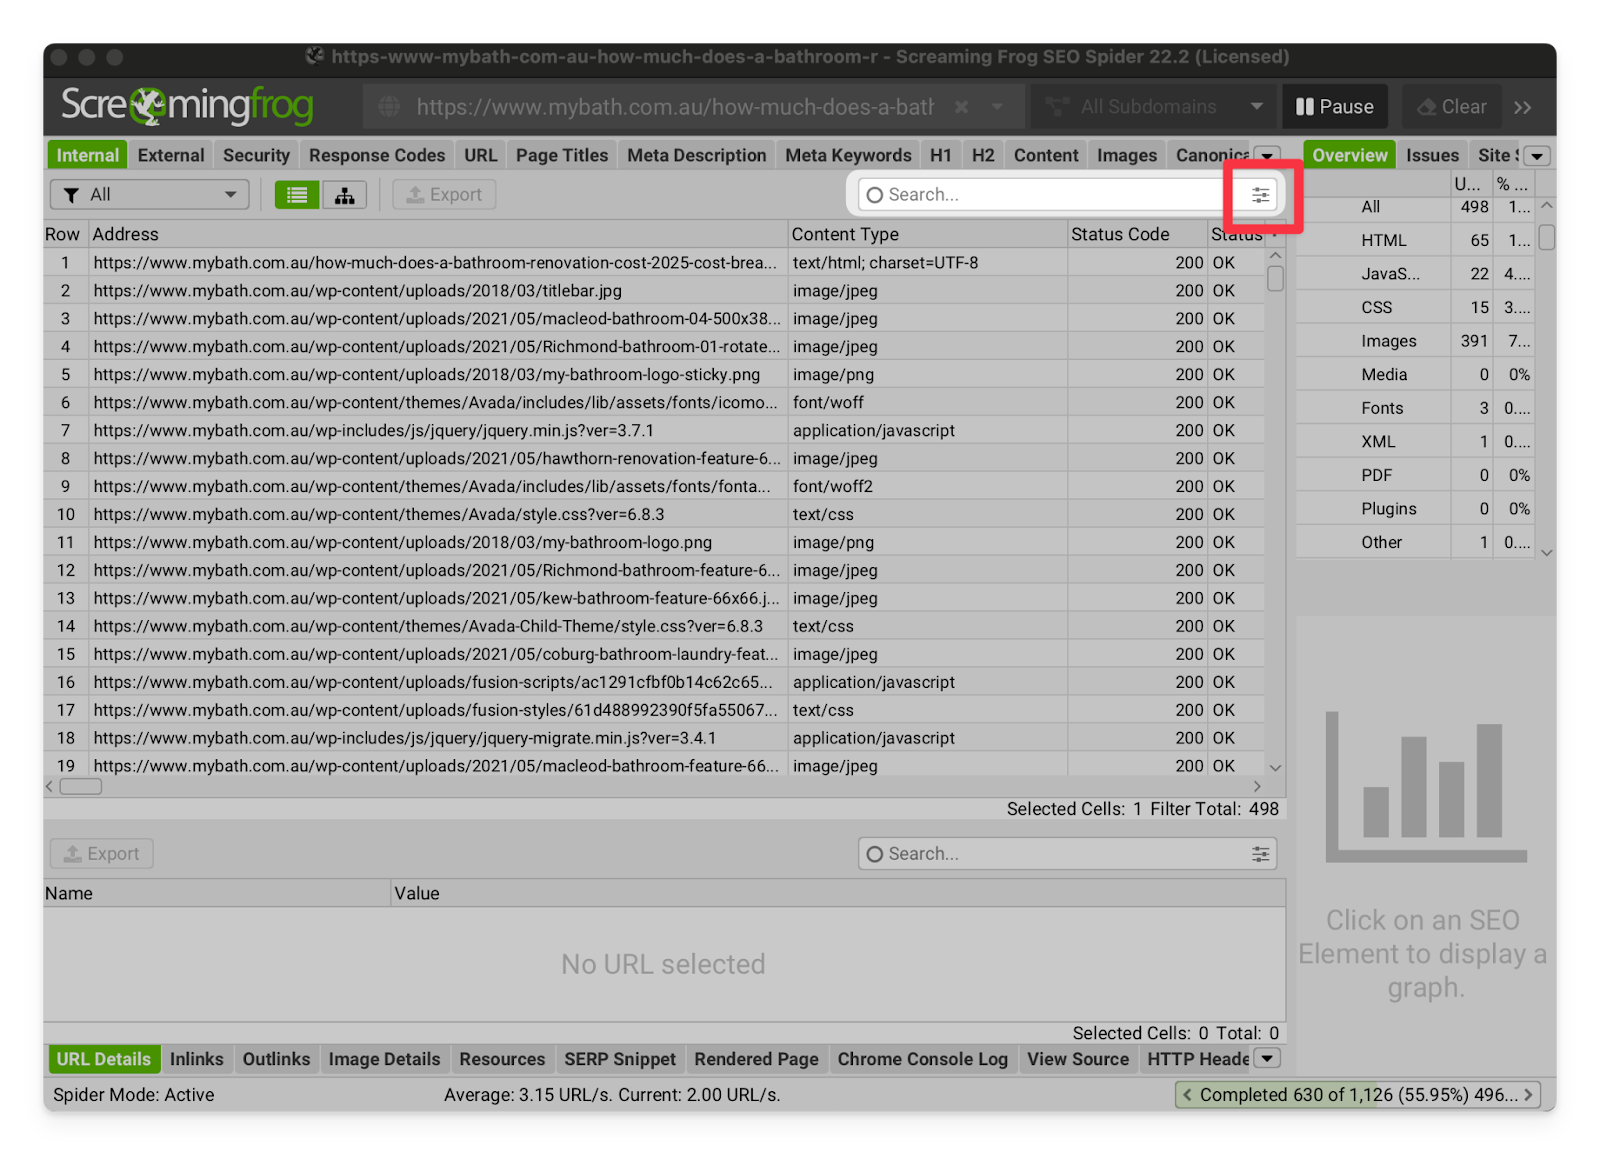 Click the three lines to get the full suite of filter options: 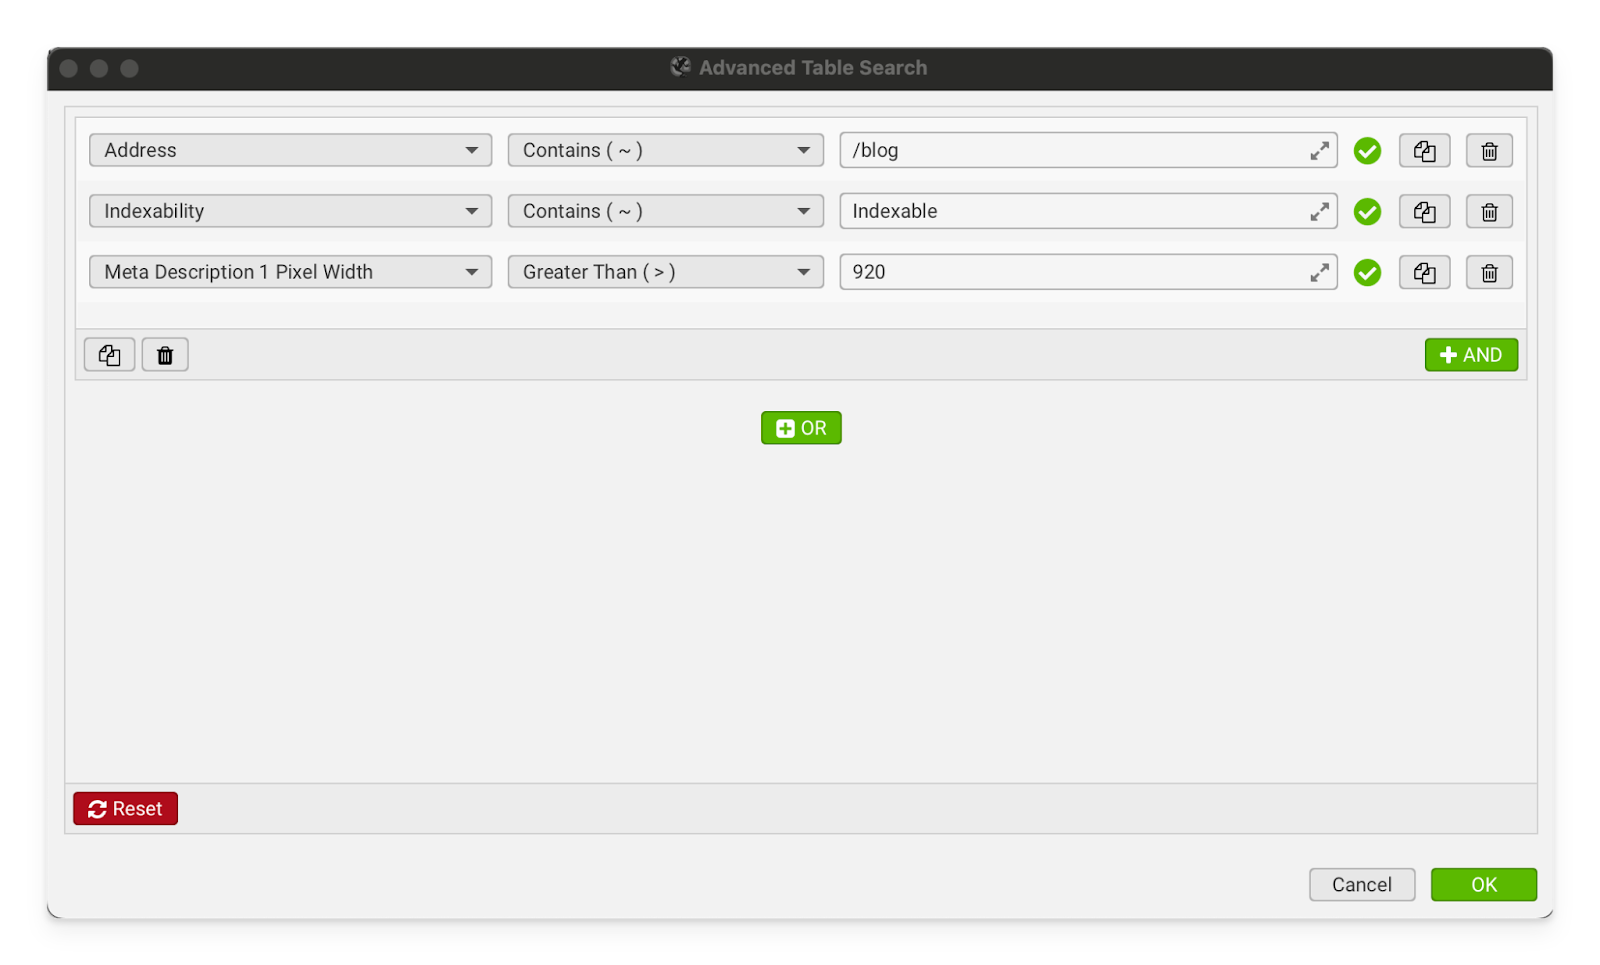 If the blog posts do not have a unique URL pathway, I recommend using a Custom Extraction (see instructions). |
I want to crawl a specific list of URLs | To crawl a specific list of URLs, switch Screaming Frog to List Mode:
Once it is in list mode, you can click Upload and either paste in the URLs or attach a csv/Google Sheet. |
I want to compare two crawls | To compare two previous crawls, switch to Compare Mode. You will need to be using Database Storage (to save previous crawls).  Click Select Crawl and pick the crawls you’d like to compare from your storage folder. |
I want to change the colour of the UI | Go to Screaming Frog SEO Spider → Settings... → User Interface
→ Select pink (or a different, less interesting colour)  |
Images/resources are being counted as external links | This is usually because the resources are being hosted on the domain for their CMS or CDN. You can fix this in Screaming Frog by adding that domain to the CDN list.” |
| Settings | |
Storage Mode | This setting should be set to Database Storage. Database storage allows you to save and re-open crawls which is very important for having historical snapshots of your client’s sites. It also prevents your computer from having to hold the entire crawl in RAM (which can crash the computer on larger crawls).  |
Memory Allocation | This should be set to at least 10GB. Increasing the amount of RAM allocated to Screaming Frog allows it to crawl more quickly, and load more data into the UI.  |
| Configuration | |
Spider - Crawl | |
Images & Media | These settings should usually be turned on. Oversized images and media are a frequent cause of site performance issues. I sometimes turn this setting off for large sites, because crawling and storing the image/media files is causing the crawl to become too large. 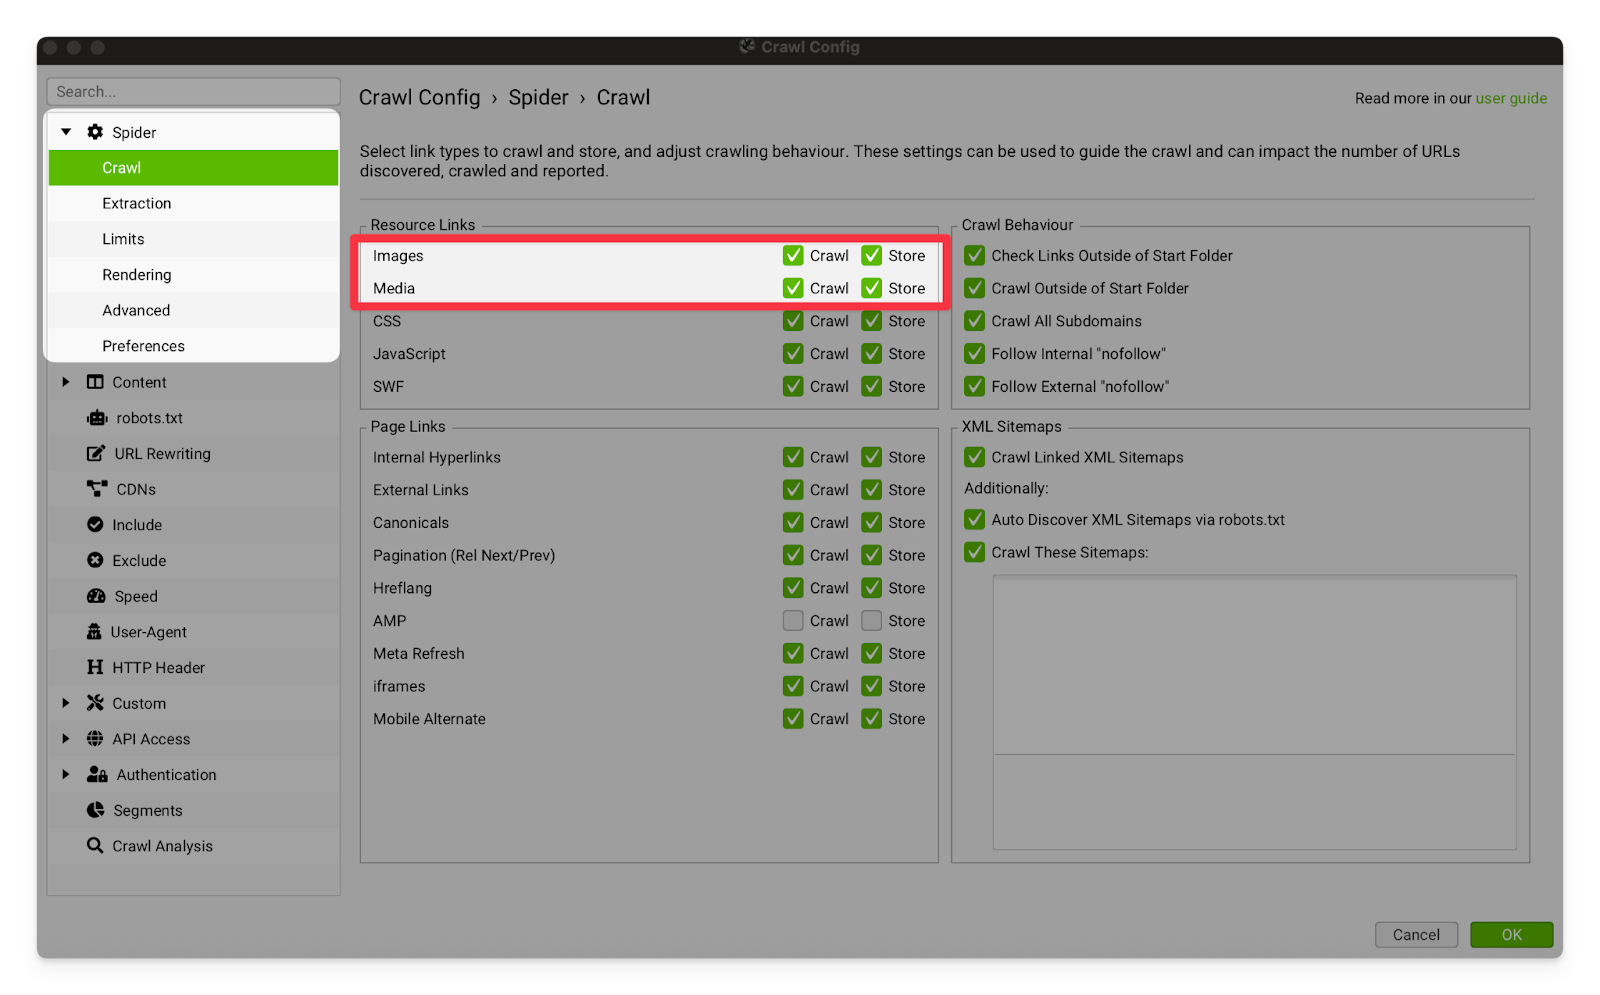 |
CSS | These settings should always be turned on. CSS (Cascading Style Sheet) Files are a key part of how all modern websites are styled and rendered. Every single one of our clients uses CSS files on their site. |
JavaScript | These settings should always be turned on. They will allow Screaming Frog to crawl and store JavaScript files. JavaScript is critical to how many modern web pages render and function. |
Canonicals | These settings should always be turned on. They allow Screaming Frog to crawl and store canonical links. 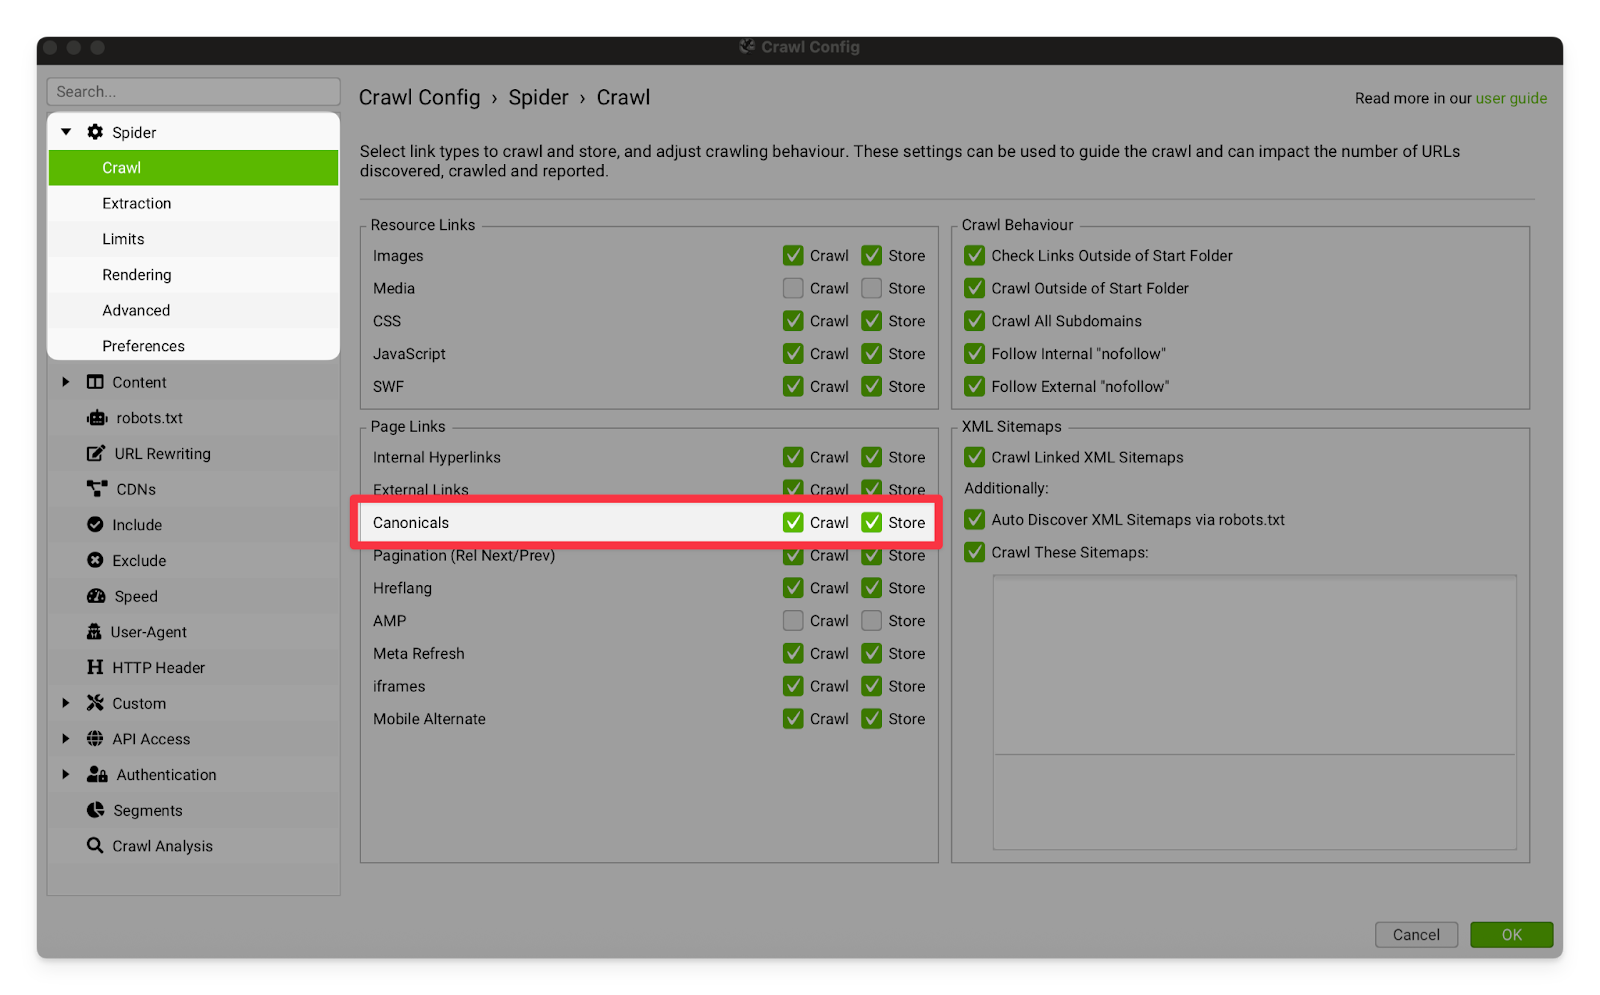 |
Hreflang | Turning these options on will allow Screaming Frog to crawl and store hreflang links. I strongly recommend that you turn this on for all international clients (even if we are only working on the Australian site). 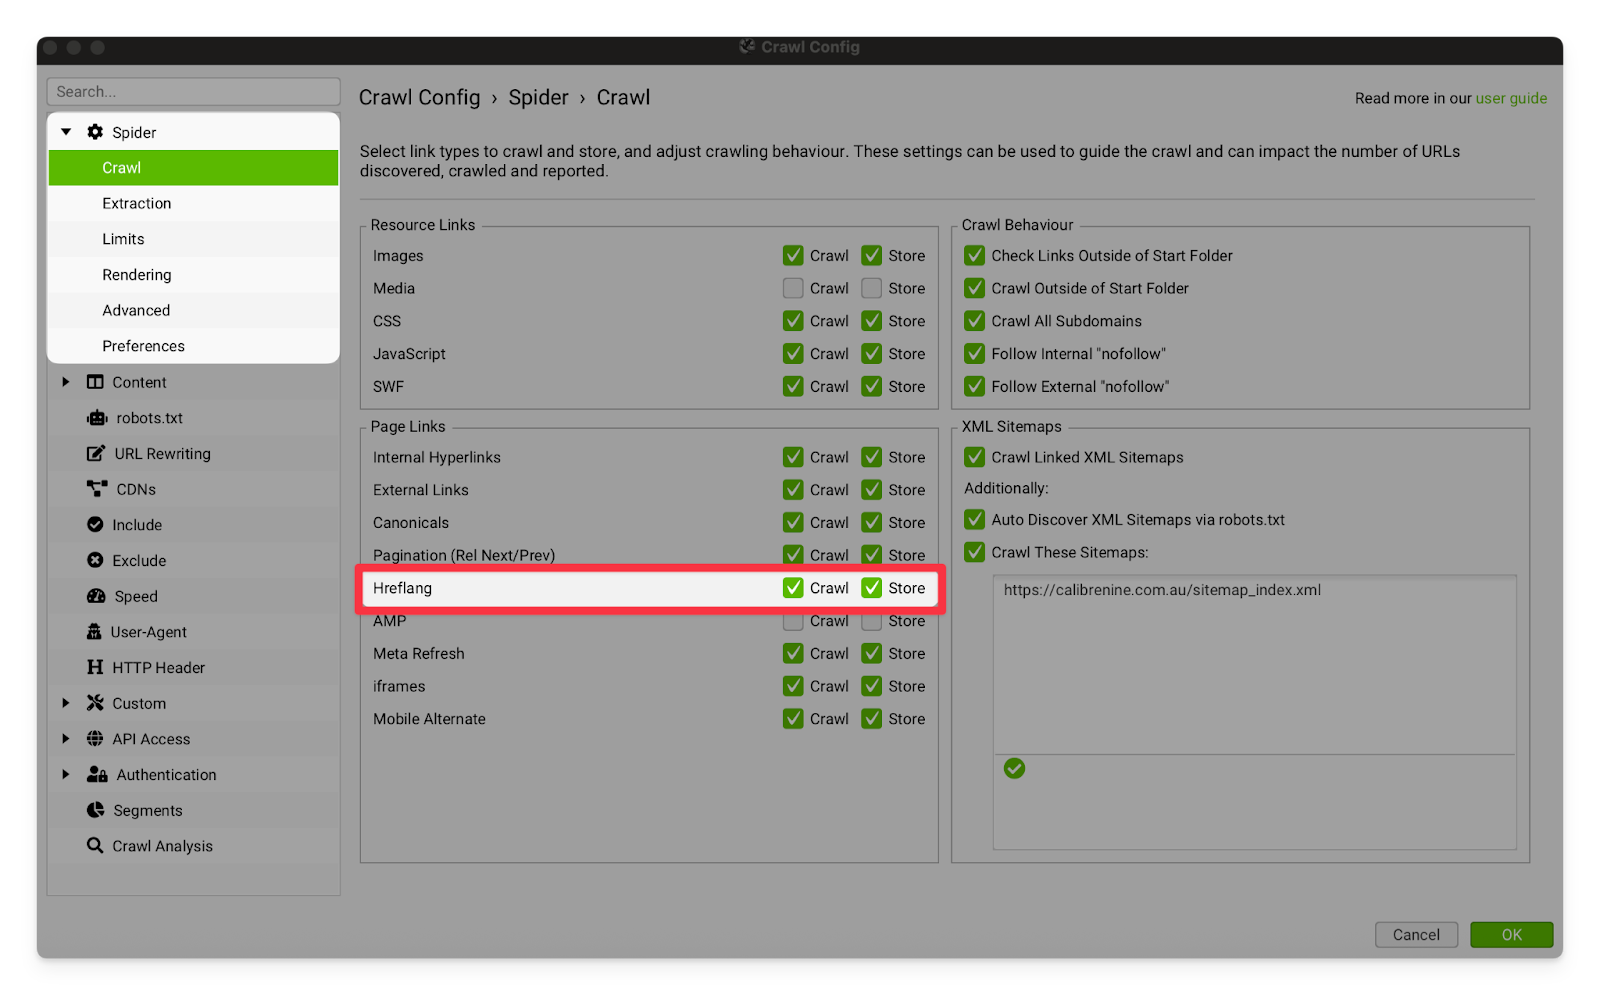 |
iframes | I recommend turning these settings on. An iframe is a second web document that has been embedded inside the client’s page. Our clients frequently use iframes for video content, contact forms and booking forms. |
Follow Internal “nofollow” & Follow External “nofollow” | Ticking these options will allow Screaming Frog to crawl links tagged with the “nofollow” attribute. I recommend turning this option on, so that you can see all of the interlinking on the site. Sometimes web developers or past SEOs will wrongly tag links as nofollow. If you are using this setting, make sure you are crawling with a VPN (Mulvad or equivalent). Some sites will intentionally have a hidden nofollow link, and then IP ban any crawler who follows the link. This is called a “blackhole” or a “honeypot” and is designed to catch and stop malicious crawlers who are not following the rules set out in the nofollow attribute or robots.txt file. 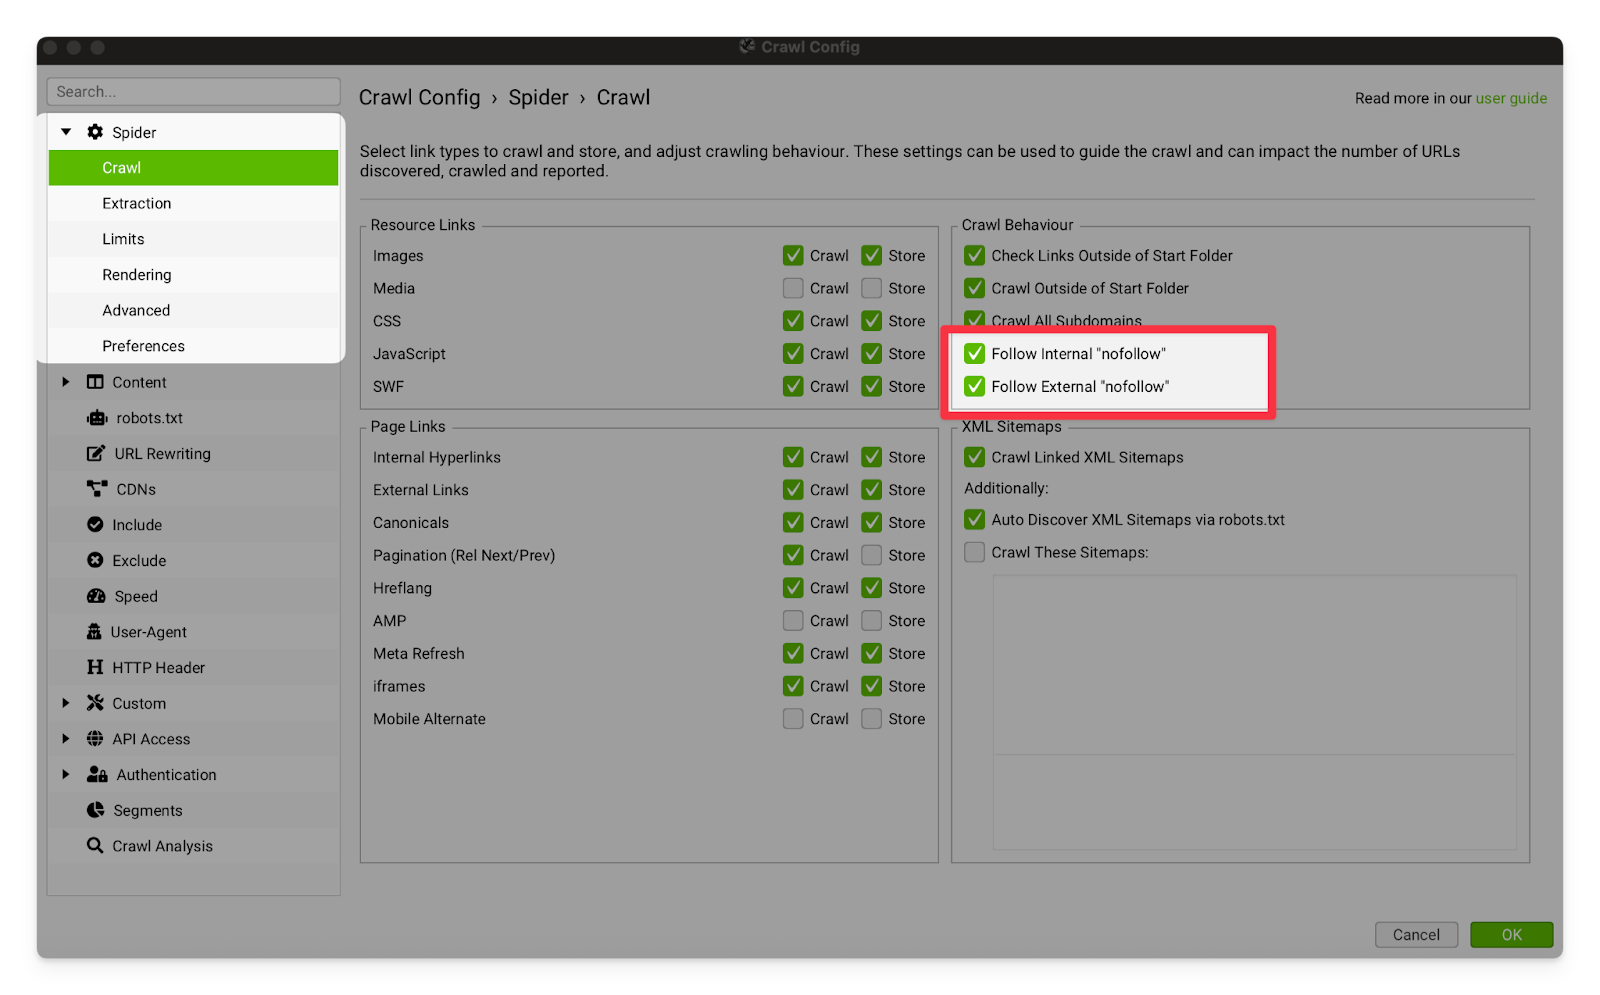 |
Crawl Linked XML Sitemaps | I strongly recommend turning on Auto Discover XML Sitemaps via robots.txt. This will allow Screaming Frog to find all of the indexable pages on the site via the robots.txt file (like the GoogleBot does), and tends to help the crawler find all of the pages on the site much more consistently. If you are still having issues with the crawler finding pages, you can feed it the sitemap directly using the “Crawl these Sitemaps” setting. 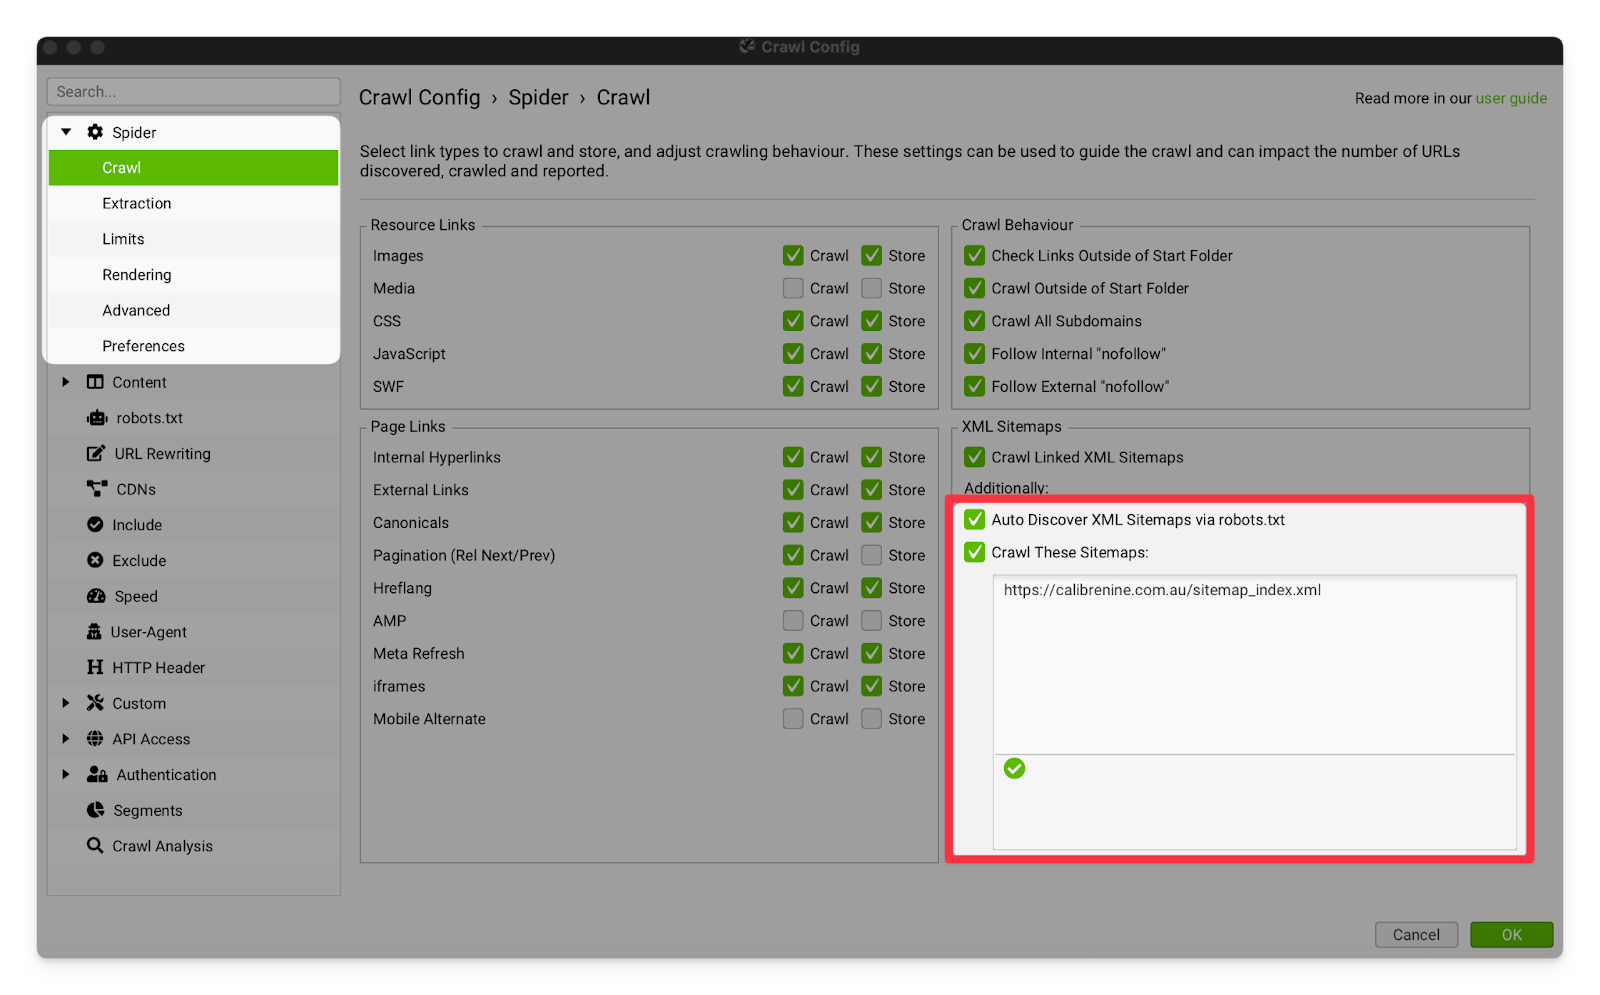 |
Spider - Extraction | |
Page Details | I usually leave all of these settings on. Page content is very important to SEO (and is pretty light on the crawler), so there is no reason to ever turn these settings off.  |
Structured Data | Never turn these settings off. Structured data is incredibly important to SEO, and is only becoming more and more important as platforms lean more heavily on LLMs to process their data. Good structured data can greatly increase visibility, particularly for long-tail transactional keywords. 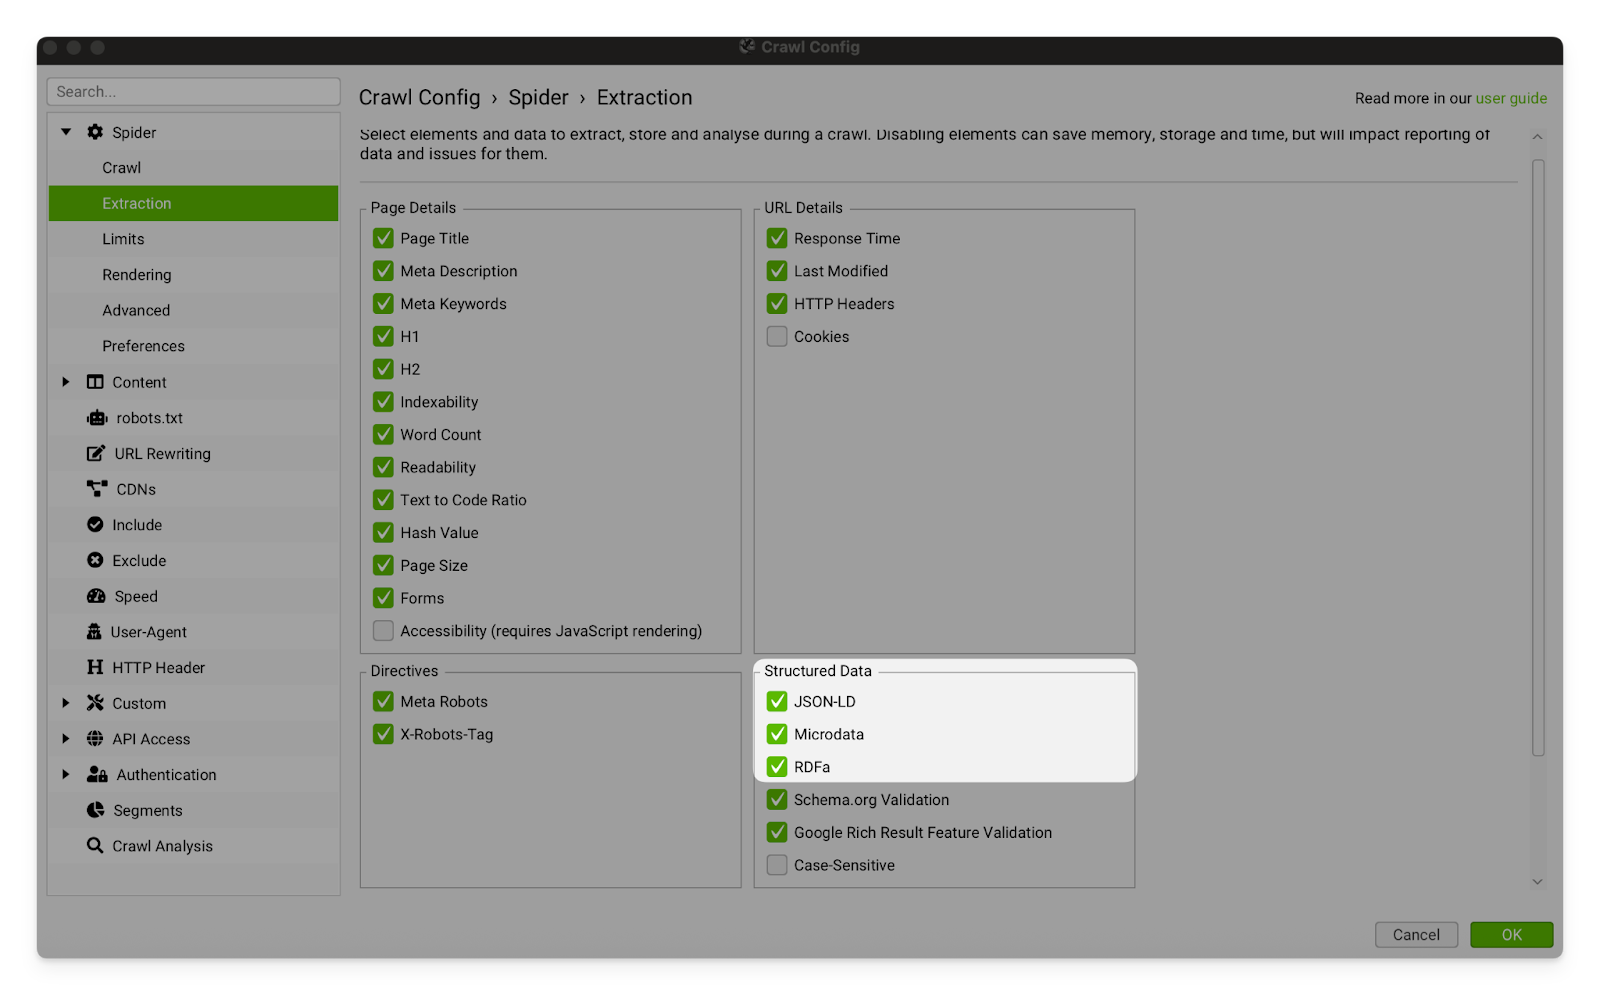 |
Directives | Never turn these settings off. Robots tags (especially noindex tags) are incredibly important to SEO. Pages with a noindex attribute in their robots tag will not be indexed by Google. 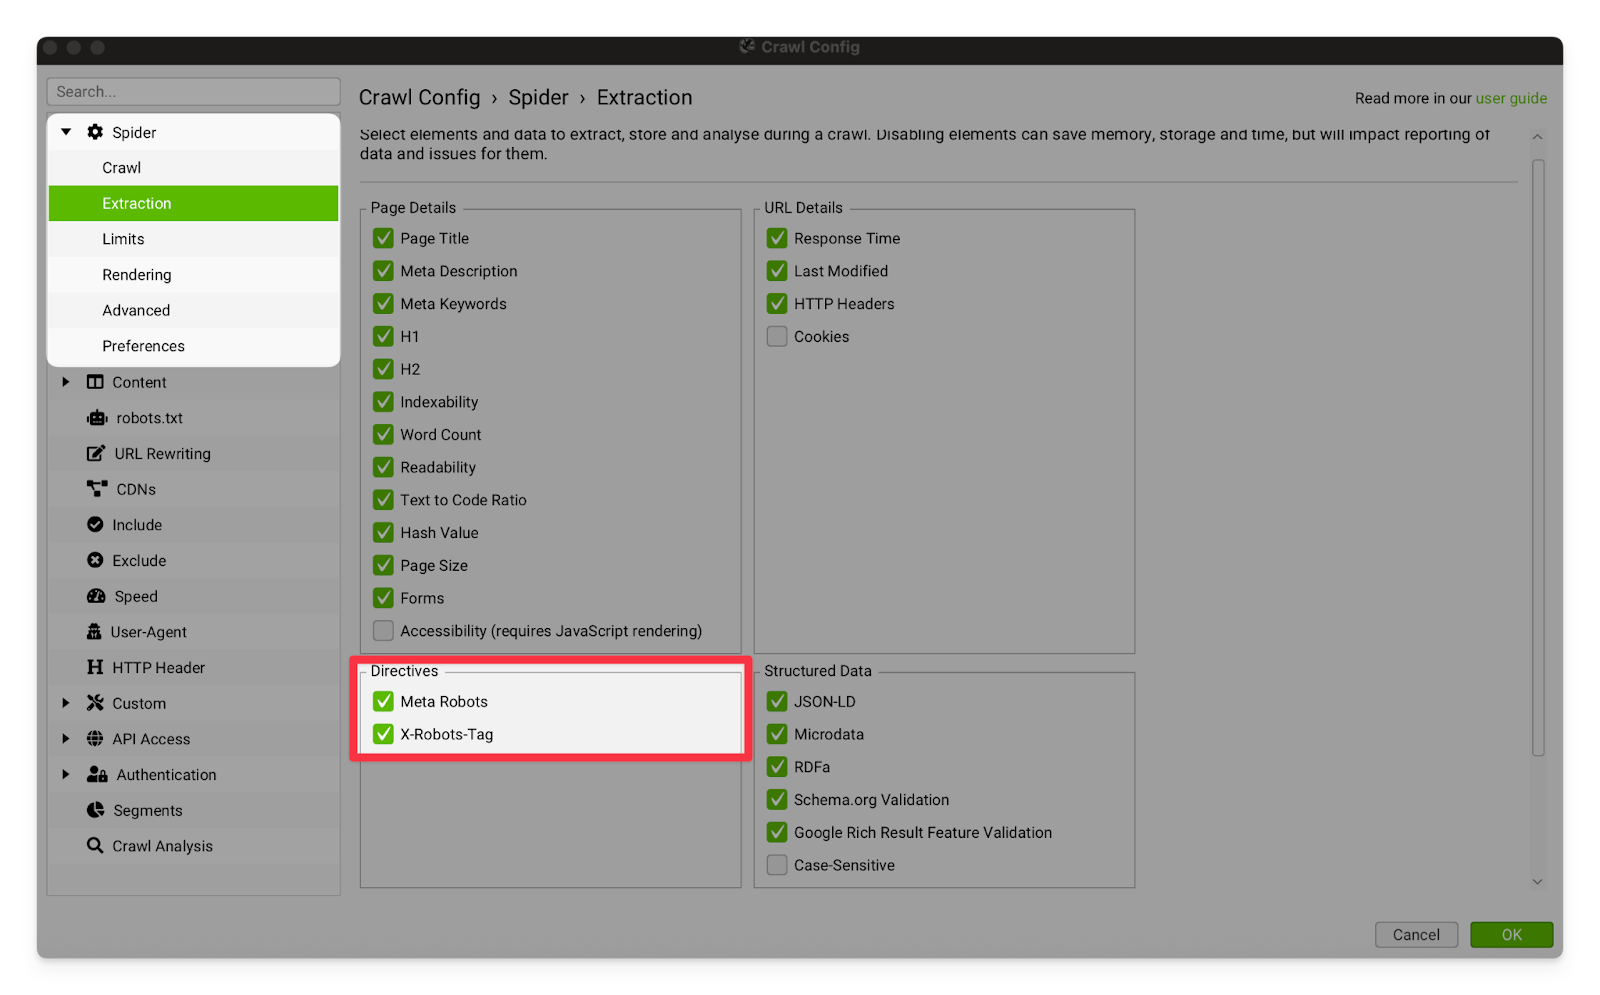 |
Structured Data Validation | I usually leave these settings on. It is very important that we make sure the client has valid structured data, but doing it page-by-page can slow the crawl significantly for large sites.  |
Spider - Rendering | |
Rendering | Set the Rendering to “Javascript”. Almost all modern websites rely on JavaScript either to render page content or to provide functionality. For some very large sites, you may need to turn this setting off so that the crawl can be completed within a realistic timespan. 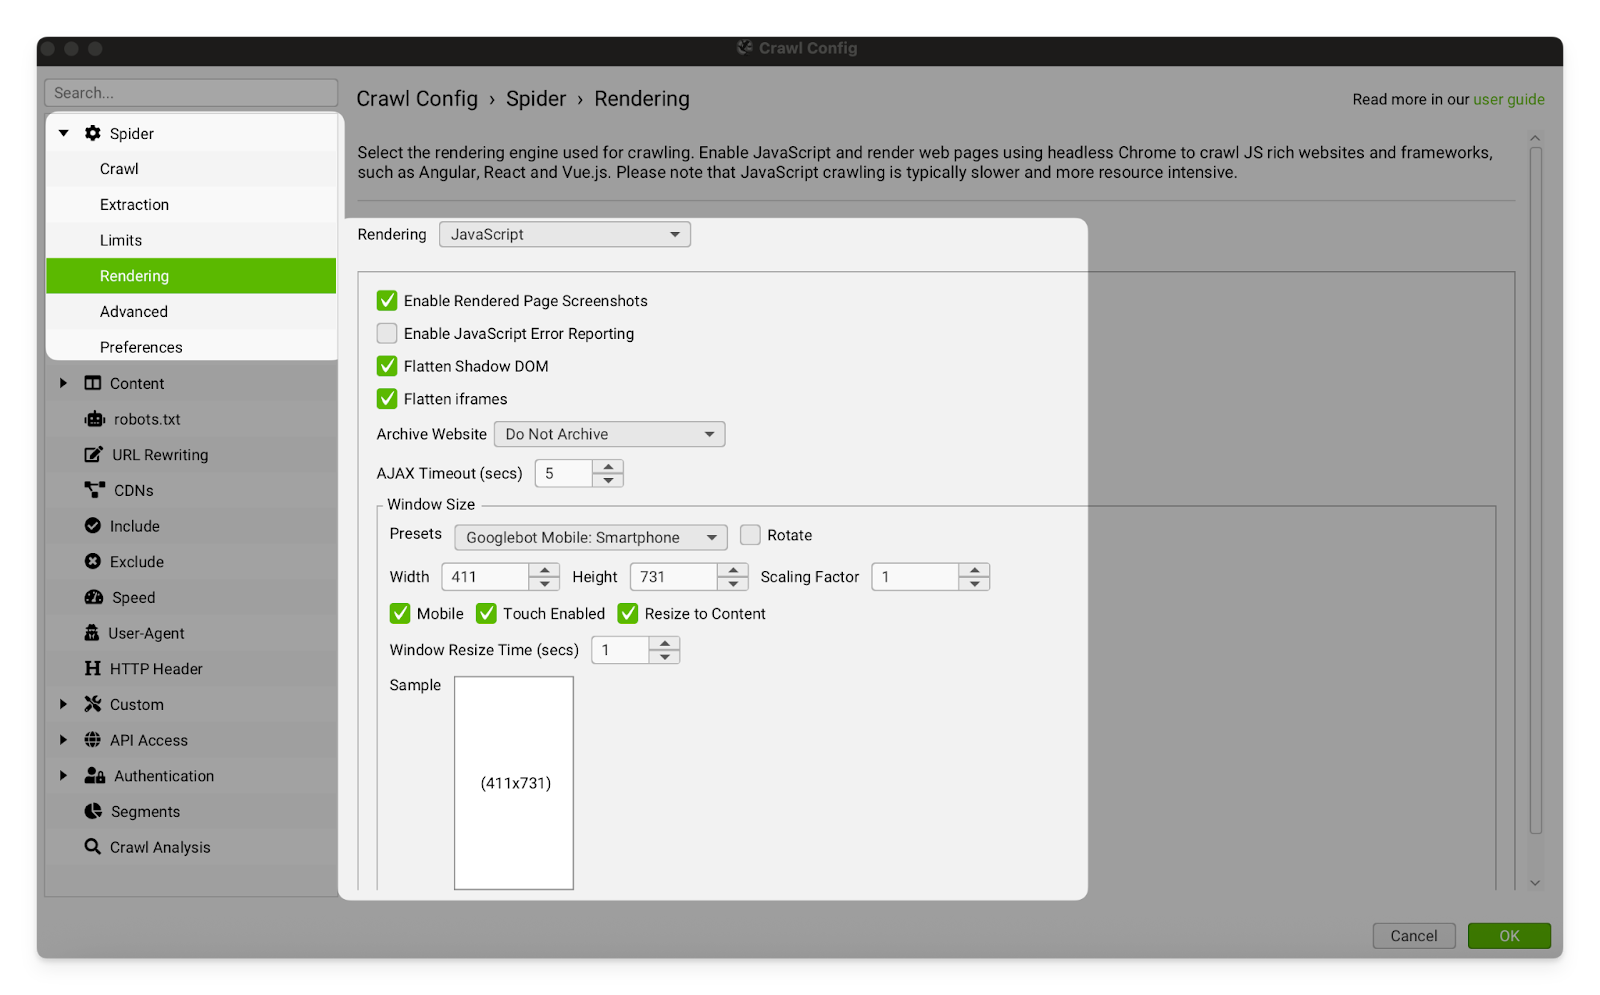 |
Spider - Advanced | |
Follow Redirects and Canonicals | Always leave these settings on. Redirects and canonicals are very important to technical SEO, and we should always follow those links where possible. 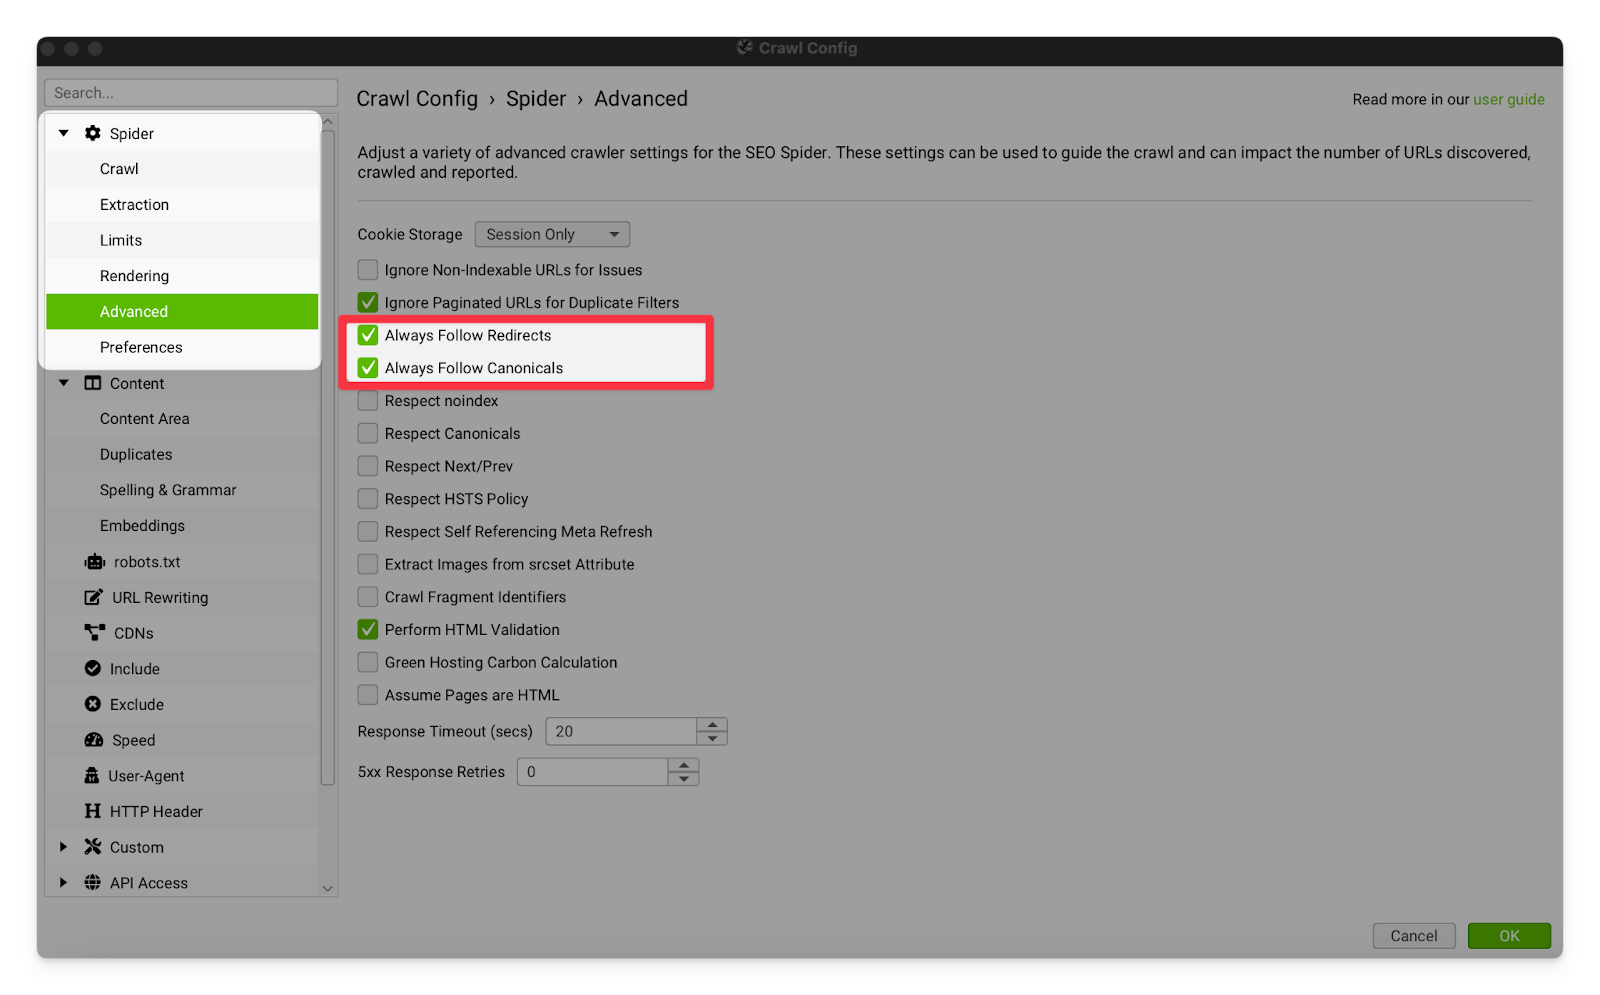
|
Respect Settings | Keep this shit off. We have no respect. In all seriousness, it’s important that our crawler does not respect noindex or canonical tags because we are looking for issues and errors (pages that should not be noindex/canonicalised, but are). 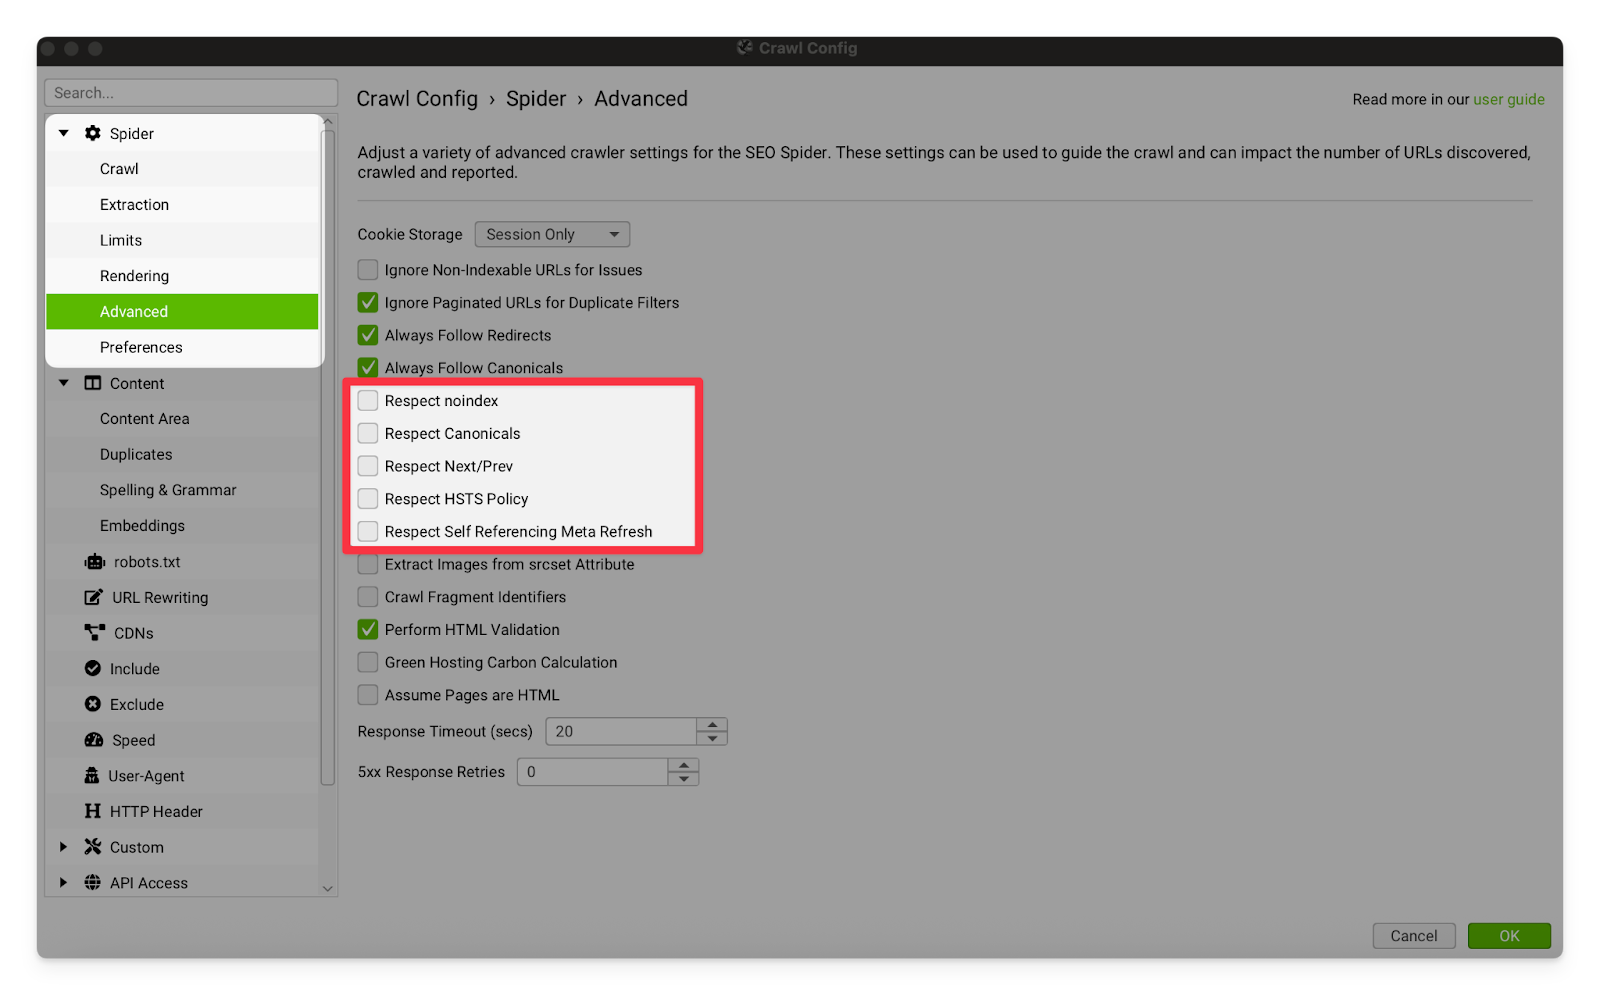
|
Spider - Preferences | |
Page Title and Meta Description Width | This is where you set limits for flagging pixels and characters. Pages over or under the limits will be put into the “Page Title Over X Pixels” tab (or equivalent) once the crawl is complete. As of writing this guide, the limits are:
For maximum accuracy, lengths should always be measured in pixels. I recommend also having a minimum to help you find titles and descriptions that are malformed or mostly missing. 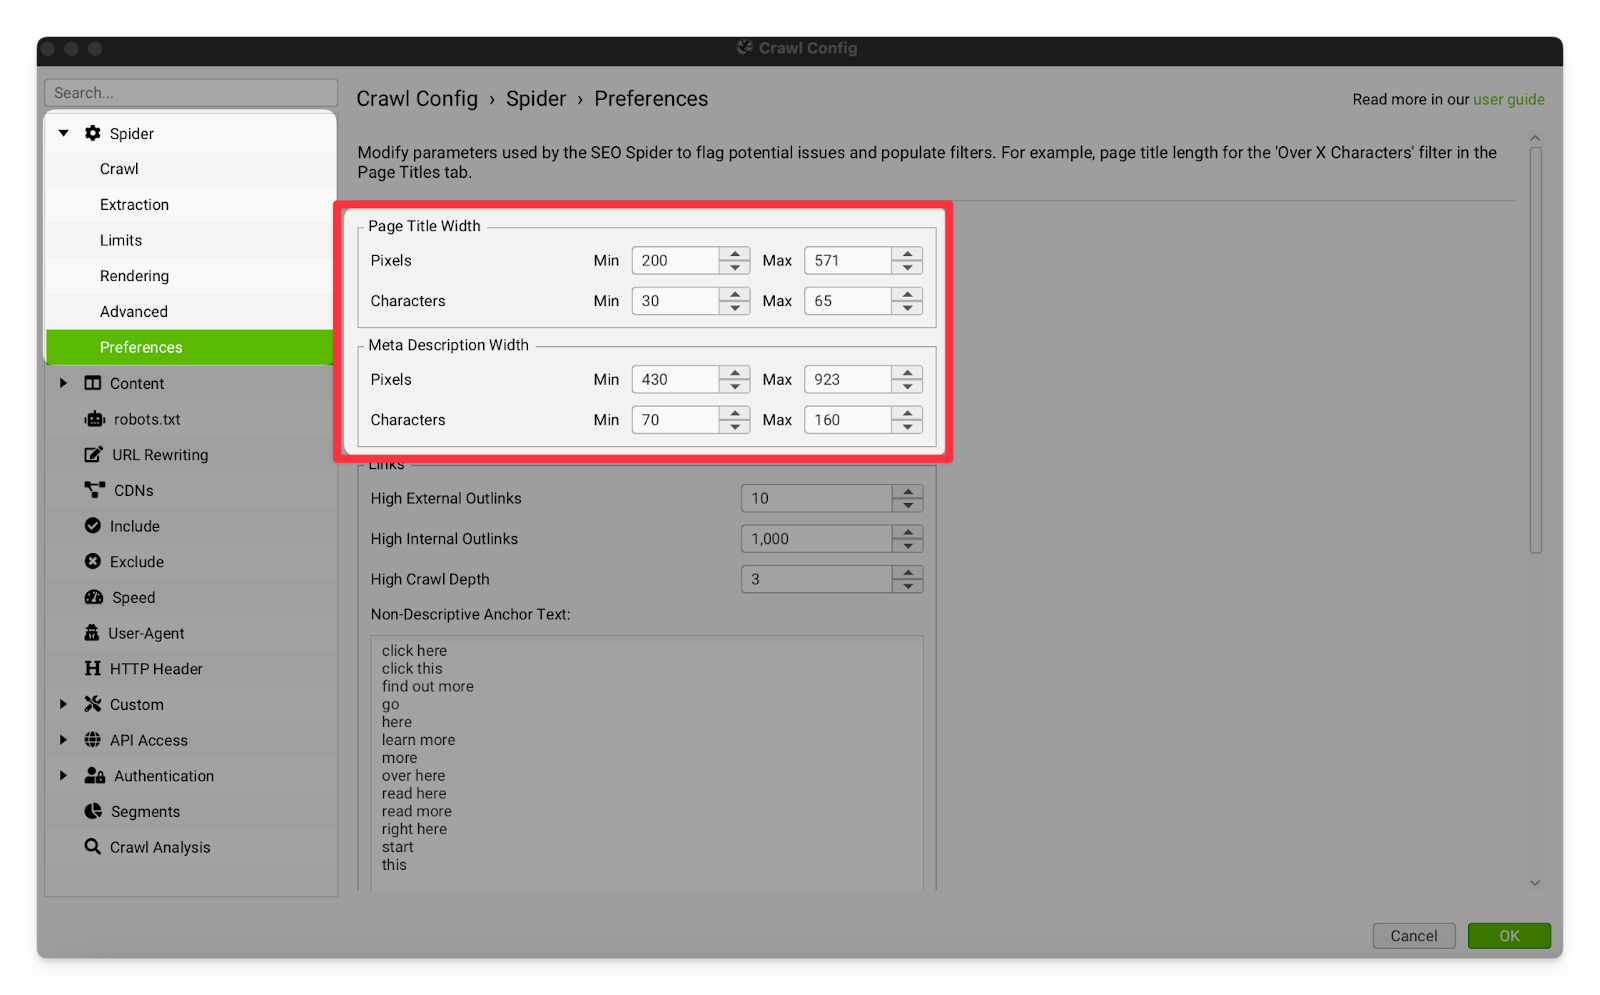 |
Non-descriptive Anchor Text | This setting allows you to adjust which links are flagged for having non-descriptive anchors. If you notice the client repeatedly uses a vague anchor in their links, I recommend adding that anchor to this list so that you can locate all instances of the issue. 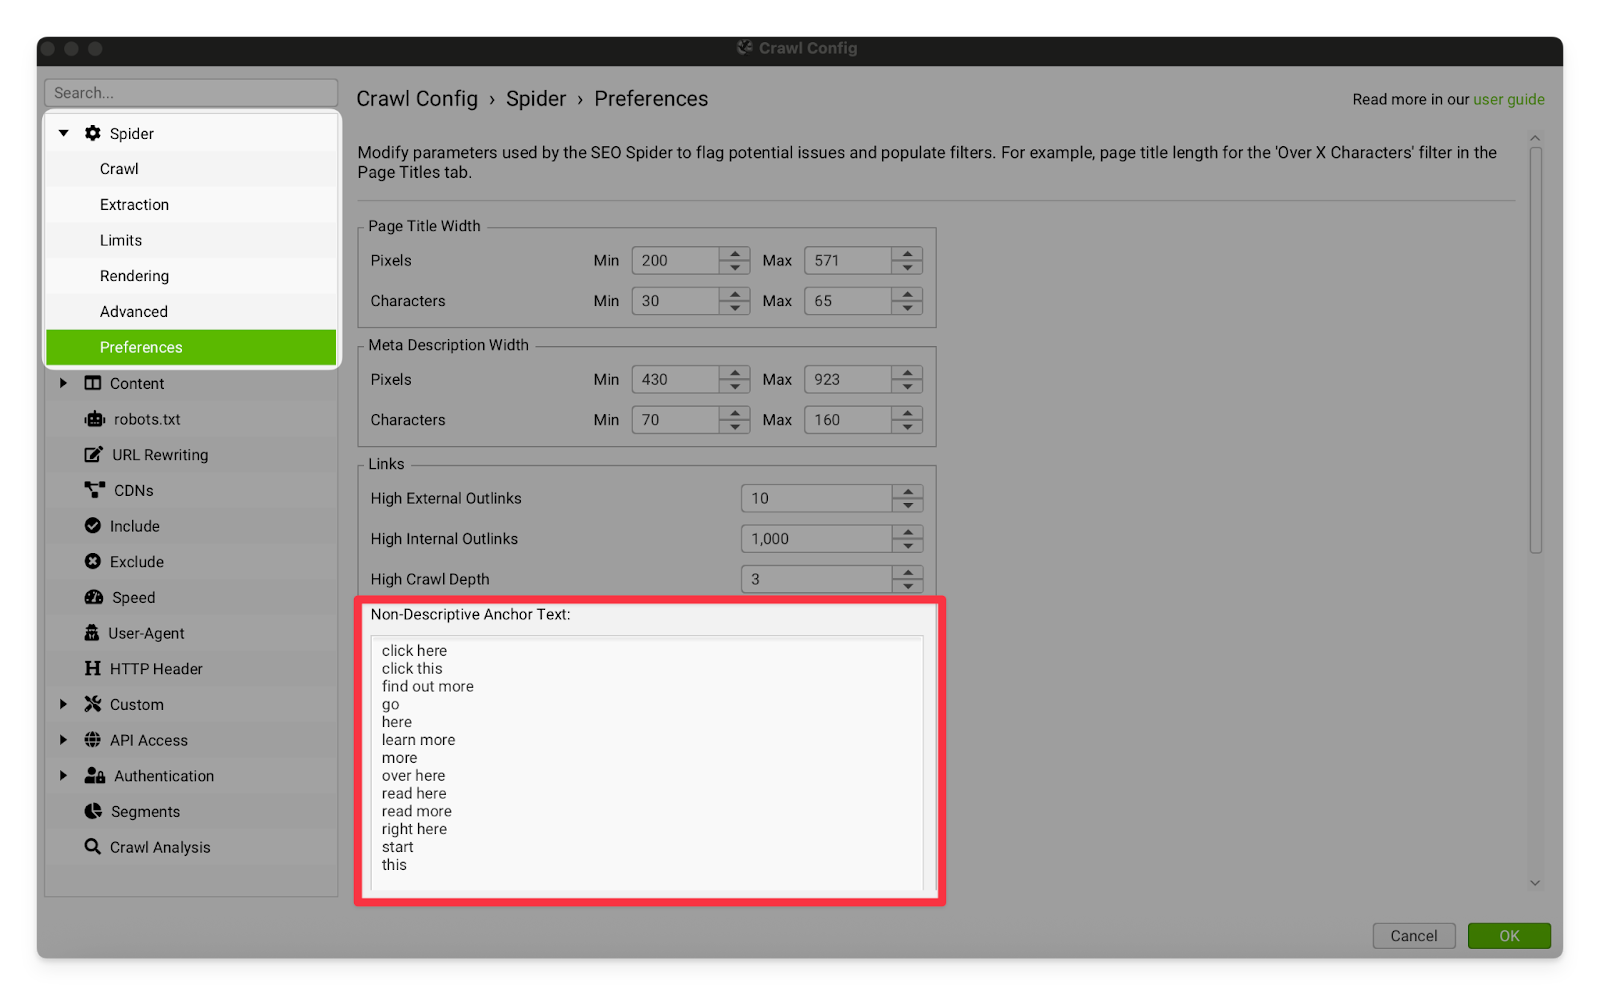 |
Content - Spelling and Grammar | |
Spelling & Grammar | I usually leave these settings on. Screaming Frog’s Spelling and Grammar checking is pretty poor and regularly incorrectly flags proper nouns, or makes incredibly pedantic grammar suggestions. I leave it on, because it’s still very useful to flick through the suggestions and see if you can find any particularly goofy mistakes. Users tend to perceive spelling mistakes as very unprofessional, and they can damage perception of the brand. 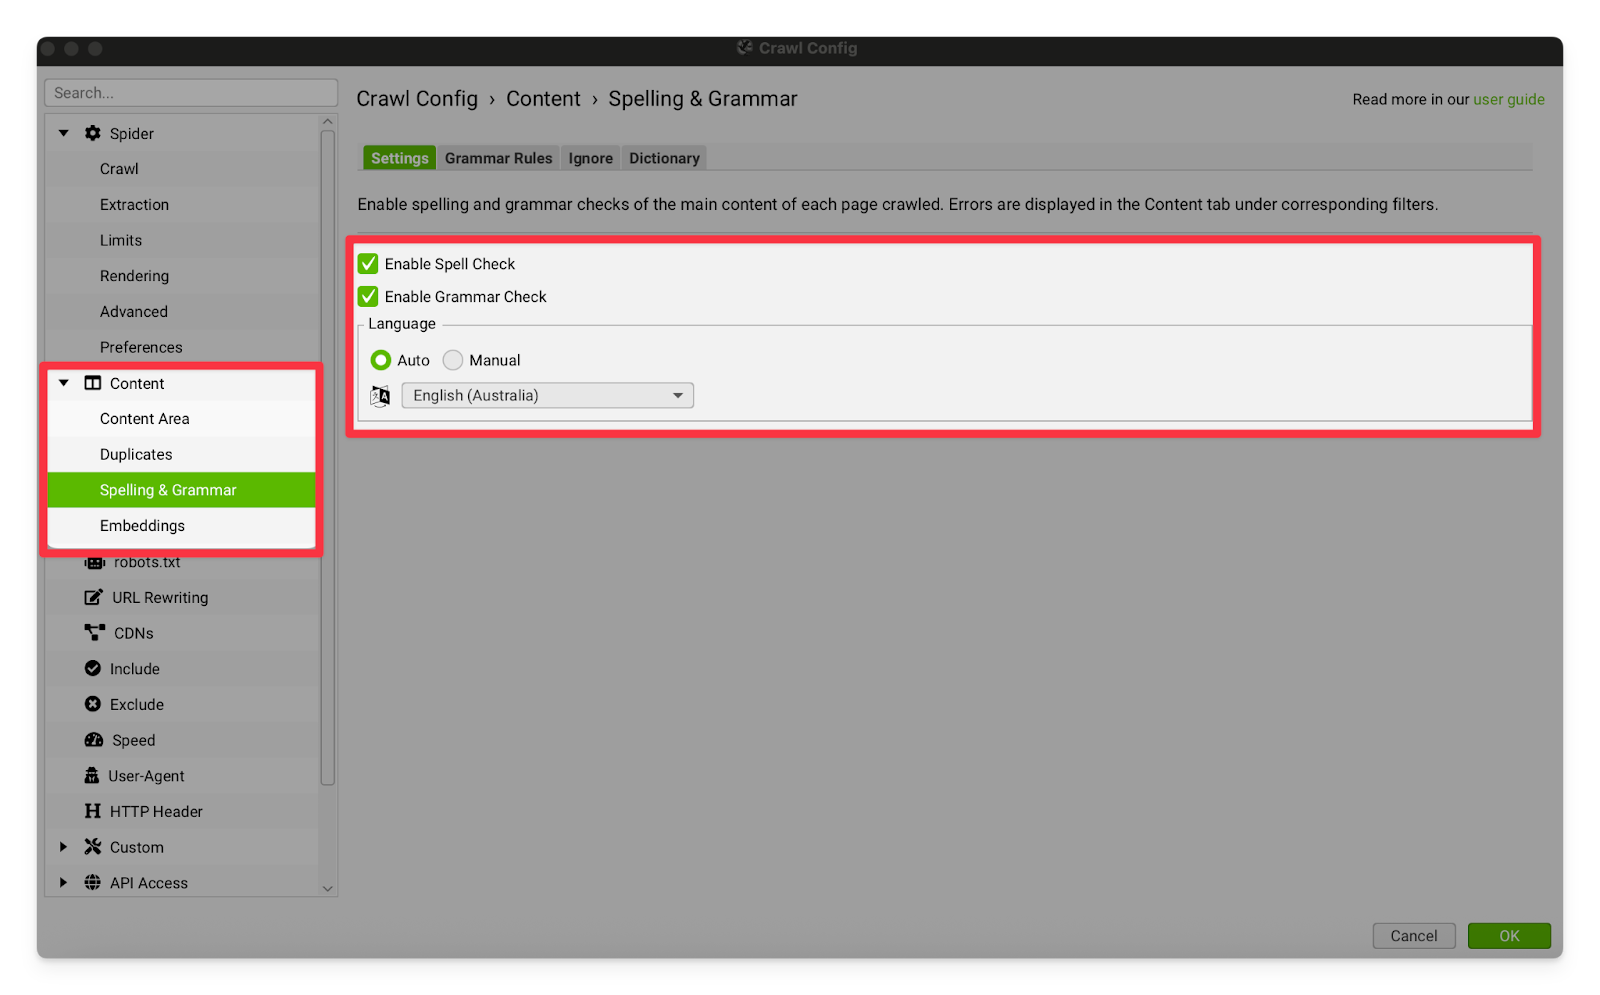
|
robots.txt | |
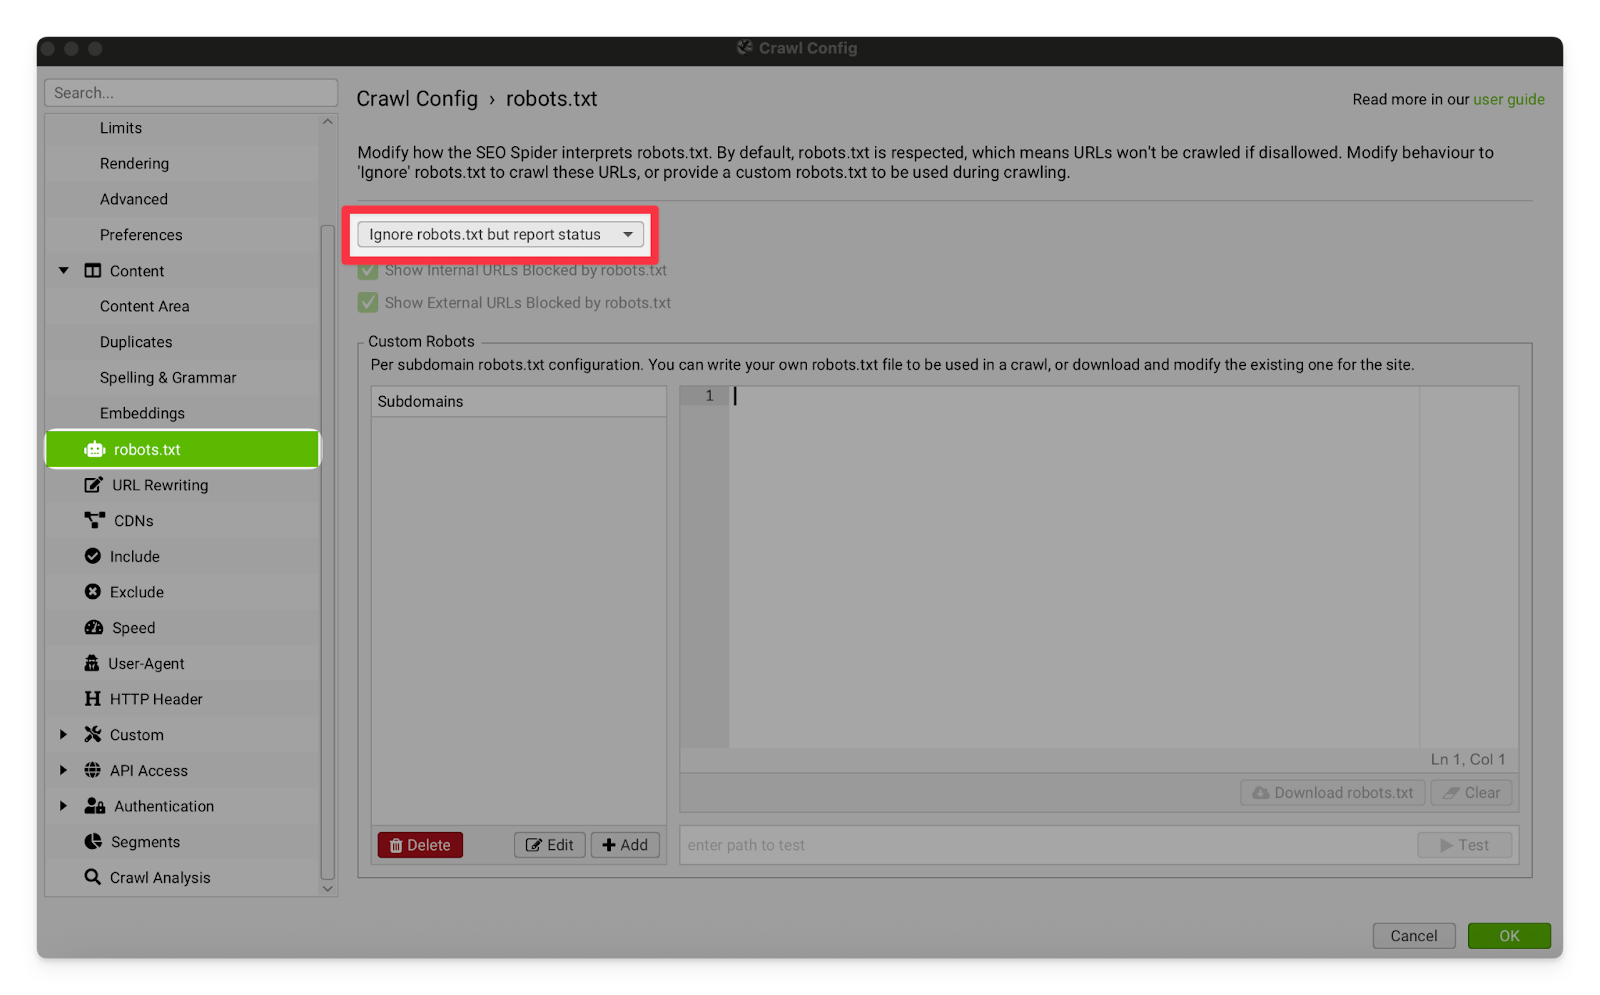
robots.txt | I usually leave this set to “ignore robots.txt but report status”. This will allow Screaming Frog to crawl parts of the site that have been blocked by the robots.txt file. We do this to find any pages that should be indexed but have been incorrectly blocked from being crawled via robots.txt. If you are using this setting, make sure you are crawling with a VPN (Mulvad or equivalent). Some sites will intentionally have a hidden page blocked via robots.txt, and then IP ban any crawler who follows the link. This is called a “blackhole” or a “honeypot” and is designed to catch and stop malicious crawlers who are not following the rules set out in the nofollow attribute or robots.txt file.
|
URL Rewriting | |
URL Rewriting | This setting rewrites removes all parameters from the URLs. I usually leave this setting off because it is important that we check all of the parameter URLs have been correctly canonicalised back to the original version of the page. For some large sites however, they have too many pages with too many parameters and we need to use this setting in order to be able to crawl the site properly. By removing parameters and combining the pages, we will significantly cut down on the number of pages Screaming Frog needs to crawl. 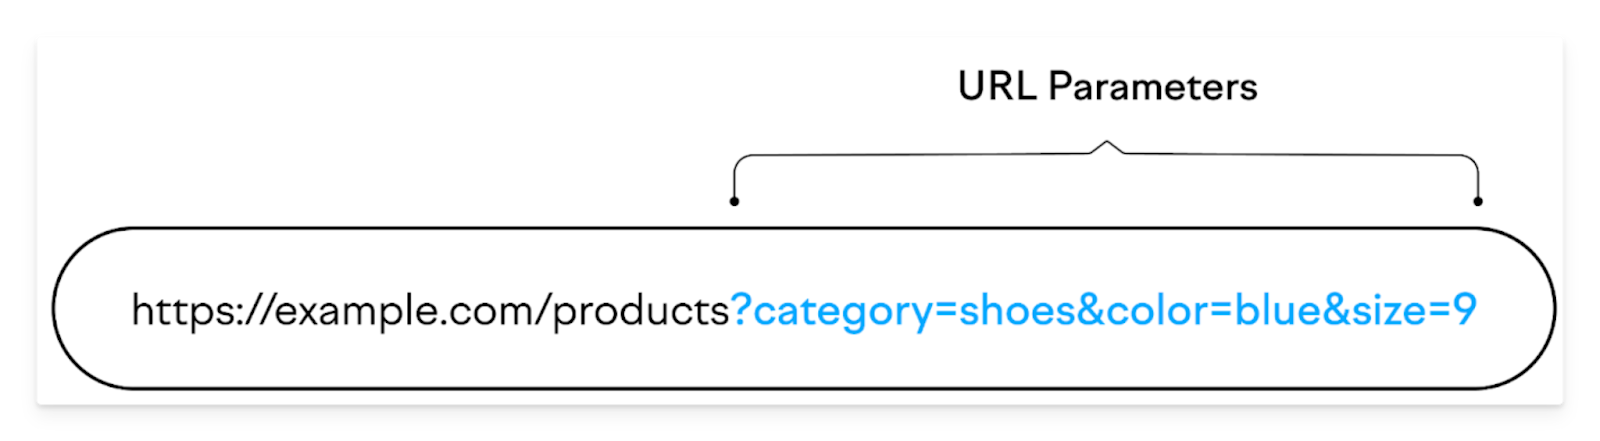 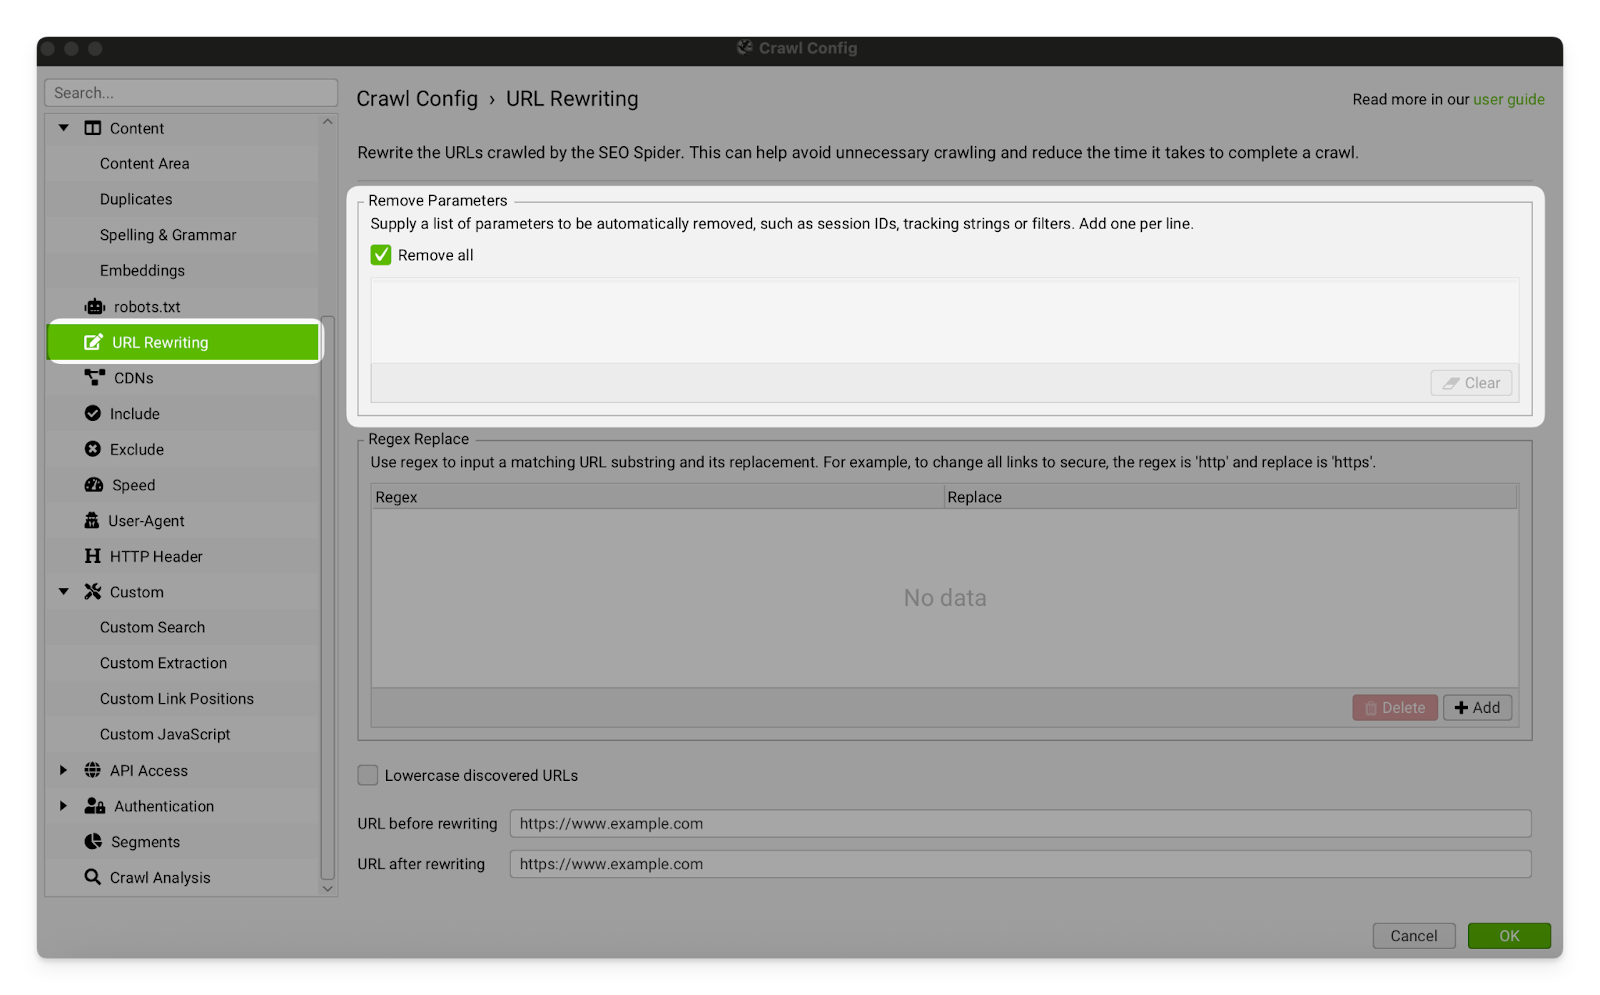
|
CDNs | |
CDNs | Sometimes the crawl will have an issue where internal images and resources are being marked as external links. This usually occurs because they are being hosted on a different domain (usually belonging to the CDN (eg. Cloudflare) or CMS (eg. Shopify)). You can fix this issue by adding the domain to this CDN list. All of those resource URLs will be counted as internal. |
Include / Exclude | |
Include | This tab allows you to narrow the crawl so that it only includes certain URLs. We don’t often use this, but it can be very useful if you only want to crawl a particular subfolder on the site. For example, you could add /services/ to only crawl URLs within the services subfolder. 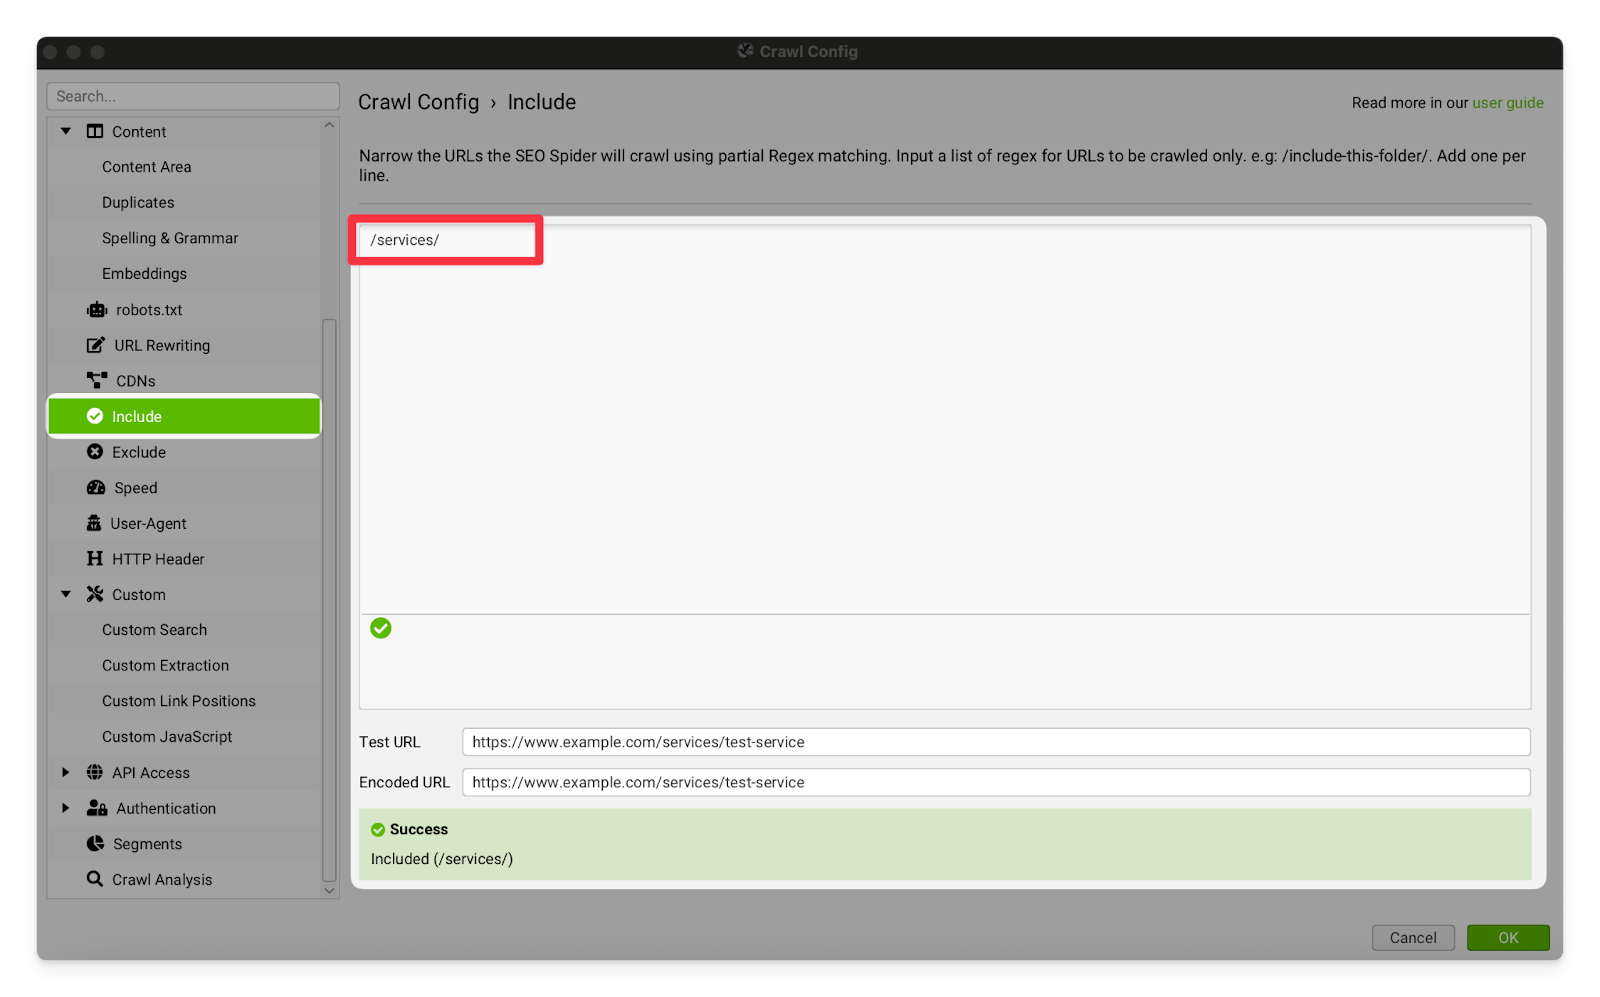 |
Exclude | This tab allows you to exclude particular URLs and sub-folders from the crawl. We don’t often use this, but it can be great if you just wanted to crawl the core pages on a site and exclude the accounts/blog pages (for example). Just add a list of any pathways or URLs you want excluded to the input box. 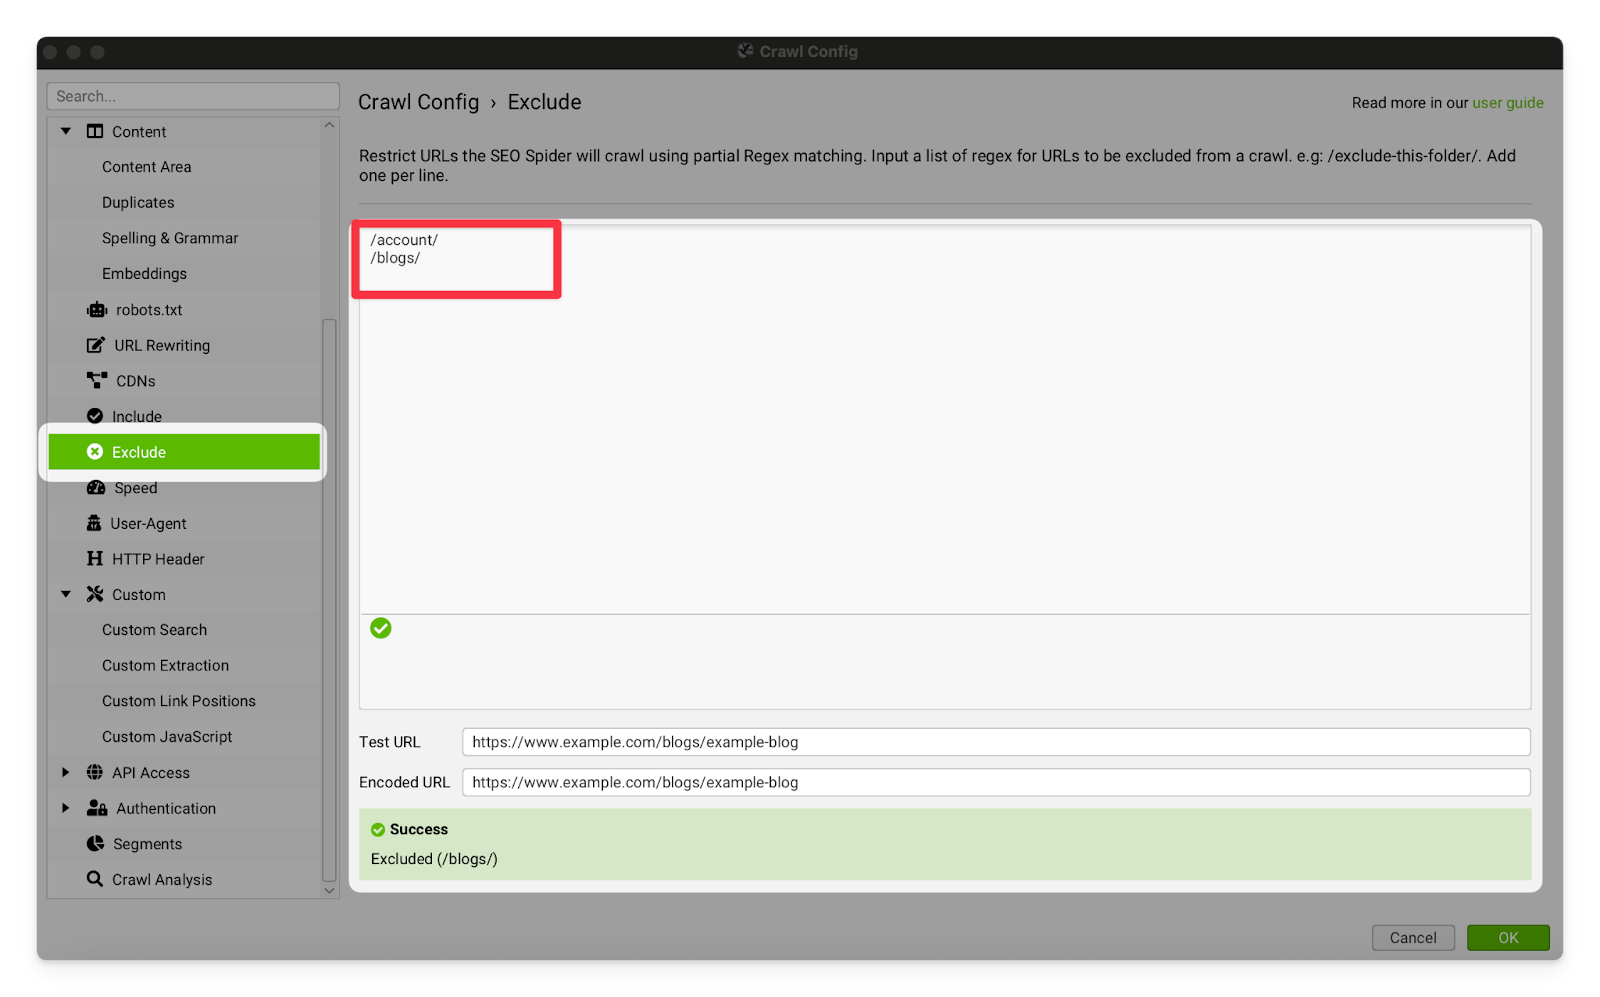 |
Speed | |
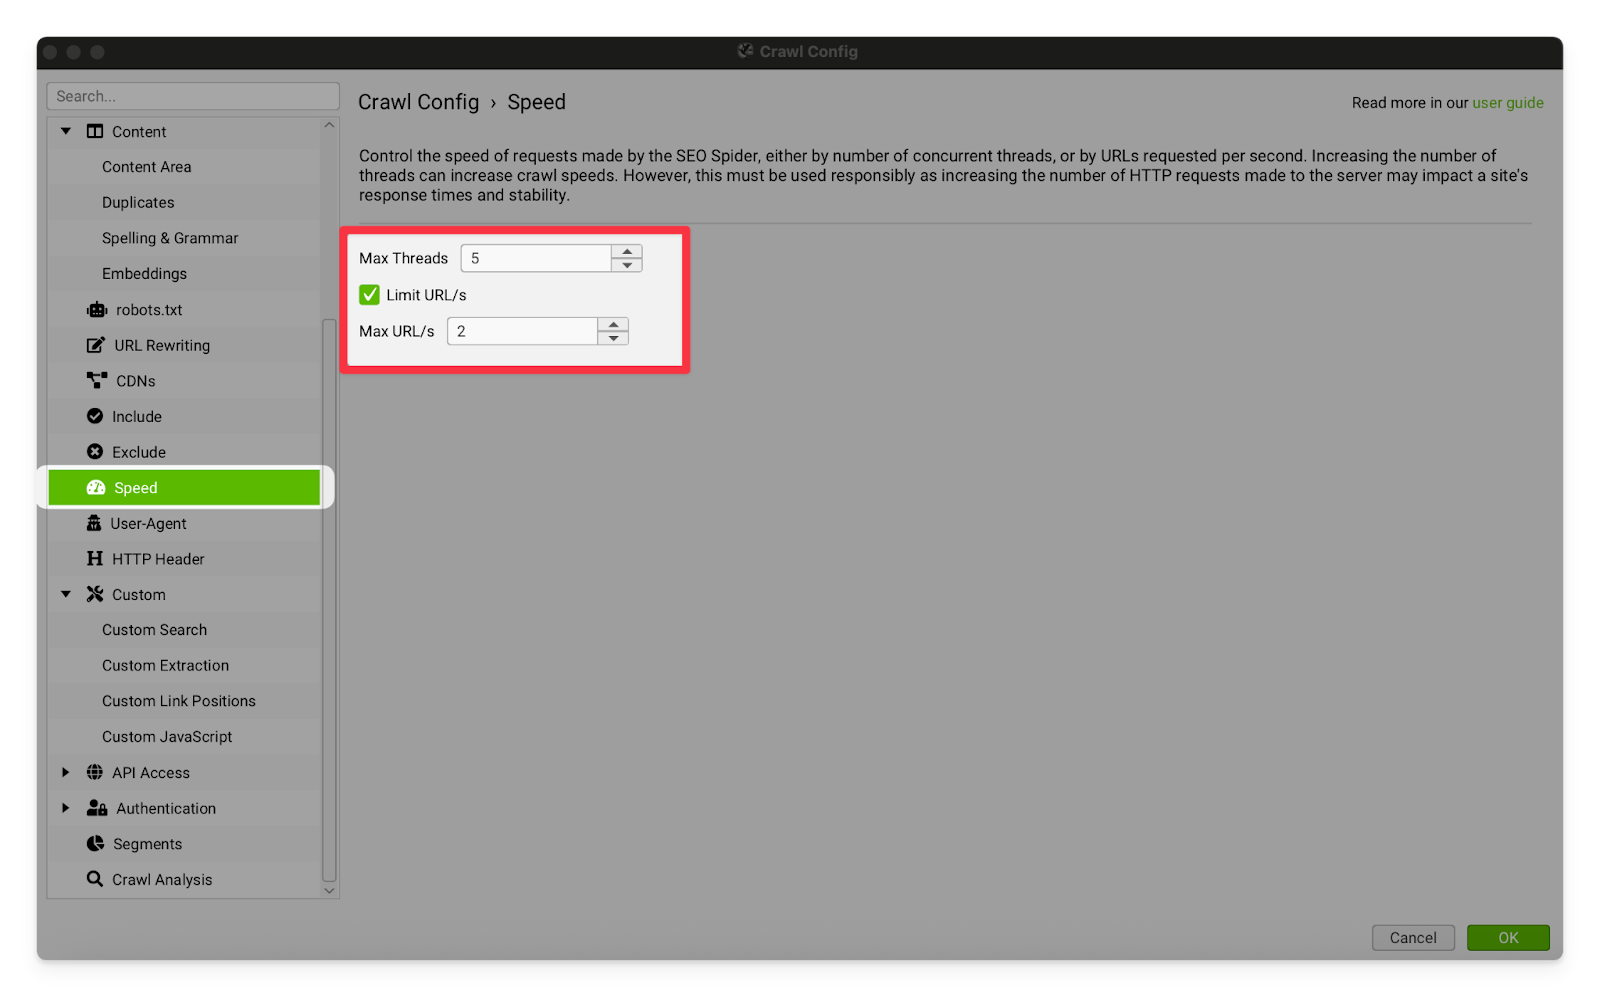
Speed | This setting allows you to reduce the amount of resources that your computer is giving to Screaming Frog, and/or restrict the number of URLs per second that Screaming Frog crawls. It is mostly used for crawling Shopify sites because Shopify will temporarily block your IP address if you make too many page requests too quickly. I recommend reducing your crawl speed to 2 URL/s.
 |
User-Agent | |
User-Agent | This setting affects the user agent of your Screaming Frog crawler (who the crawler says it is when it requests a page). I usually have this set to Googlebot (Smartphone) because that is the crawler Google primarily uses for indexing, and I’d like to see the pages as Google sees them. For some clients you may also want to use the GPTBot or the ClaudeBot to see how the pages are served to LLMs. In some very rare cases, the site will block you for using the Googlebot user agent (because they can tell you are not making the request from an IP address that is actually owned by Google). As a result, I recommend using a VPN while you commit this kind of user agent identity theft. 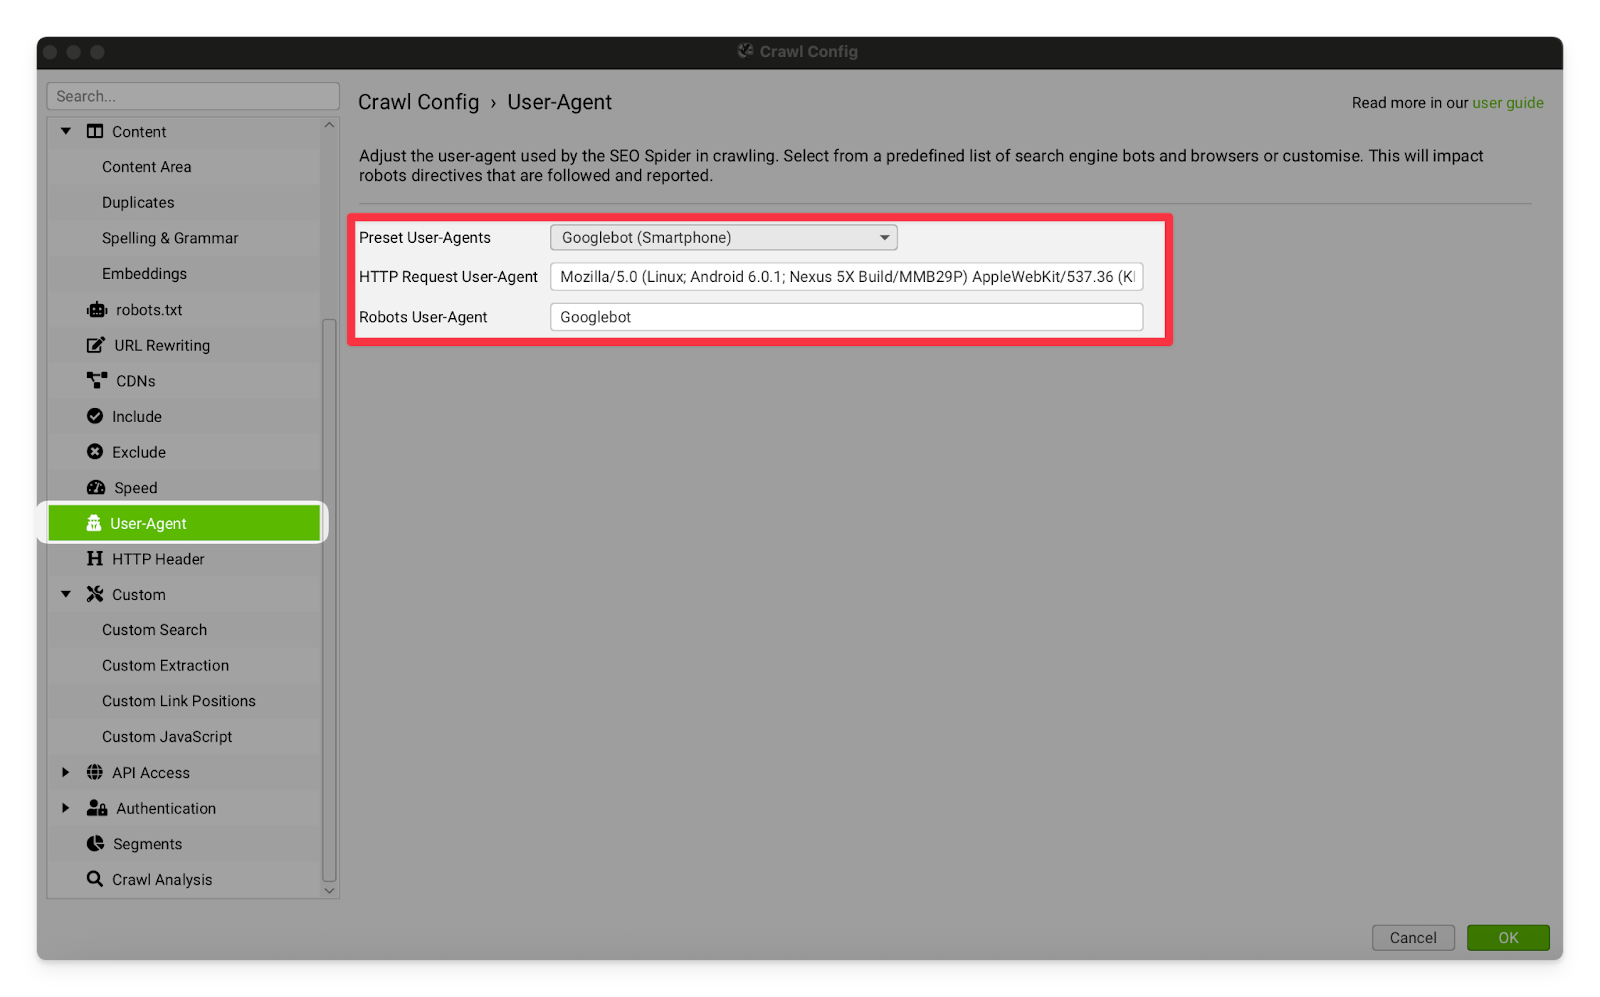 |
Custom | |
Custom Extraction | The custom extraction settings allow you to separate pages based on specific pieces of HTML in the page’s code. This is very useful for making a list of blog pages when the client’s site does not have a blog subfolder. You can identify an element that exists on the template for blog pages, but not the rest of the site and then extract all of the pages with that element. → Open a blog page and find a styling element that is present on all of the blog pages, and no other kind of page. “Recent Posts” and “Further Reading” sections are great for this. 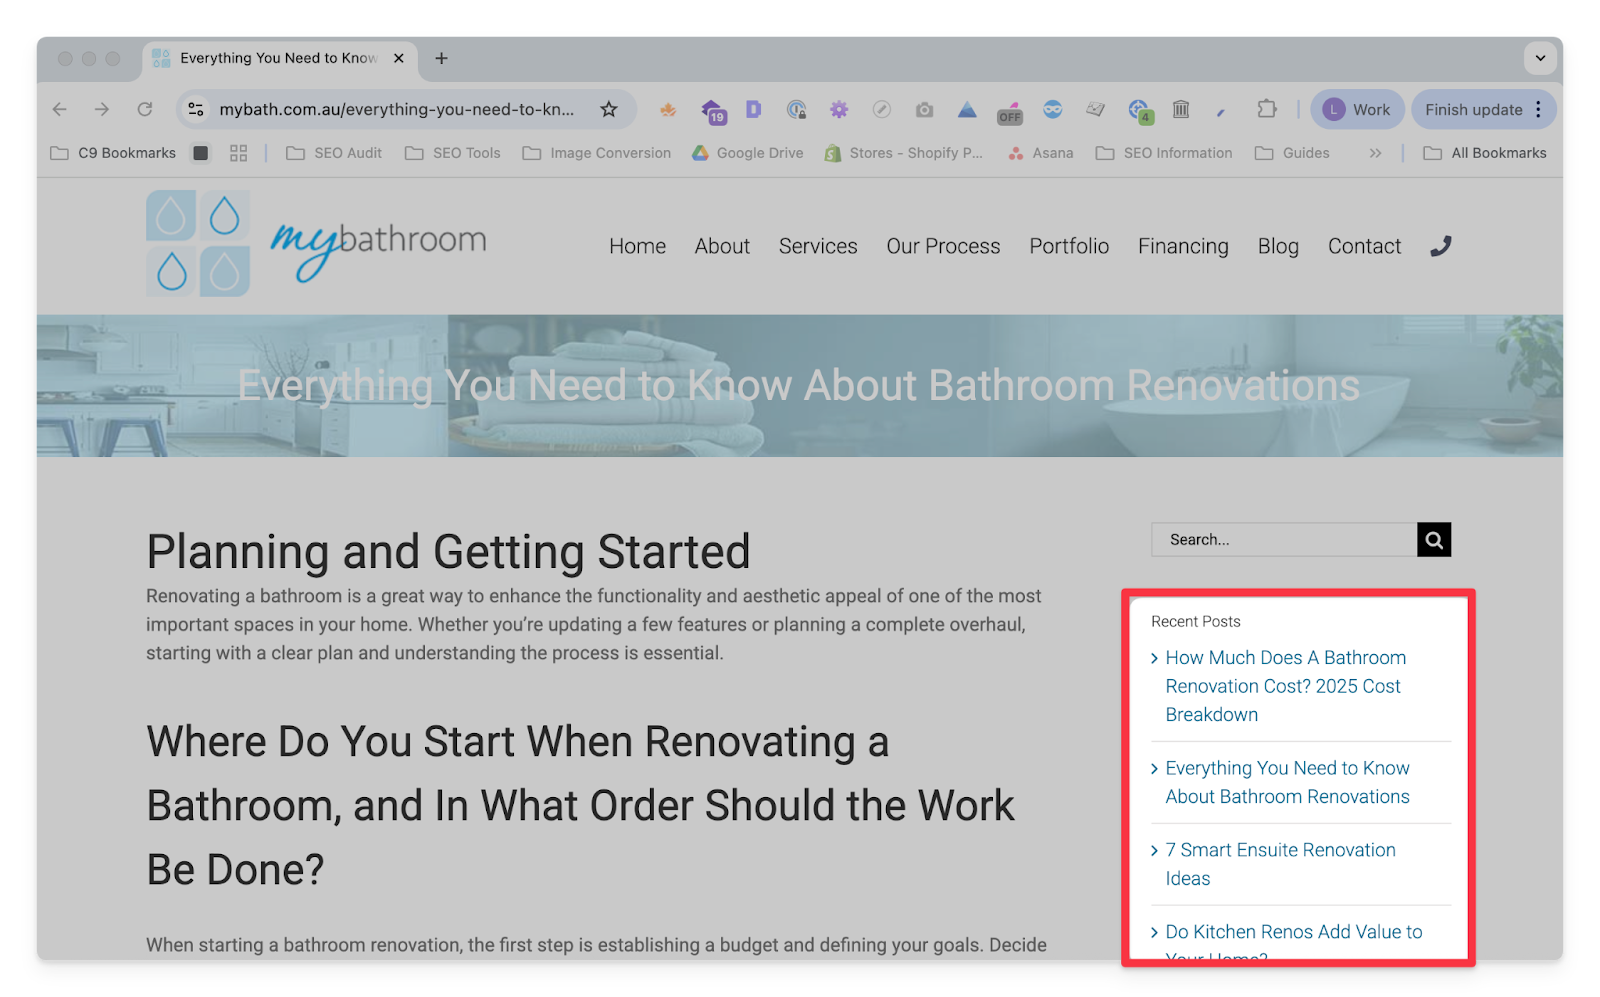 → Go to Screaming Frog and open the Custom Extraction settings. Click on the button with the globe icon. 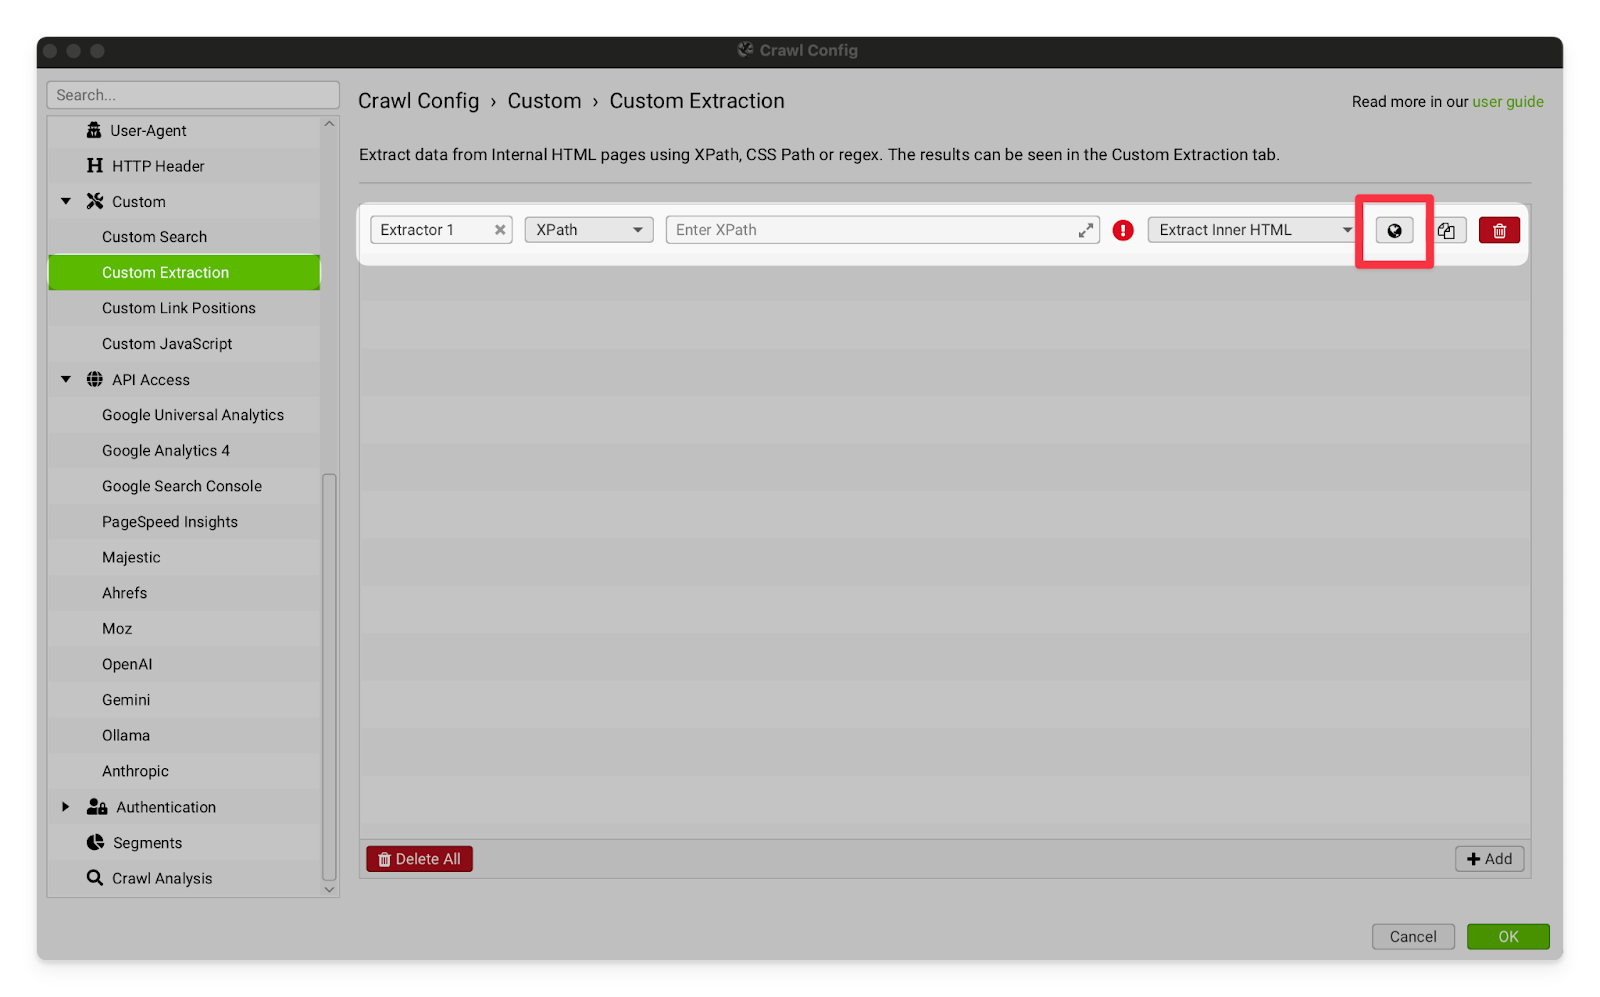 → Paste the URL from your blog into the address box, then scroll down and click on the element you found that is unique to blog posts on this site. 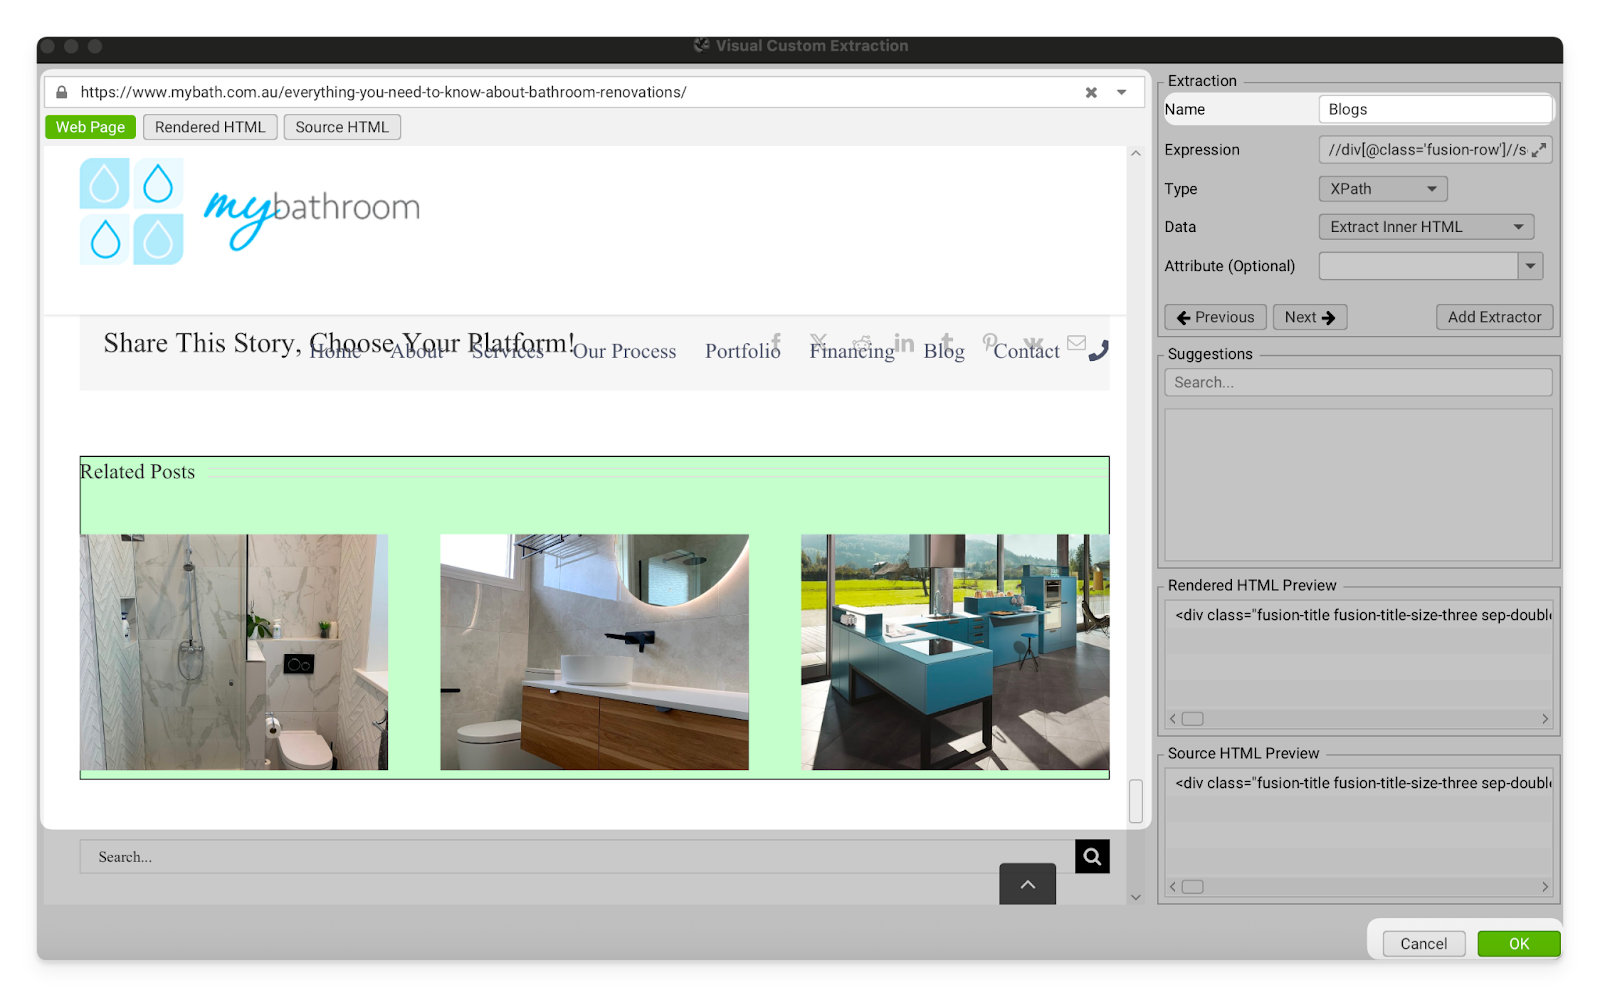 → Click OK and then run the crawl. All of the blog posts should now be separated into a tab under Custom > Blogs (or whatever you called the extraction) OR
You can also do this by highlighting the element in the Chrome Dev Tools (CMND/Ctrl + Shift + C) and then right clicking and selecting Copy > X-path.  |
API Access | |
You can use this feature to connect your Screaming Frog to our Google Search Console account. This will allow you to see the current indexing status and performance of your pages within Screaming Frog. I don’t usually use this option because I look at GSC separately, and I often begin audits before the client has given us access to their analytics but it’s pretty cool and I recommend having a play around to see what works for you. 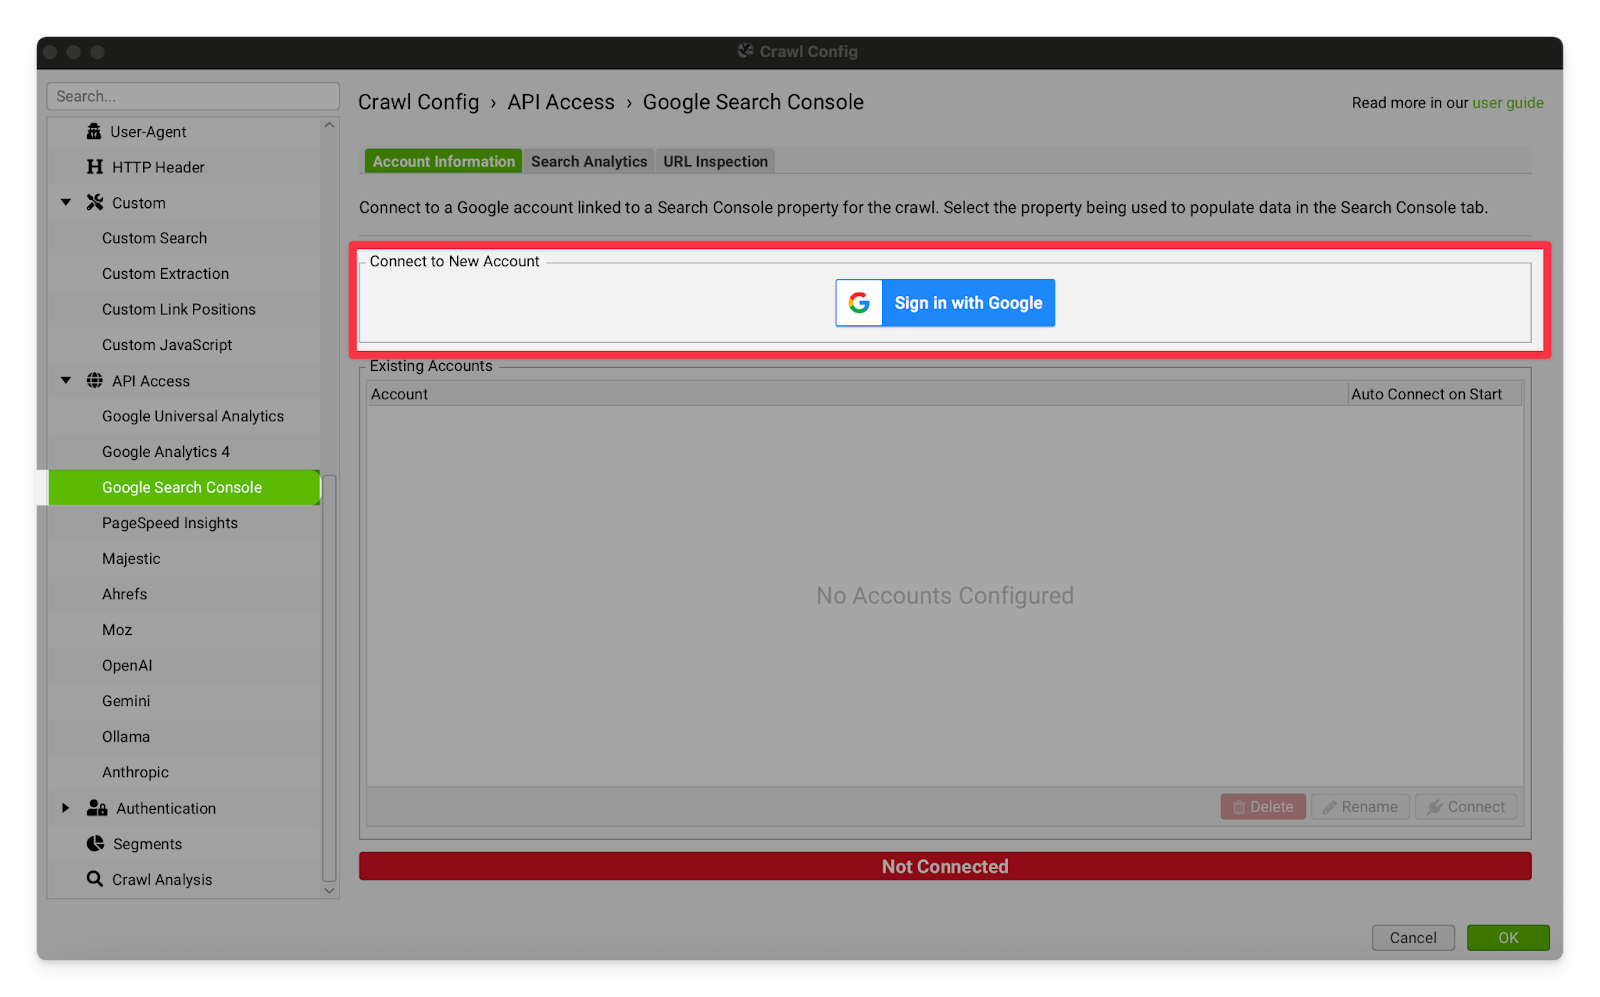 | |
Crawl Analysis | |
Crawl Analysis | I strongly recommend leaving all of these settings on. They make Screaming Frog automatically perform additional analysis at the end of its crawls to find orphaned pages, sitemap issues, hreflang issues and more. This is very useful and there’s no good reason to turn it off. I have noticed some occasional errors/inconsistencies in the crawl analysis, particularly when dealing with paginated products or sitemaps. I recommend double checking to make sure that a page is actually orphaned/missing from the sitemap. 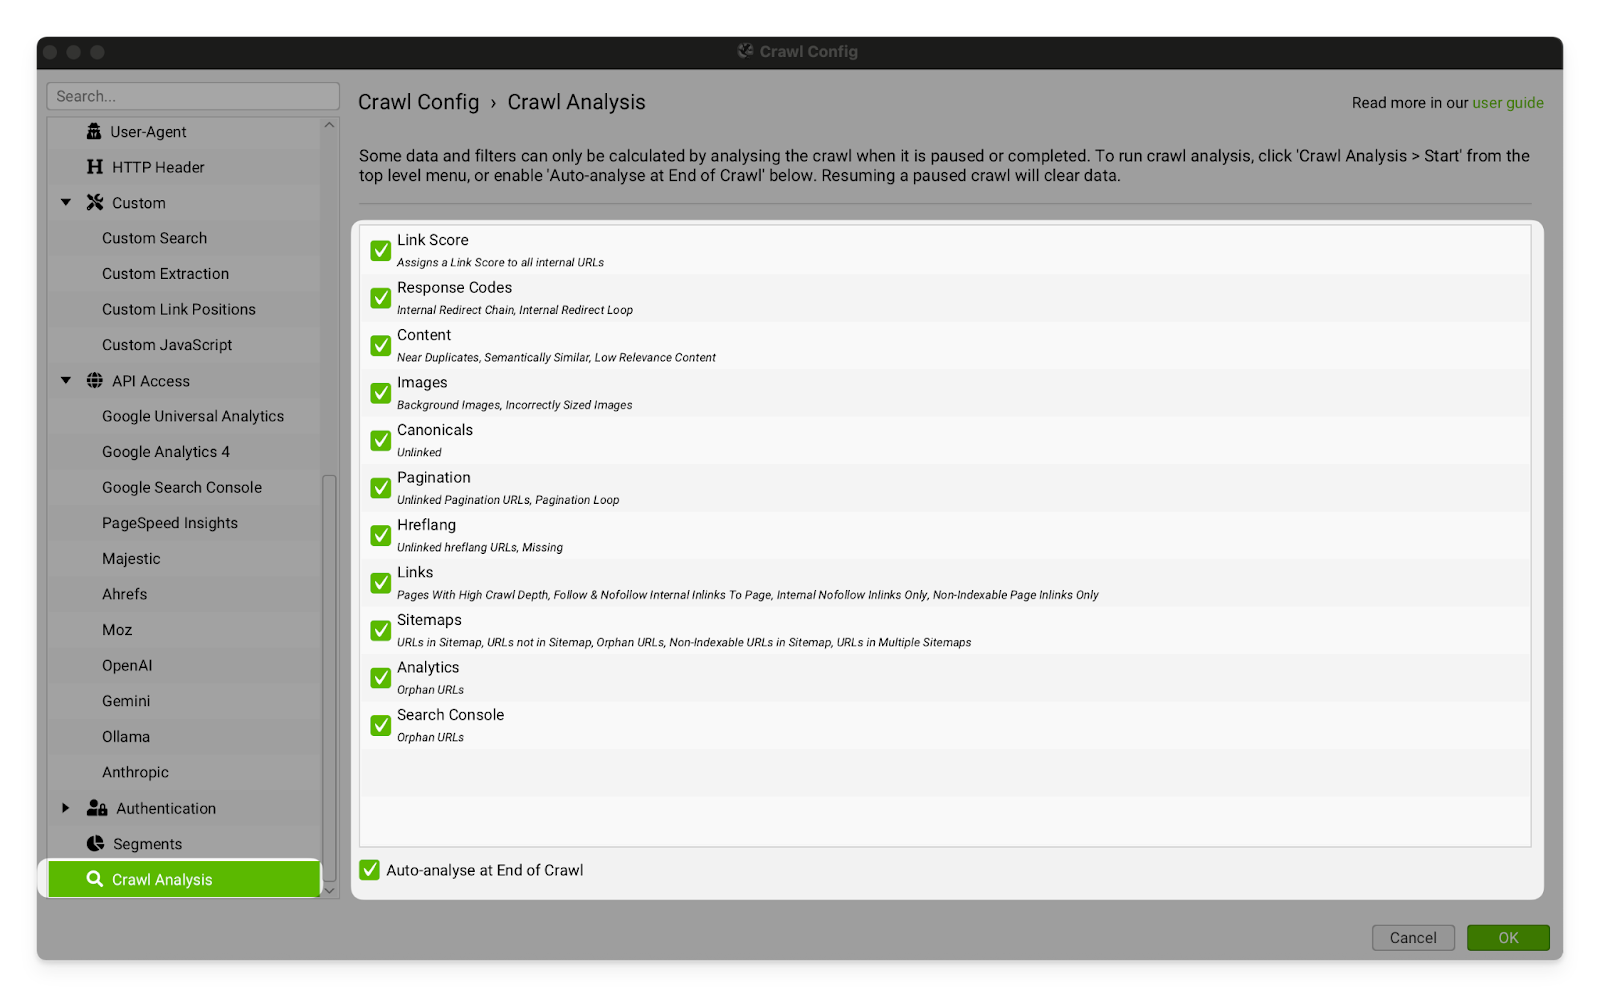
|
Categories:
Documentation
Tools